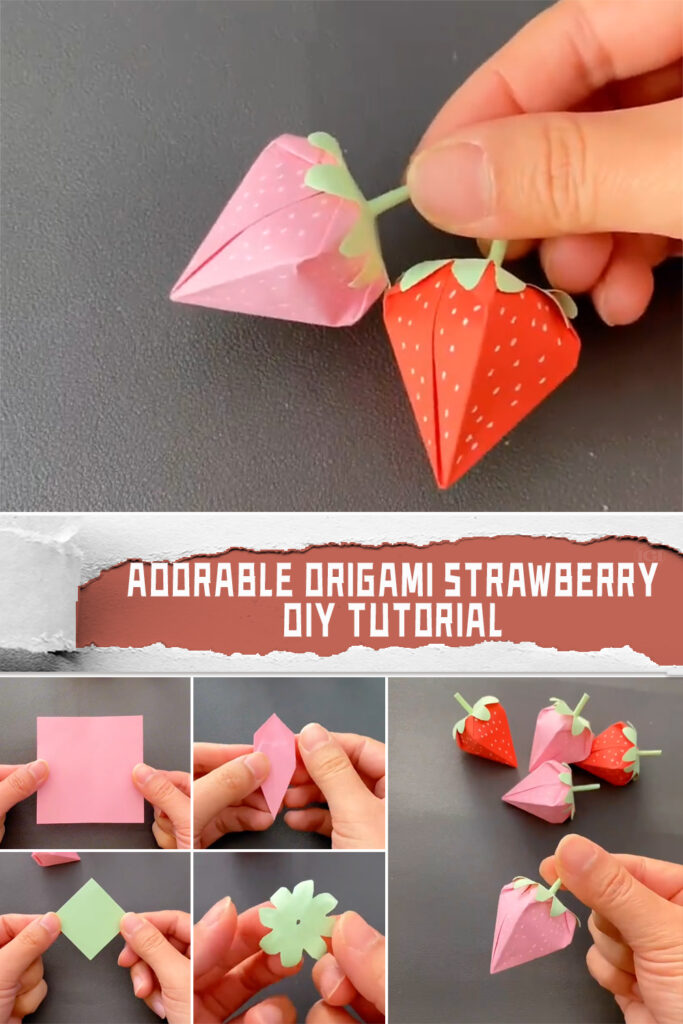
Origami, the art of paper folding, is not only a relaxing and creative activity but also allows you to create beautiful objects with just a few simple folds. Among the myriad of origami designs, the origami strawberry stands out as a delightful and charming creation. In this essay, we will explore how to create your very own adorable origami strawberry in just a few easy steps.
Firstly, gather your materials. You will need a sheet of pink colored paper for the main body of the strawberry. This will form the fleshy part of the fruit. Next, prepare a smaller sheet of green paper for the leaves and another green sheet to roll into the stem.
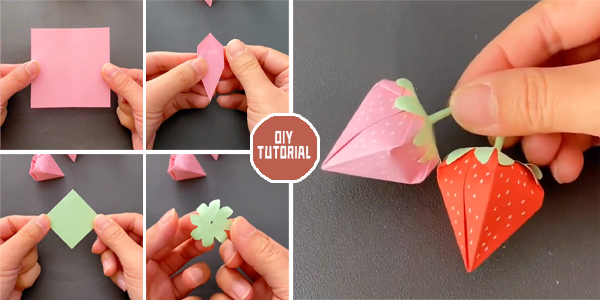
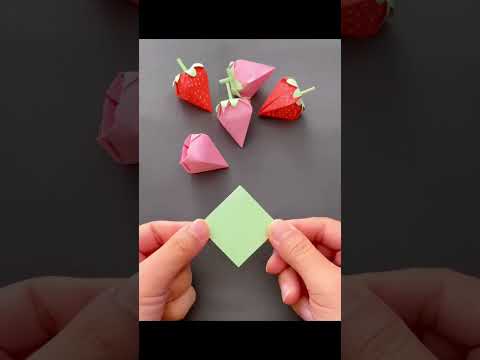
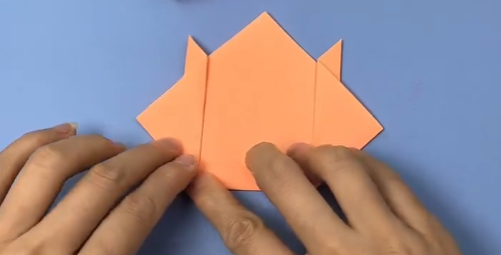
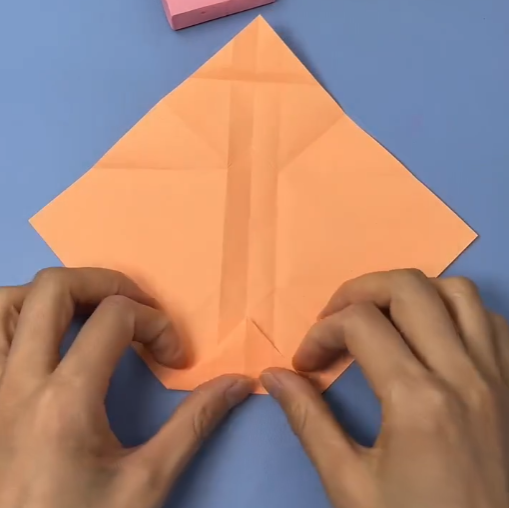
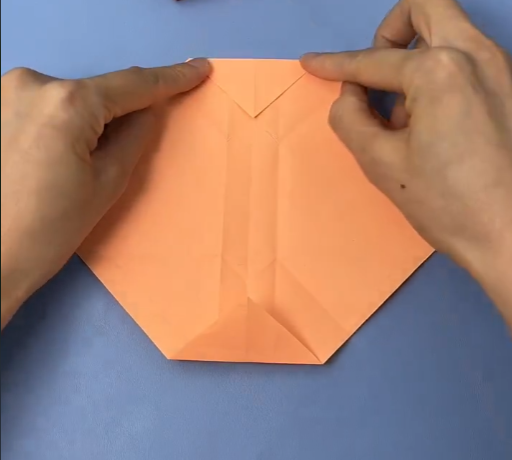
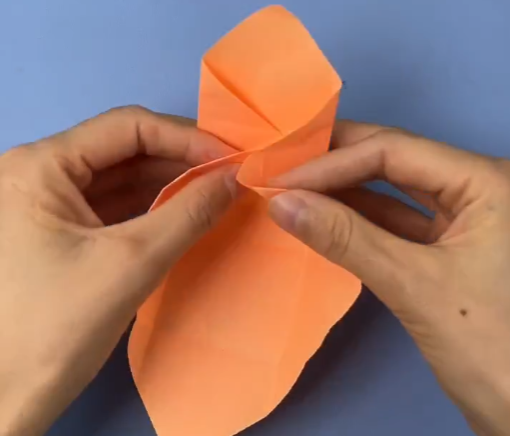
1..Begin by following the instructions in the provided video to fold the pink paper into the shape of the strawberry’s fleshy segments. Pay close attention to each fold to ensure accuracy and precision. This step forms the core of the strawberry.
2. Next, take the smaller green paper and carefully cut it into leaf shapes according to the instructions in the video. These will serve as the strawberry’s leaves, adding a realistic touch to your creation.
3. Now, take the third sheet of green paper and roll it into a thin tube to create the stem of the strawberry. This step adds dimension and detail to your origami fruit.
4. Finally, using a dab of glue, carefully attach the segments, leaves, and stem together to form your completed origami strawberry. Take your time with this step to ensure everything is securely fastened.
And there you have it – a fun and adorable origami strawberry! Display it proudly or give it as a charming gift to brighten someone’s day. Enjoy the process of creating your own little piece of fruity art through the ancient craft of origami.
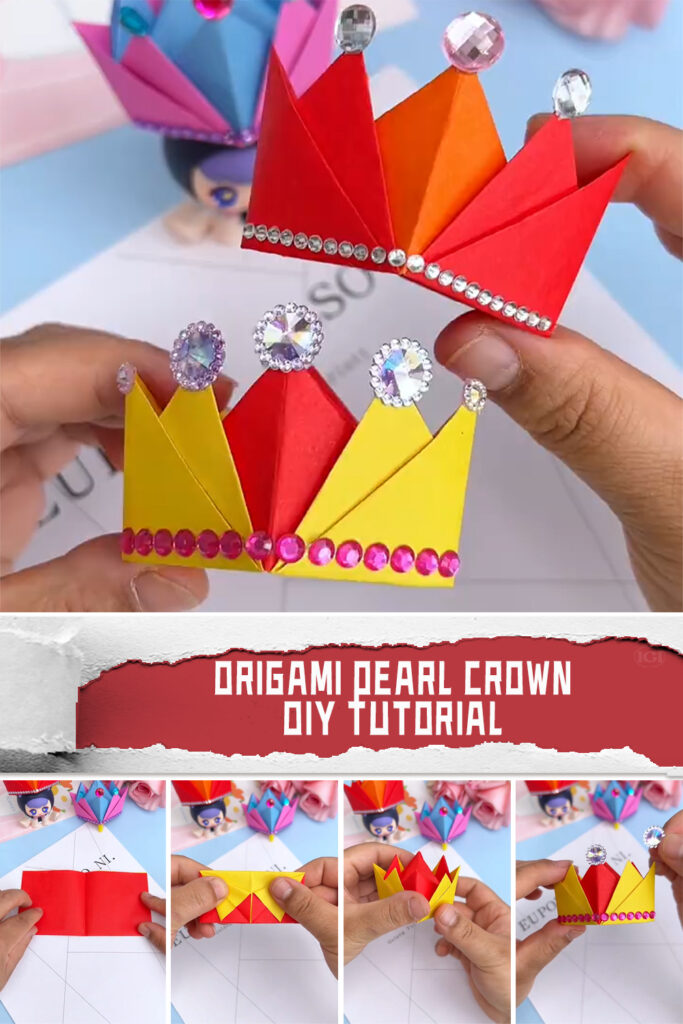
Origami, the ancient Japanese art of paper folding, has captivated hearts and minds for centuries with its simplicity and beauty. From delicate cranes to intricate flowers, origami offers endless possibilities for creativity and expression. In this tutorial, we will explore how to create a stunning origami pearl crown, combining the elegance of pearls with the timeless charm of origami.
Materials Needed for DIY Origami Pearl Crown:
Square paper (preferably pearl or metallic finish)
Pearls or pearl stickers
Glue (if using loose pearls)
Scissors (optional)
Ruler (optional)
Instruction:
Step 1: Choose Your Paper
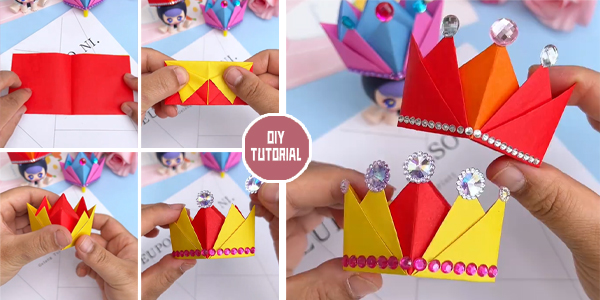
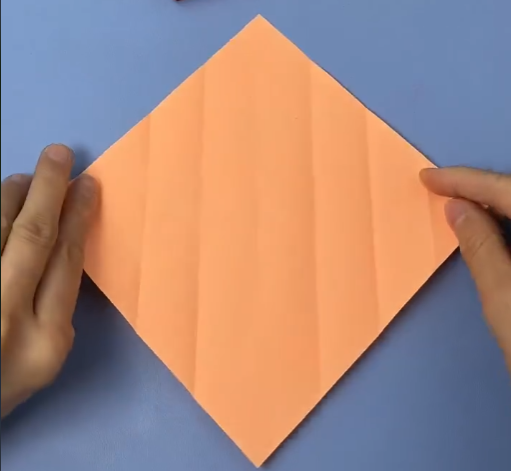
Select a square sheet of paper in a color and finish of your choice. Pearl or metallic finish papers work well for creating an elegant crown with a touch of shimmer and sophistication.
Step 2: Fold the Paper
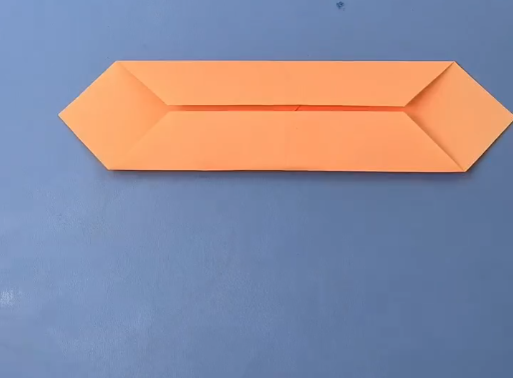
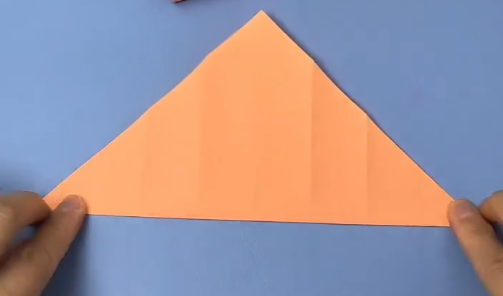
Start by folding the square paper diagonally to form a triangle. Ensure that the edges align perfectly to create a crisp fold.
Step 3: Create Base Folds
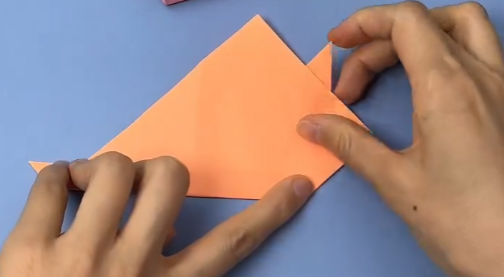
Fold the bottom corners of the triangle up to the top corner, creating two smaller triangles. This will serve as the base for your crown.
Step 4: Fold the Side Edges
Fold the left and right edges of the triangle towards the center crease, creating two additional smaller triangles along the sides.
Step 5: Flip and Fold Again
Flip the paper over and fold the bottom edge up towards the top edge, aligning it with the existing crease. This will create a narrow strip of paper along the bottom edge of the crown.
Step 6: Fold Downward
Fold the top layer of the narrow strip downwards, tucking it under the layers of paper to secure it in place. This will form the band of the crown.
Step 7: Decorate with Pearls
Now it’s time to add the finishing touches to your origami pearl crown. If using loose pearls, apply a small dab of glue to the crown and carefully place the pearls in your desired pattern or design. Alternatively, you can use pearl stickers for a quick and mess-free application.
Step 8: Let Dry (If Necessary)
Allow the glue to dry completely before wearing or displaying your origami pearl crown. Once dry, gently adjust the shape of the crown as needed to achieve the desired look.
Step 9: Wear with Pride
Your stunning origami pearl crown is now complete! Wear it with pride for special occasions such as weddings, parties, or photo shoots, or display it as a decorative accent in your home.
Here is the video tutorial for DIY Origami Pearl Crown:
In conclusion, crafting a DIY origami pearl crown offers a delightful blend of creativity and elegance, allowing you to create a one-of-a-kind accessory that is sure to turn heads and spark conversation. Whether you’re a seasoned origami enthusiast or new to the art form, this tutorial provides a simple yet stunning project that anyone can enjoy. So gather your materials, unleash your creativity, and prepare to craft a crown fit for royalty!
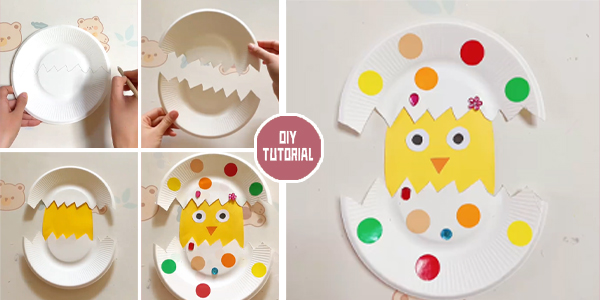
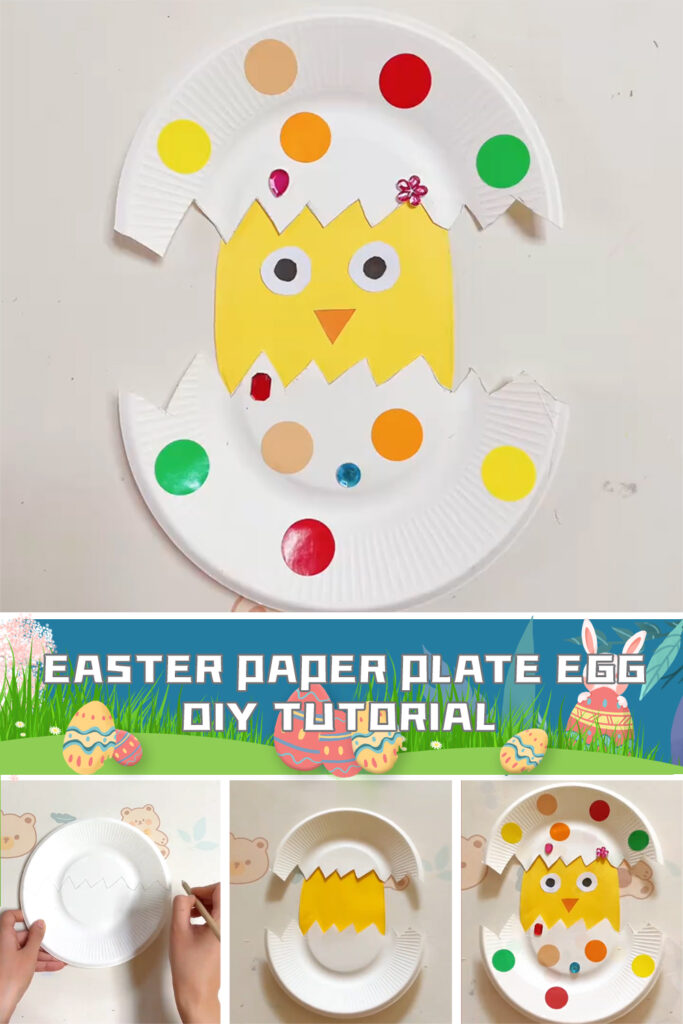
Looking for a fun and easy Easter craft activity? Why not try making these adorable Easter Paper Plate Eggs? Follow these simple steps to create your own festive decorations.
Materials you will need :
Paper plates
Yellow oval-shaped cardstock
Scissors
Glue
Markers or googly eyes
Colorful paper circles or stickers
Instructions:
1. Start by drawing zigzag lines on the paper plate to resemble the cracked shell of an egg.
2.Use scissors to carefully cut along the zigzag lines, creating a jagged edge around the paper plate.
3.Take a yellow oval-shaped piece of cardstock and glue it onto the paper plate to cover the center.
4.Next, use markers or googly eyes to decorate the yellow cardstock with chicken eyes, a beak, and any other facial features you like.
5. To add some extra flair, glue on colorful paper circles around the edges of the paper plate to represent Easter decorations.
Voila! Your Easter Paper Plate Egg is complete and ready to display. Hang it up as a festive decoration or use it as a unique Easter-themed serving platter for treats and snacks.
This DIY Easter Paper Plate Egg craft is perfect for kids and adults alike, providing a fun and creative way to celebrate the Easter holiday. Get together with friends and family to make a whole flock of these cute Easter Paper Plate Eggs and spread joy and cheer throughout your home. Happy crafting!
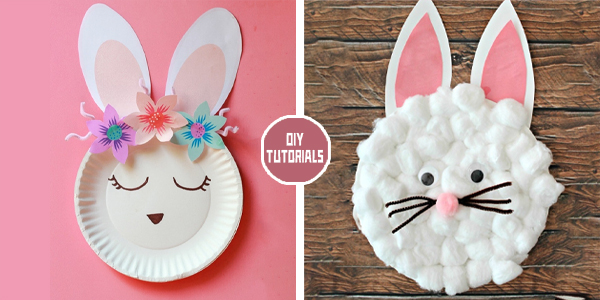
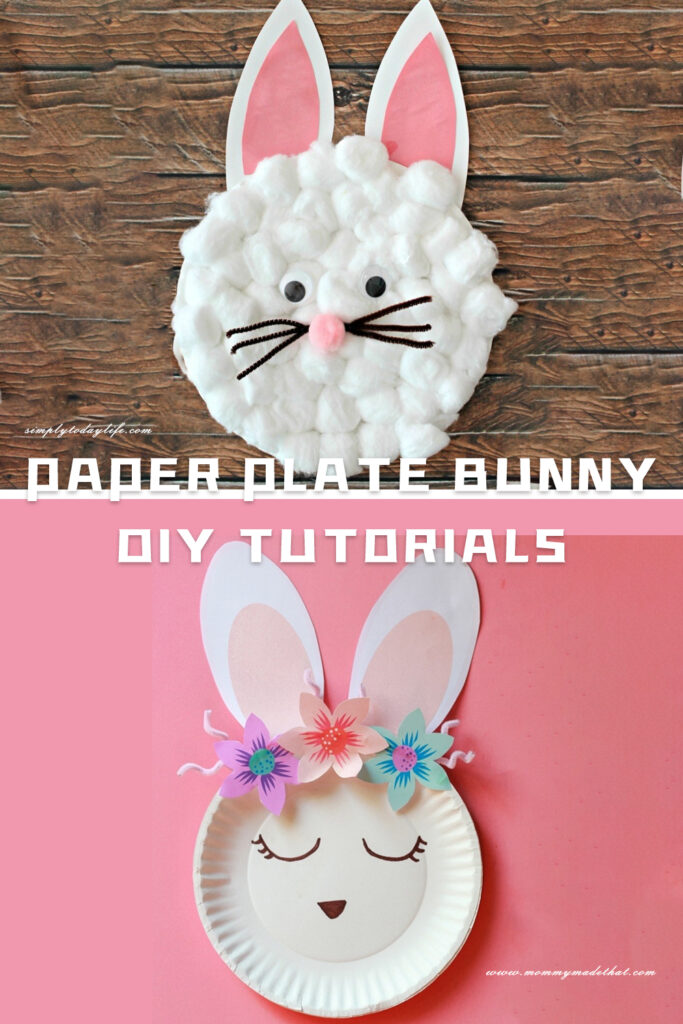
In the realm of children’s crafts, simplicity often reigns supreme, and the paper plate bunny craft epitomizes this principle. Leveraging common household materials and a touch of creativity, these tutorials transform humble paper plates into adorable Easter bunnies, igniting imagination and fostering hands-on engagement for young crafters. Here we will explore two DIY Paper Plate Bunny Tutorials . Both tutorials share a common goal beyond mere craft-making: fostering quality bonding experiences between parents and children. The collaborative nature of these projects encourages communication, teamwork, and shared problem-solving—a trifecta of skills crucial for healthy familial relationships and children’s overall development.We extend our heartfelt gratitude to all the talented designers who generously shared these DIY Paper Plate Bunny Tutorials, allowing crafters to bring their creative visions to life. To access these delightful tutorials, simply scroll down the page and click on the links provided below the pictures. Happy crafting!
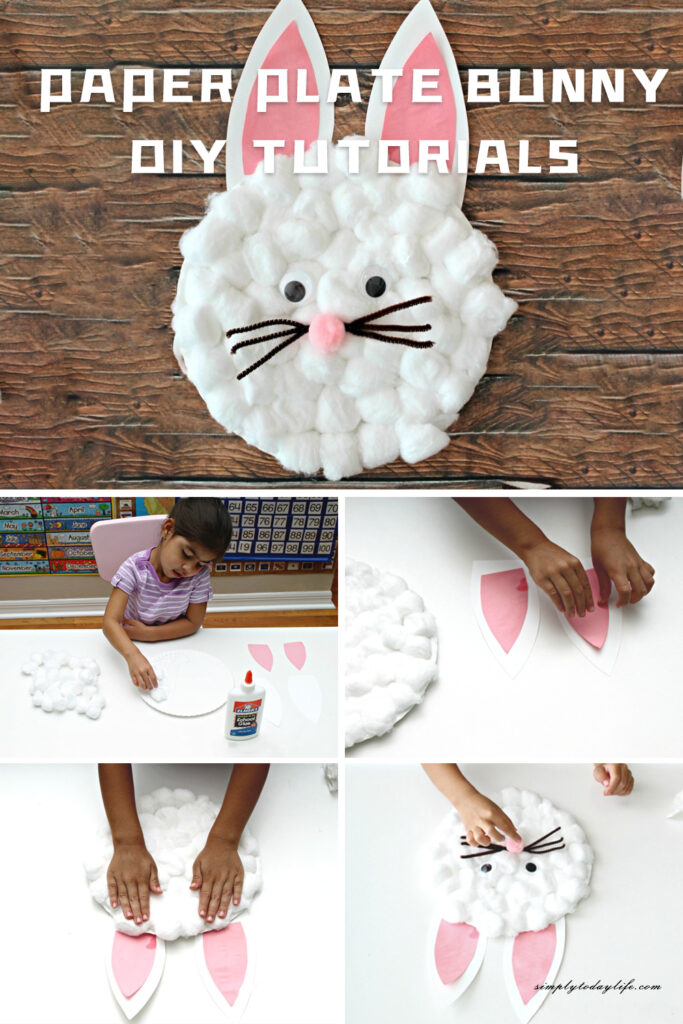
1. The first tutorial, hosted on “Mommy Made That,” offers a step-by-step guide accompanied by vibrant visuals, ensuring accessibility for both parent and child. The materials list is refreshingly uncomplicated, featuring essentials like paper plates, paint, and scissors. This simplicity not only streamlines the crafting process but also encourages resourcefulness and adaptability, qualities beneficial for children’s cognitive development.
Moreover, the tutorial emphasizes customization, empowering children to infuse their personalities into each bunny creation. From selecting paint colors to embellishing with googly eyes and cotton balls, every step invites creative expression, nurturing individuality and boosting confidence. Through this interactive approach, children not only produce tangible artworks but also cultivate their artistic identity—a priceless outcome of the crafting experience.
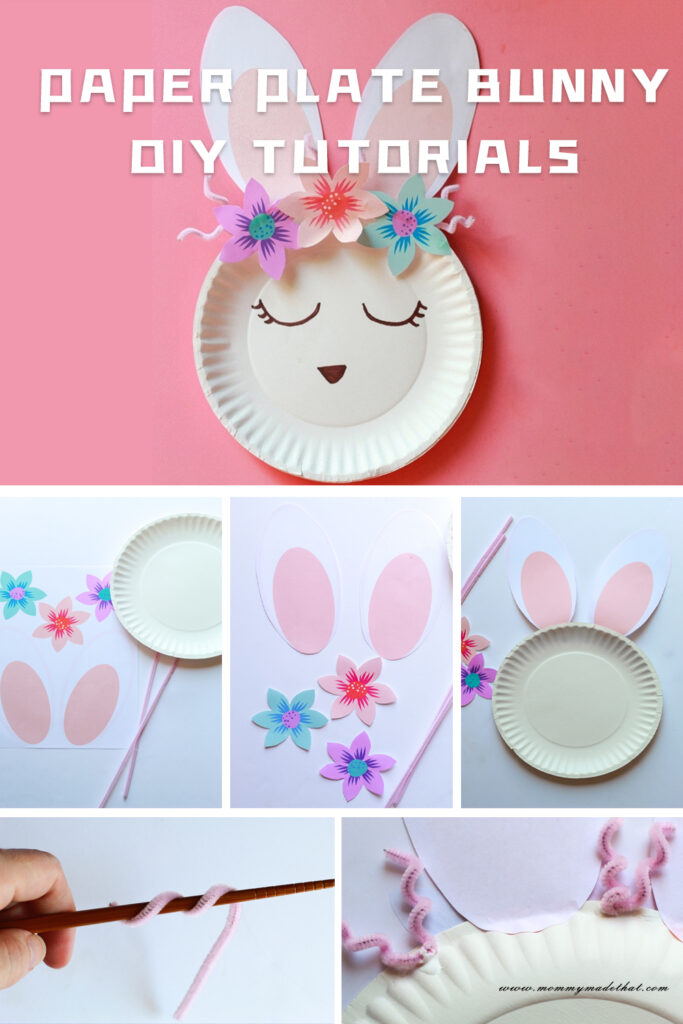
2. On the other hand, the second tutorial, hosted on “Simply Today Life,” offers a slightly different perspective while maintaining the core essence of simplicity and creativity. Clear instructions complemented by insightful tips ensure smooth execution, catering to varying skill levels and fostering a sense of accomplishment regardless of expertise. Additionally, the incorporation of printable templates adds an extra layer of convenience, easing the crafting process and reducing potential barriers to participation.
In conclusion, the paper plate bunny DIY tutorials exemplify the beauty of simplicity, creativity, and togetherness in children’s crafting. By leveraging household materials and encouraging personalization, these tutorials transcend mere art projects, becoming catalysts for joyful exploration and meaningful connections in the realm of family creativity.
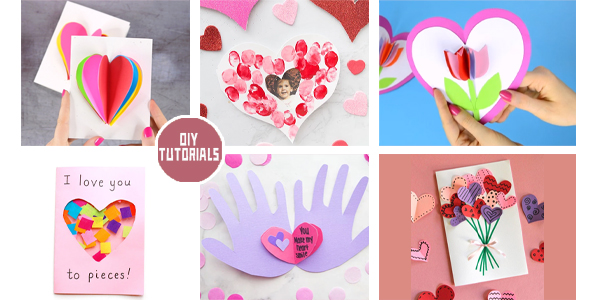
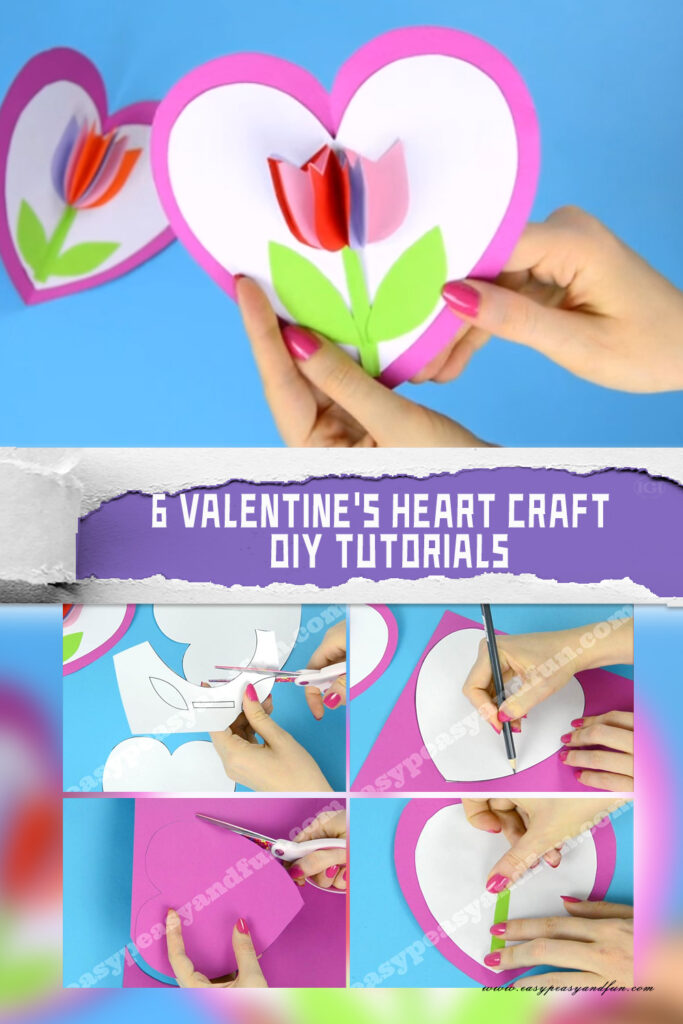
Valentine’s Day is a celebration of love, and what better way to express your affection than through heartfelt handmade crafts? Crafting provides a personal touch that speaks volumes, and with these six delightful DIY tutorials, you can create memorable tokens of love for your significant other, friends, or family. From 3D heart cards to handprint valentines, each project offers a unique way to spread love and joy on this special day. We extend our heartfelt gratitude to all the talented designers who generously shared these free DIY Valentine’s Heart Craft tutorials, allowing crafters to bring their creative visions to life. To access these delightful patterns, simply scroll down the page and click on the links provided below the pictures. Happy crafting!
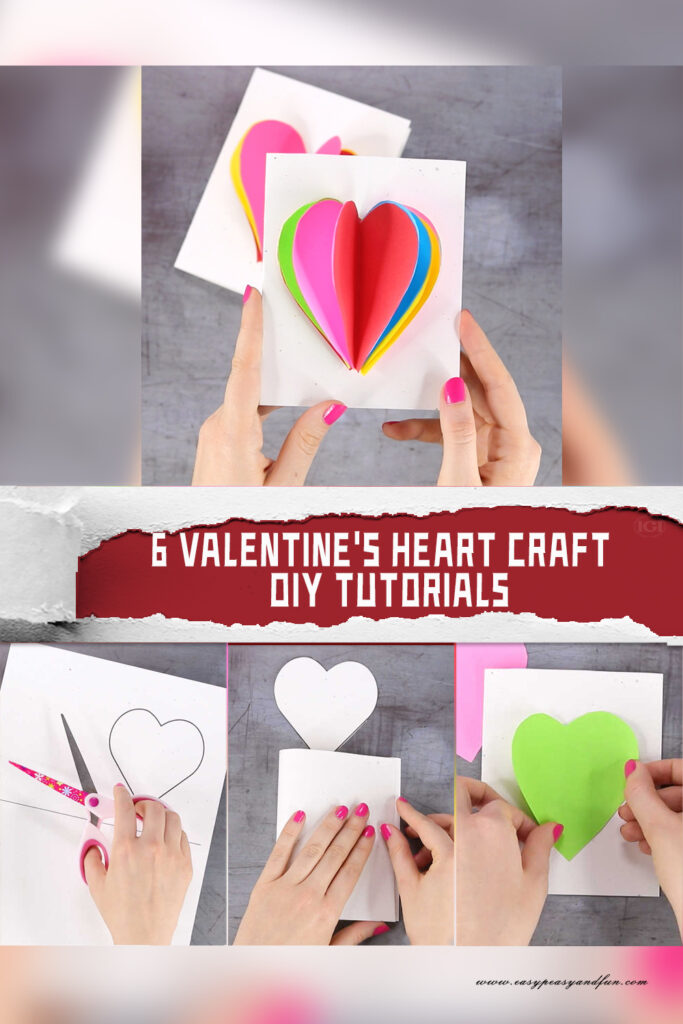
1. 3D Heart Card:
The 3D heart card tutorial from easypeasyandfun.com is a charming way to convey your love. With simple materials like paper, scissors, and glue, you can create a pop-up card that will surely impress your loved one. The step-by-step instructions make it easy to follow, and the end result is a delightful surprise that will warm the heart of anyone who receives it.
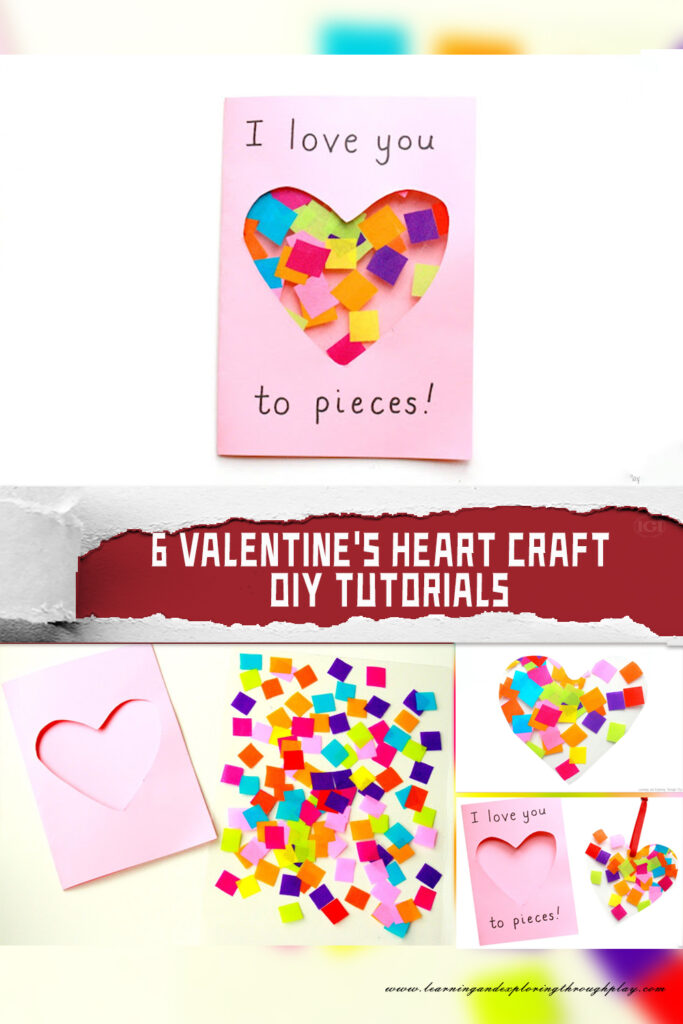
2. Love You to Pieces Suncatcher Card:
This creative project from learningandexploringthroughplay.com combines the beauty of a suncatcher with a heartfelt message. By using colorful tissue paper and clear contact paper, you can create a stunning card adorned with heart-shaped “pieces” that symbolize your love. Hang it in a sunny window to catch the light and spread love throughout the room.
3. Fingerprint Heart Card:
The fingerprint heart card tutorial from thebestideasforkids.com adds a personal touch to your Valentine’s Day greetings. With just ink or paint and your fingertips, you can create adorable heart designs that showcase your unique bond. This project is perfect for kids and adults alike, and each fingerprint becomes a precious reminder of the love shared between you and your recipient.
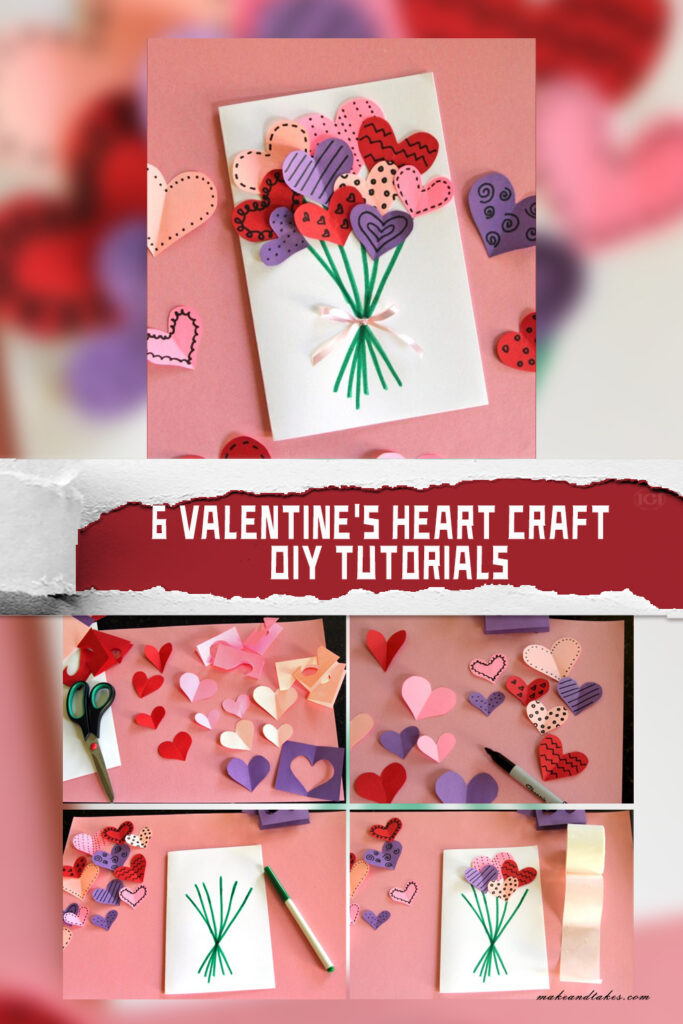
4. Bouquet Hearts Card:
Makeandtakes.com offers a bouquet hearts card tutorial that puts a creative spin on traditional Valentine’s Day flowers. Using colorful paper hearts and a few simple folds, you can craft a charming card that resembles a bouquet of flowers. Add a heartfelt message to complete the gesture, and watch as your loved one’s face lights up with joy.
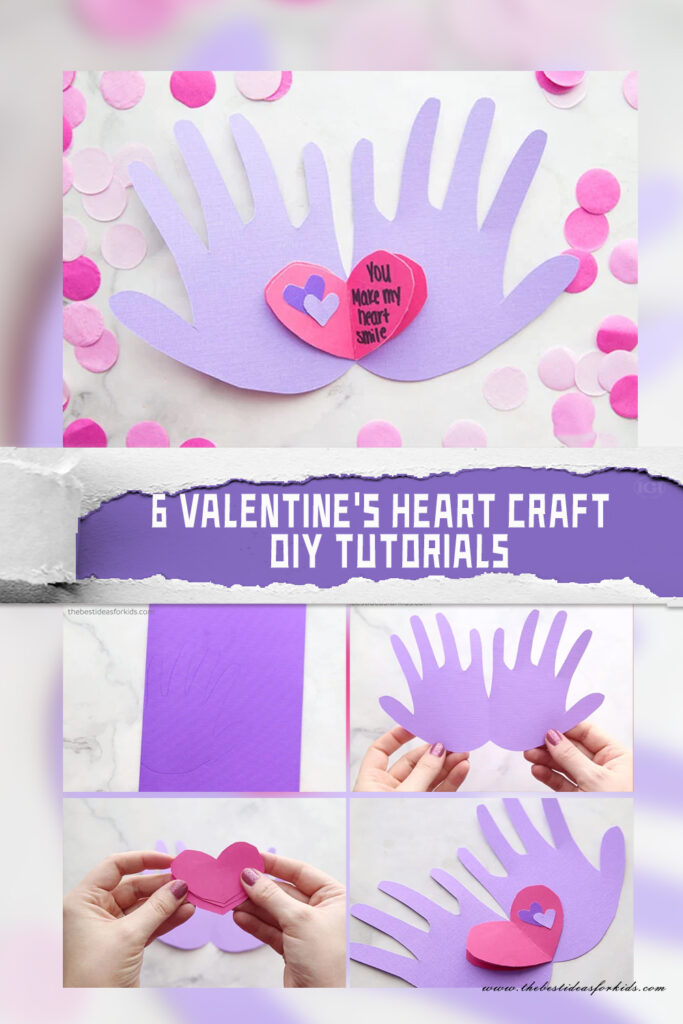
5. Handprint Valentine:
Celebrate the love of family with the handprint valentine tutorial from thebestideasforkids.com. This project captures the unique size and shape of each person’s hand, making it a meaningful keepsake for years to come. Whether you’re crafting with children or adults, the process of tracing and cutting out handprints is sure to create cherished memories.
6. Tulip in a Heart Card:
The tulip in a heart card tutorial from easypeasyandfun.com combines two classic symbols of love into one delightful design. With just paper, scissors, and glue, you can create a beautiful card that features a tulip nestled within a heart-shaped frame. This project is perfect for expressing your affection to someone special and will surely brighten their day.
This Valentine’s Day, unleash your creativity and spread love with these six heartwarming DIY Valentine’s Heart projects. Whether you’re crafting cards for your partner, children, or friends, each tutorial offers a unique way to express your affection and appreciation. From simple fingerprint designs to intricate pop-up cards, there’s a project for every skill level and preference. So gather your materials, set aside some time for crafting, and let love guide your hands as you create meaningful gifts that will be treasured for years to come.
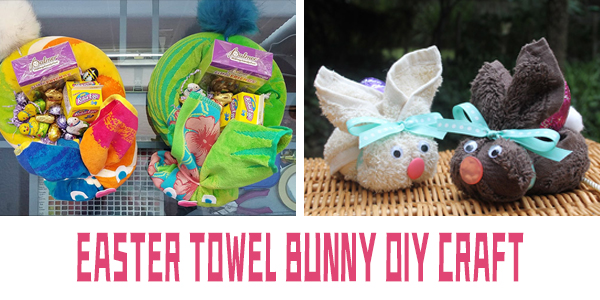
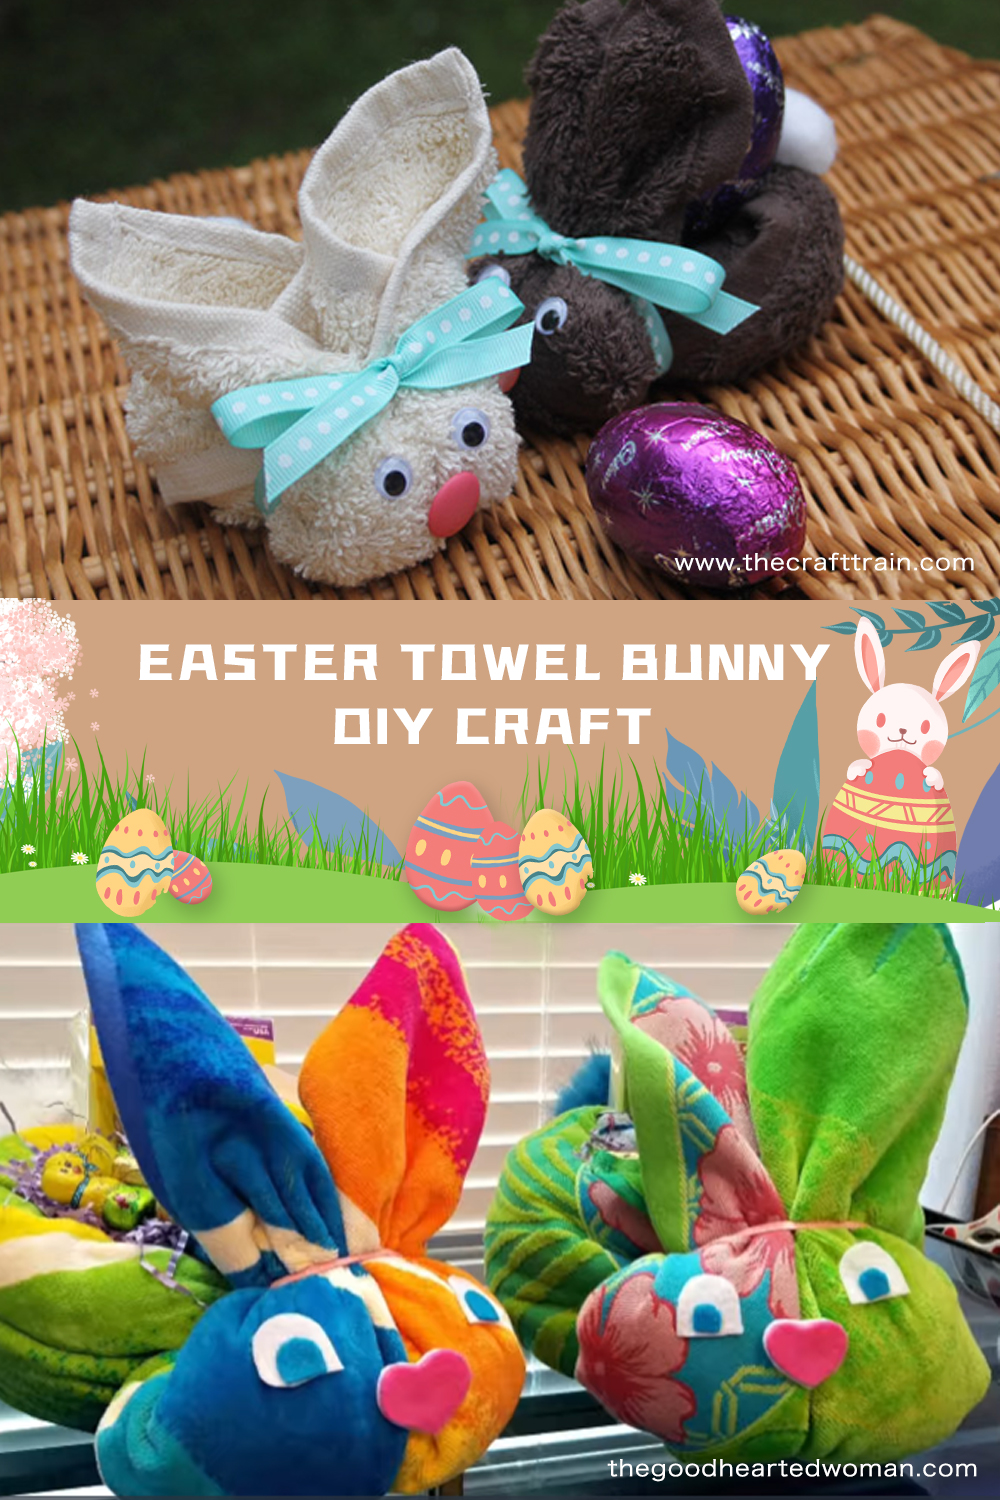
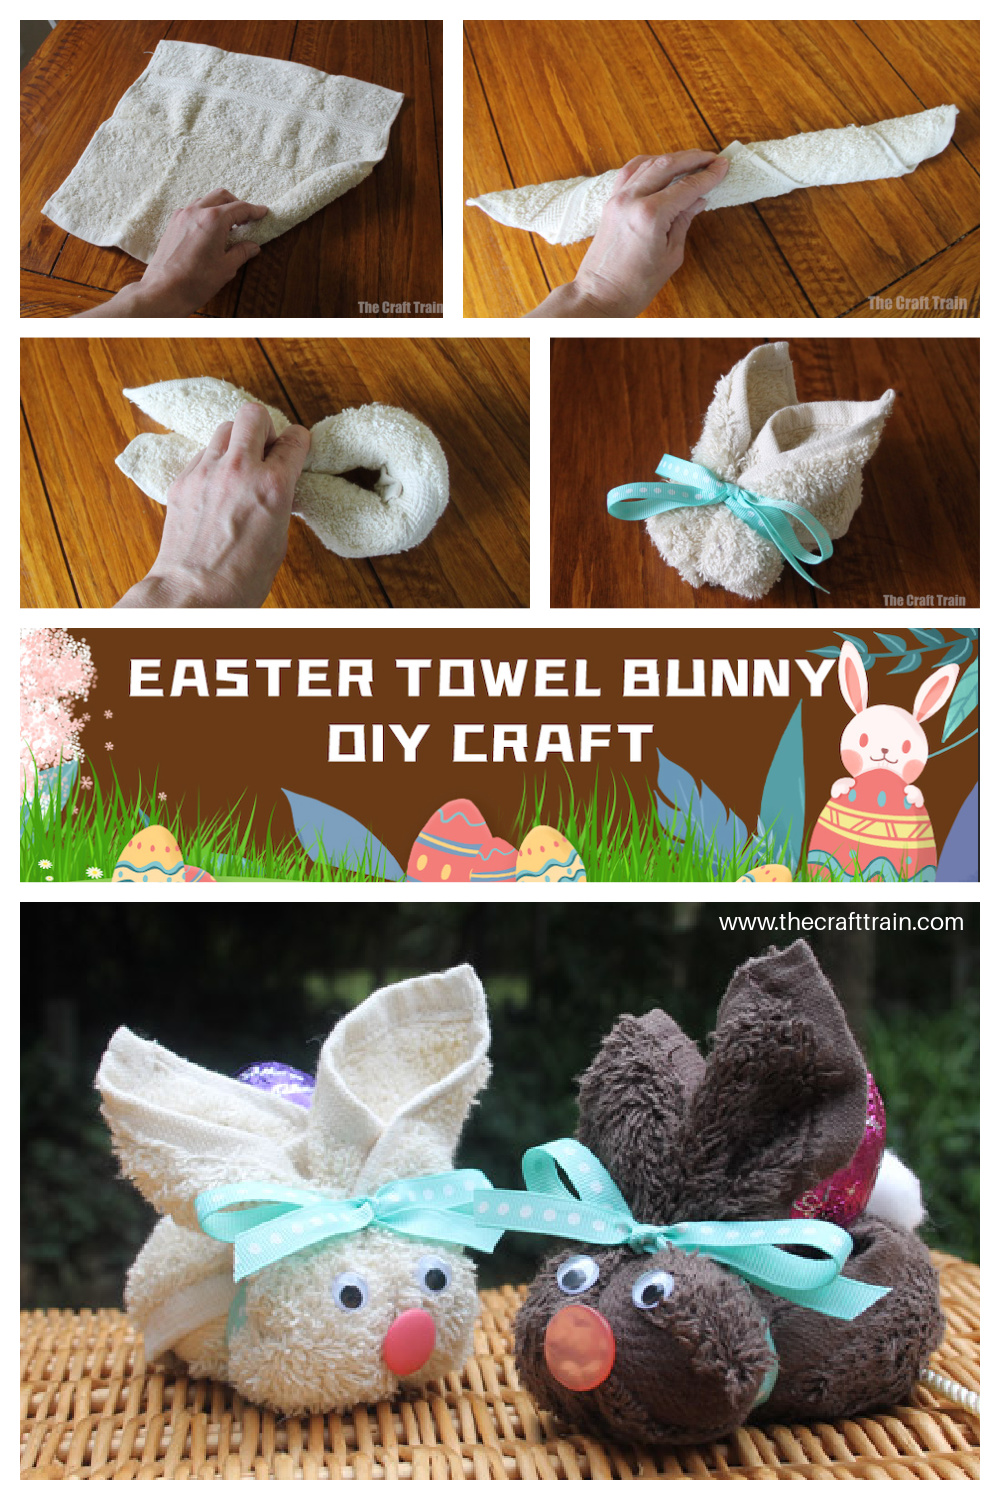
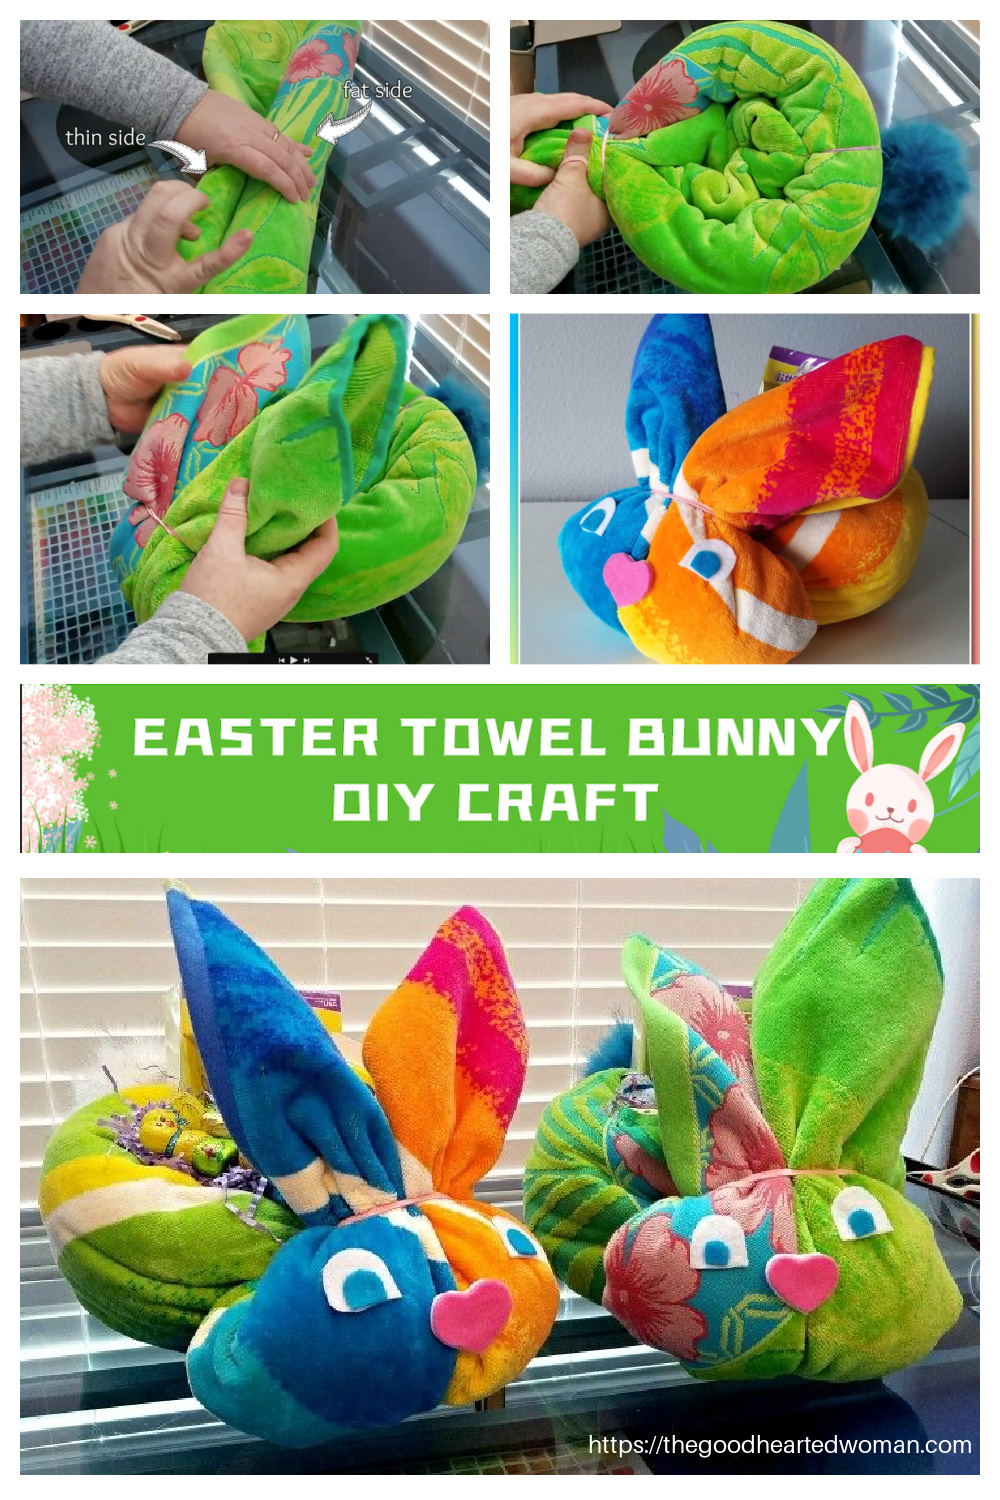
Easter is a wonderful time to get creative and try out new craft ideas. If you’re looking for a fun and easy Easter-themed craft project, then look no further than the DIY Easter Towel Bunny craft. This cute and cuddly bunny is made using just a few simple materials and can be completed in just a few hours.
1.One popular tutorial for making an Easter towel bunny is provided by The Craft Train. This adorable craft is perfect for decorating your home or for giving as a gift to someone special during the Easter holiday. The tutorial is easy to follow and requires only a few materials, including a washcloth, rubber bands, and googly eyes. The end result is a cute and fluffy bunny that will bring a smile to anyone’s face. The Craft Train also provides a printable template for the bunny’s ears, making the process even simpler. The step-by-step instructions are accompanied by helpful photos, making it a fun and easy craft for both kids and adults to enjoy. Not only is this craft a fun way to celebrate Easter, it also provides a practical use for a washcloth. This tutorial is a great example of how a simple household item can be transformed into a creative and festive decoration. Whether you’re looking for a fun activity to do with your family or a unique way to decorate your home, the Washcloth Bunny Craft is a great option.
2.Another great tutorial for making an Easter towel bunny is provided by The Good Hearted Woman. In this tutorial, a beach towel is used to create a bunny-shaped Easter basket. The tutorial provides step-by-step instructions, complete with photos, to guide crafters through the process of folding and shaping the towel into the desired bunny shape. The end result is a cute and practical Easter basket that can be used to hold Easter eggs, candy, or other small gifts.This towel bunny Easter basket is a fun and unique way to celebrate the holiday and would make a great project to do with kids. The tutorial is easy to follow and requires only a few materials, making it a budget-friendly option for those looking to add a festive touch to their Easter celebrations. Whether used as a centerpiece for an Easter brunch or as a fun way to surprise loved ones with Easter treats, this towel bunny Easter basket is sure to bring a smile to anyone’s face.
The great thing about the Easter towel bunny DIY craft is that it’s so versatile. You can use any type of towel or washcloth to create the bunny, and you can customize it with different colors and decorations to make it your own. You can also experiment with different sizes and shapes to create different types of bunnies, from small and cute to large and cuddly.
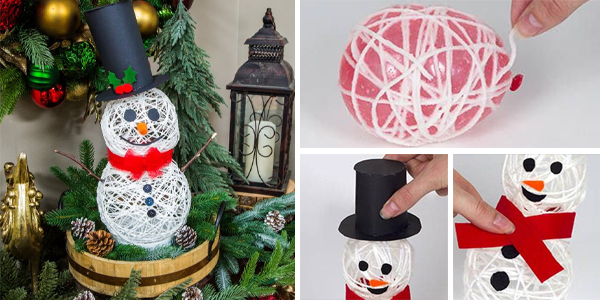
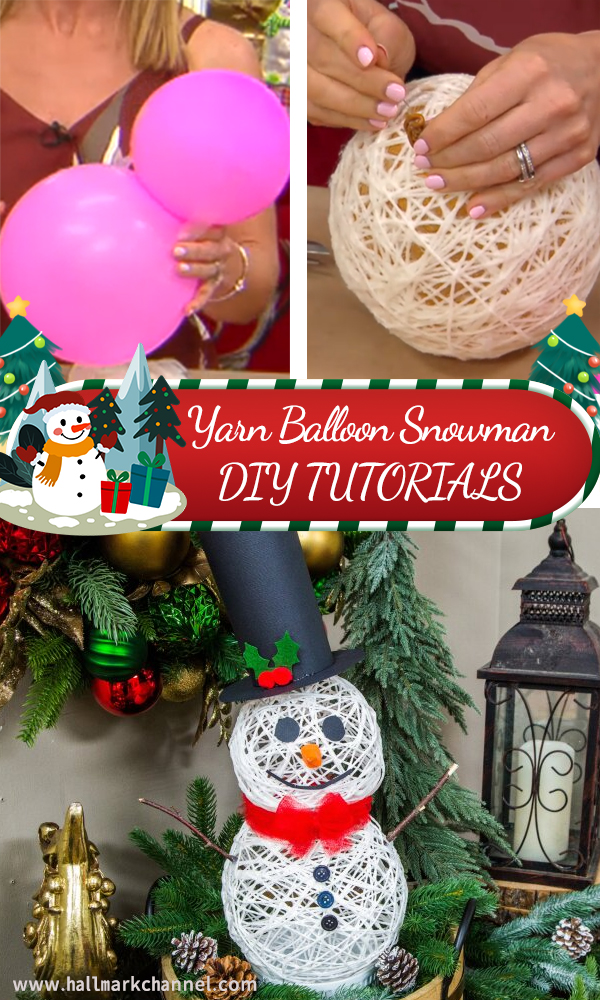
In my memory, everyone likes to build snowmen when it snows in winter. Our snowman is generally composed of two to three snowballs of different sizes. Usually, the smaller one is placed on top of the larger one to form a human shape, and a scarf, hat or coat button is attached to make it more human-like. Sometimes, buckets, brooms, carrots, etc. are used as decorations to make it more cute. However, some warm places do not snow in winter, such as most places in California, Christmas is not perfect without a snowman. Moreover, the snowman doesn’t last long, and it melts when the temperature is high, so how to make a snowman that won’t melt? The answer is that we DIY our own snowmen from materials that won’t melt. Here are two DIY Yarn Balloon Snowman tutorials, let’s go through them, and make Christmas more fun. First we need to add 2 parts PVA and 1 part water to a bowl and mix together to blow up the balloon. Put the wool in the glue mixture and wrap it around the balloon. Repeat the previous steps to make the snowman’s head and body separately. Finally glued together. Then use some decorations for the snowman’s eyes, mouth, etc. Let’s follow the tutorial and make it step by step. Both tutorials are easy to follow, and in no time you’ll be able to make really cute snowmen. Thanks to Hallmarkchannel and Bakerross for the great DIY Yarn Balloon Snowman tutorials. The details is linked below the picture, Have fun!
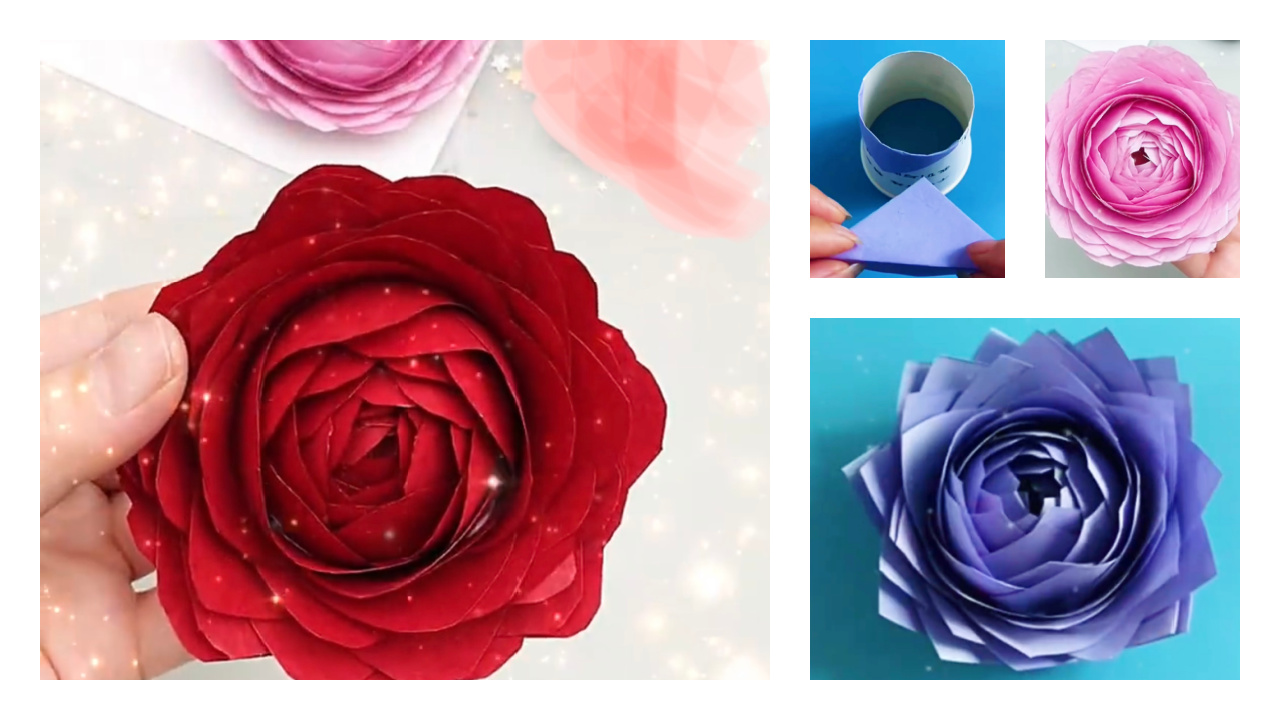
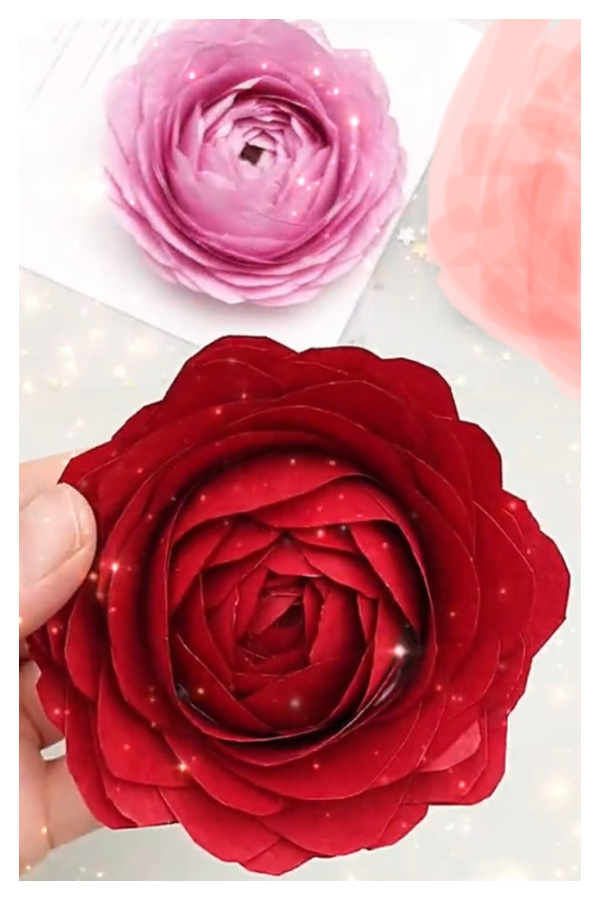
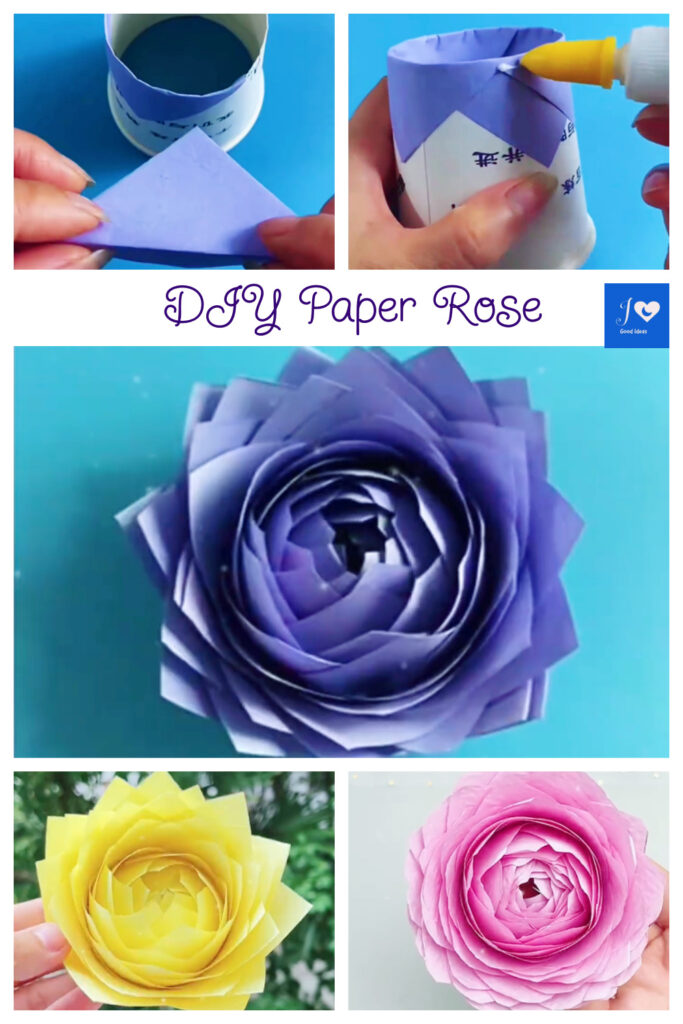
I like roses very much, I like all kinds of roses. How about you? Today we are going to share a tutorial on folding roses. They are so pretty that they can be decorated at home without worrying about them dying. Let’s get started now.
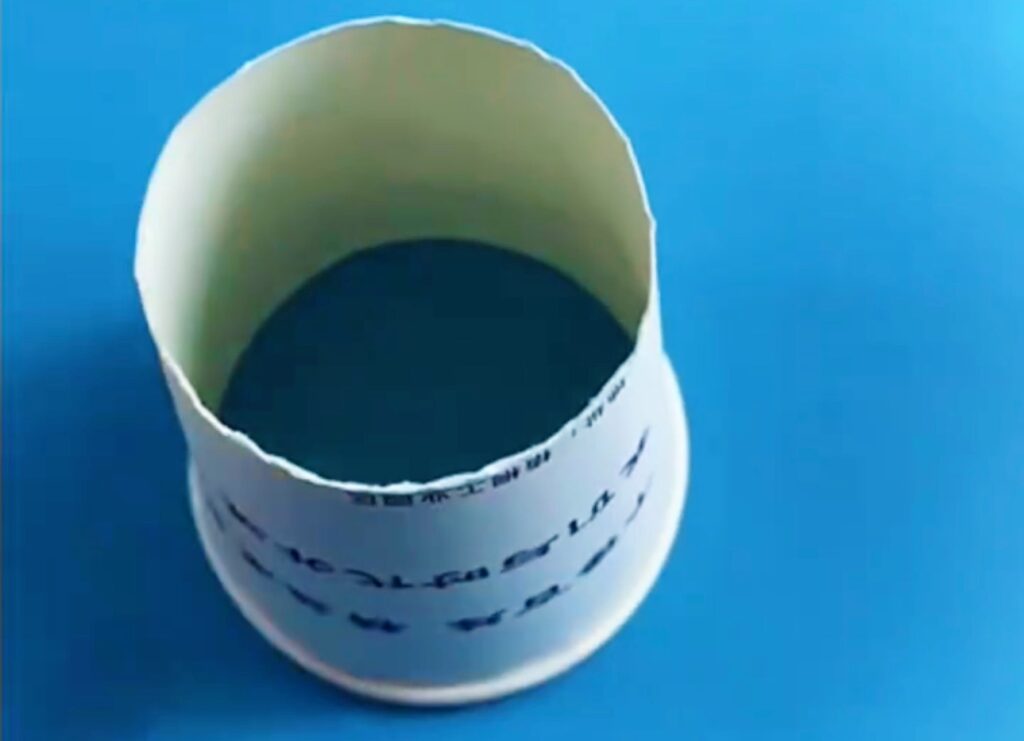
For Easy DIY Paper Rose project, what you will need: square paper, paper cup and glue.
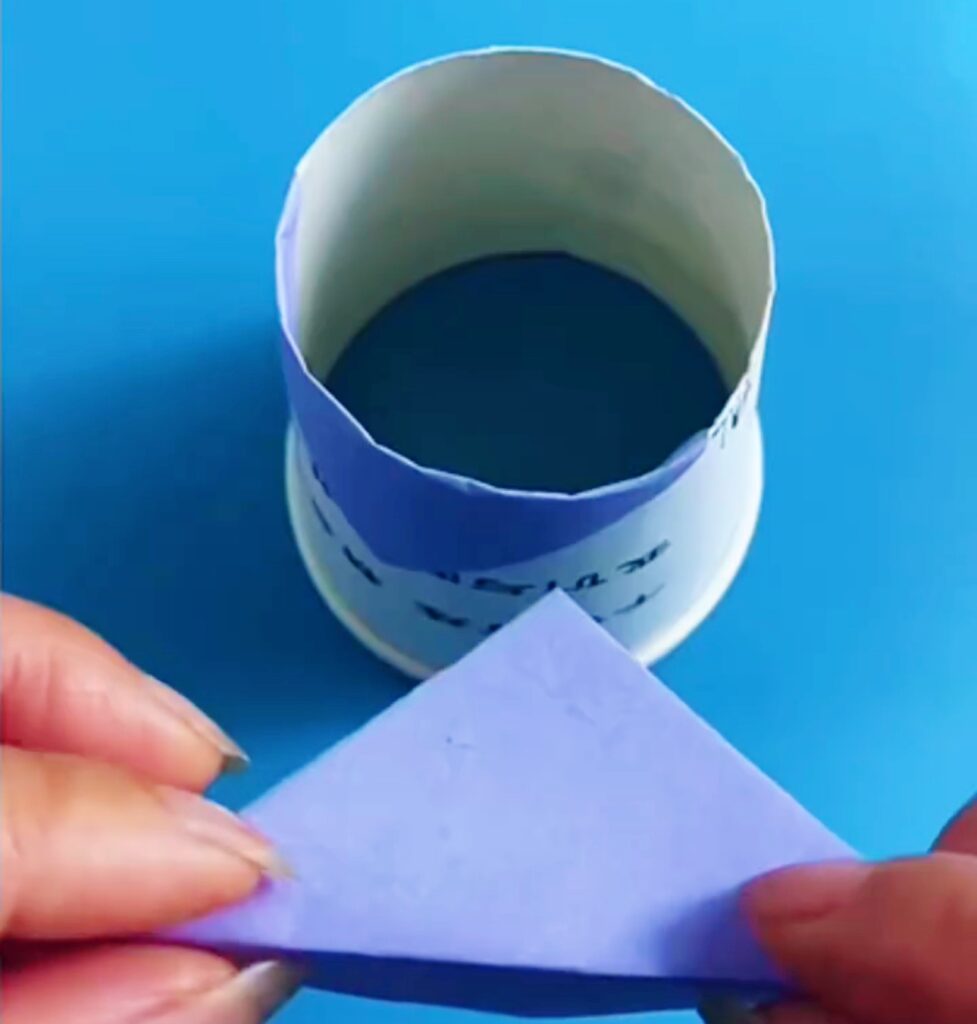
1. First we prepare an 8 OZ paper cup, cut the bottom and put it upside down on the table.
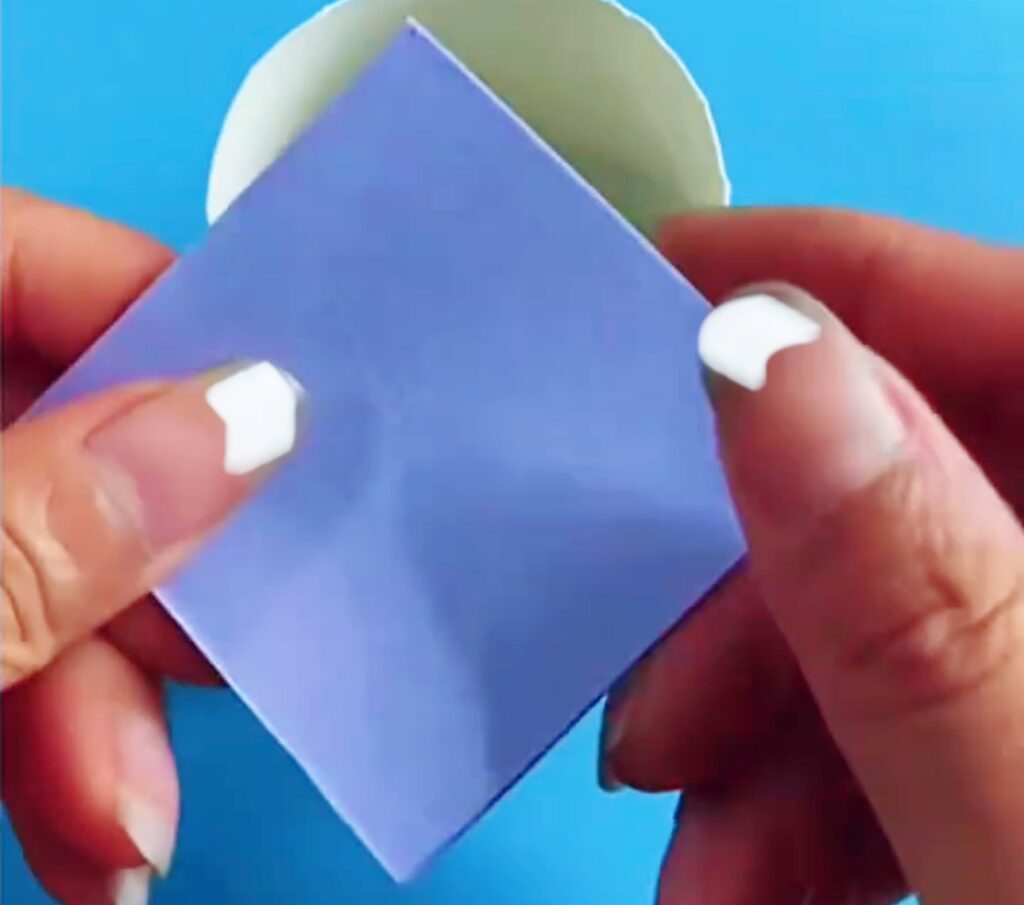
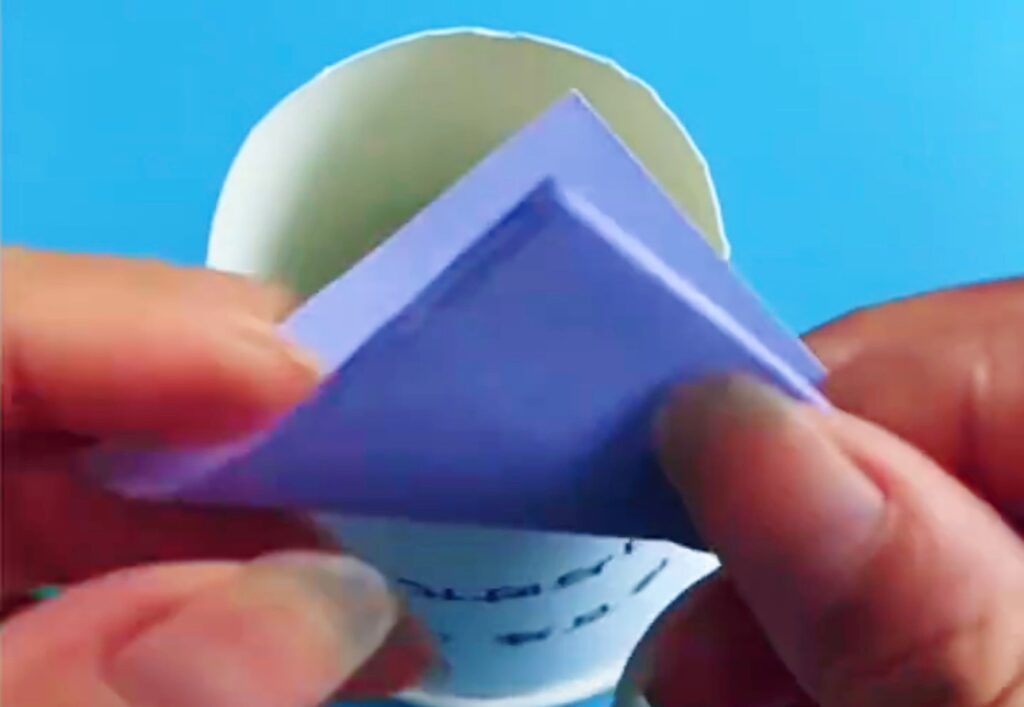
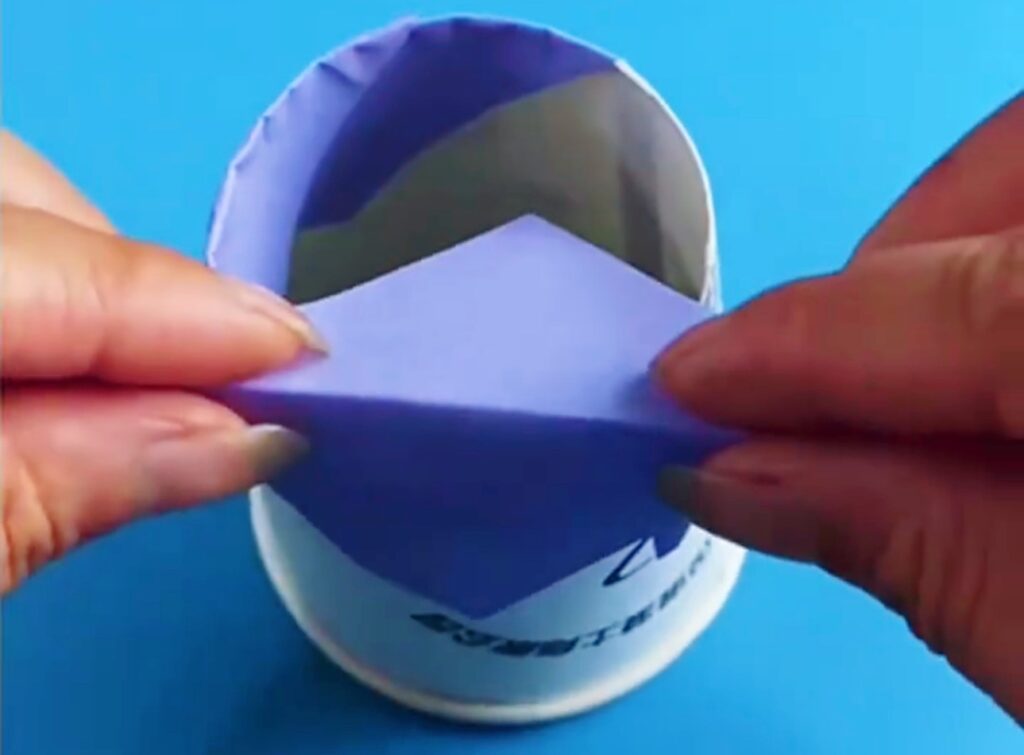
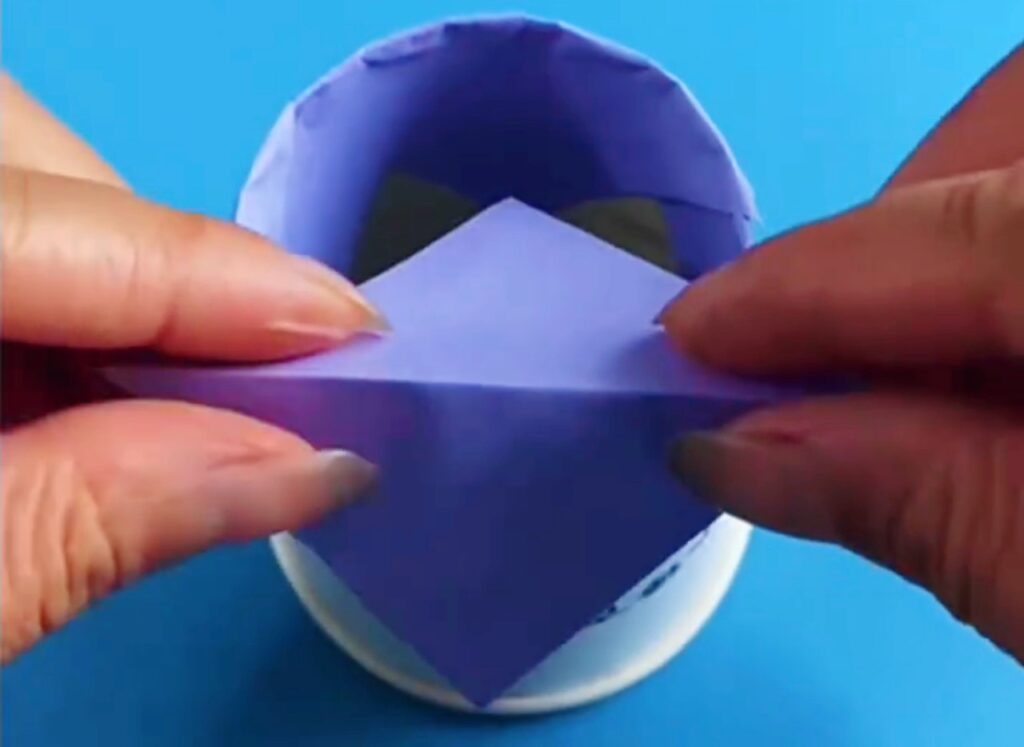
2. Then prepare 30 pieces of colored square paper, the size of the paper is 5.5 x 5.5cm. You can choose the color you like. We first take a piece of paper and fold it in half along the diagonal line once and we will get a triangle. Then put it Open and clamp it to the edge of the paper cup.
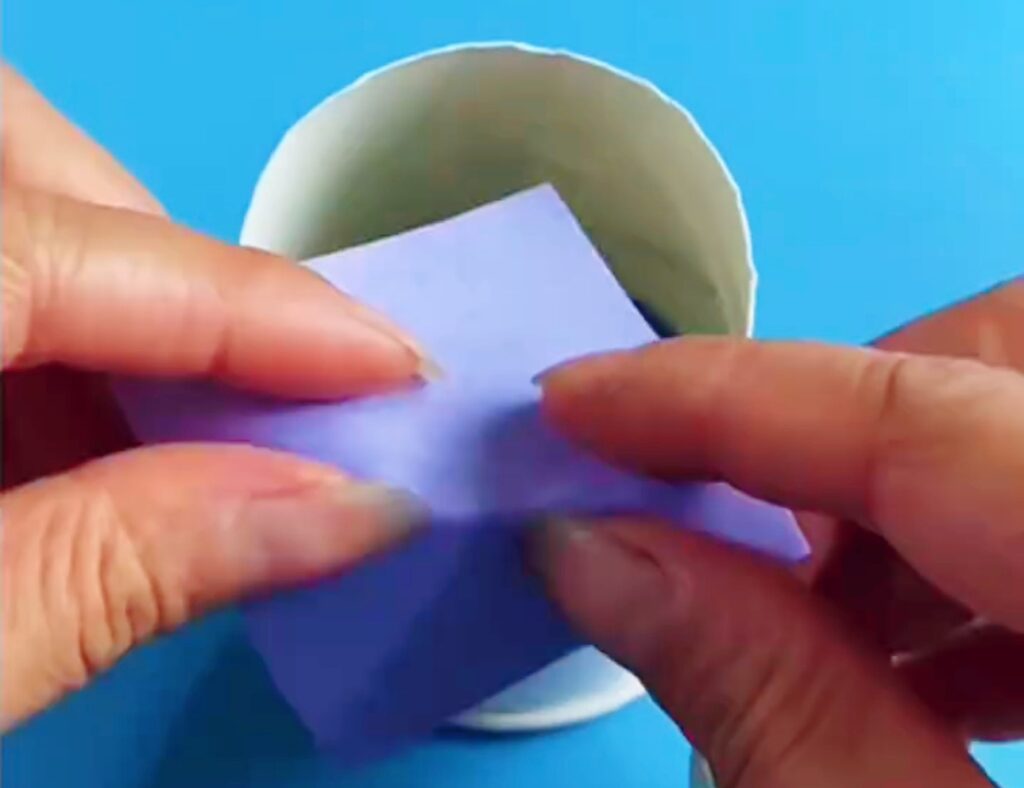
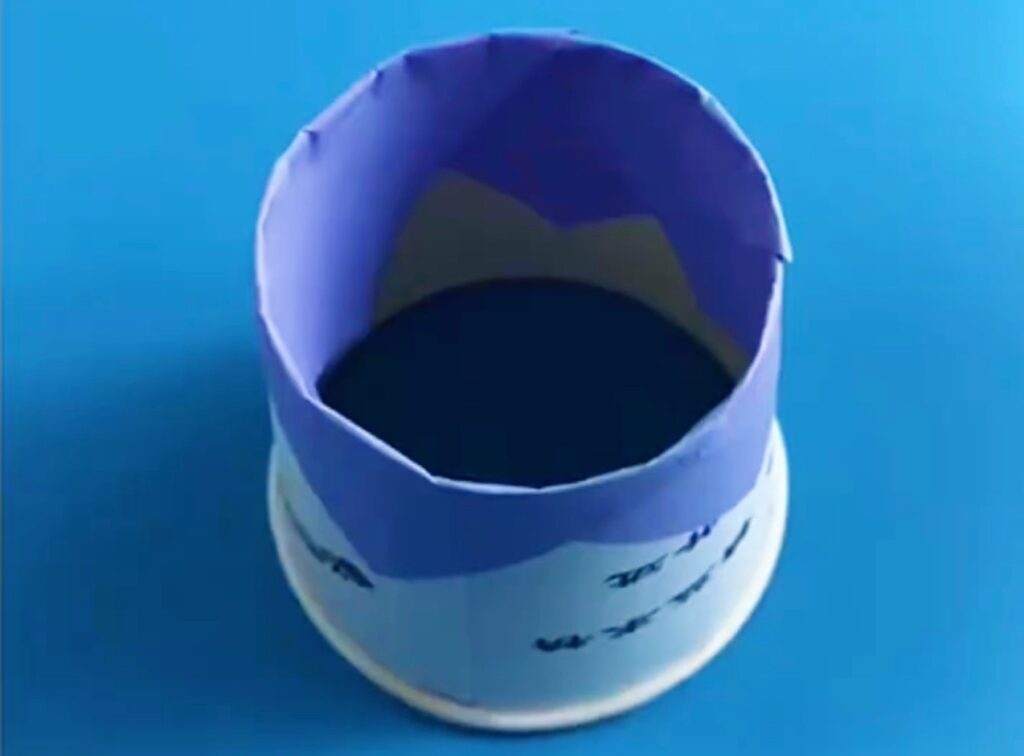
3. We repeat the above steps, and fill the triangular paper along the paper cup.
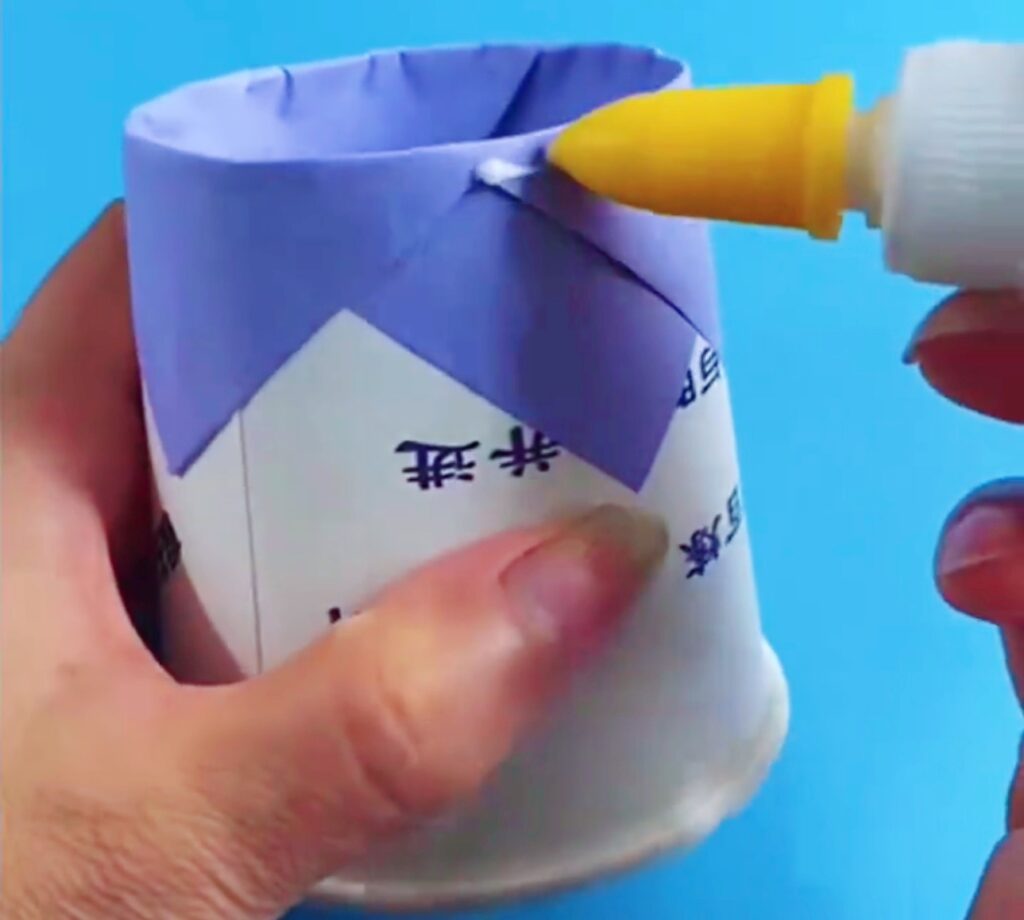
4. To apply glue to the bottom of the paper, put the triangular paper one by one, and repeat this step until all the paper is used up.
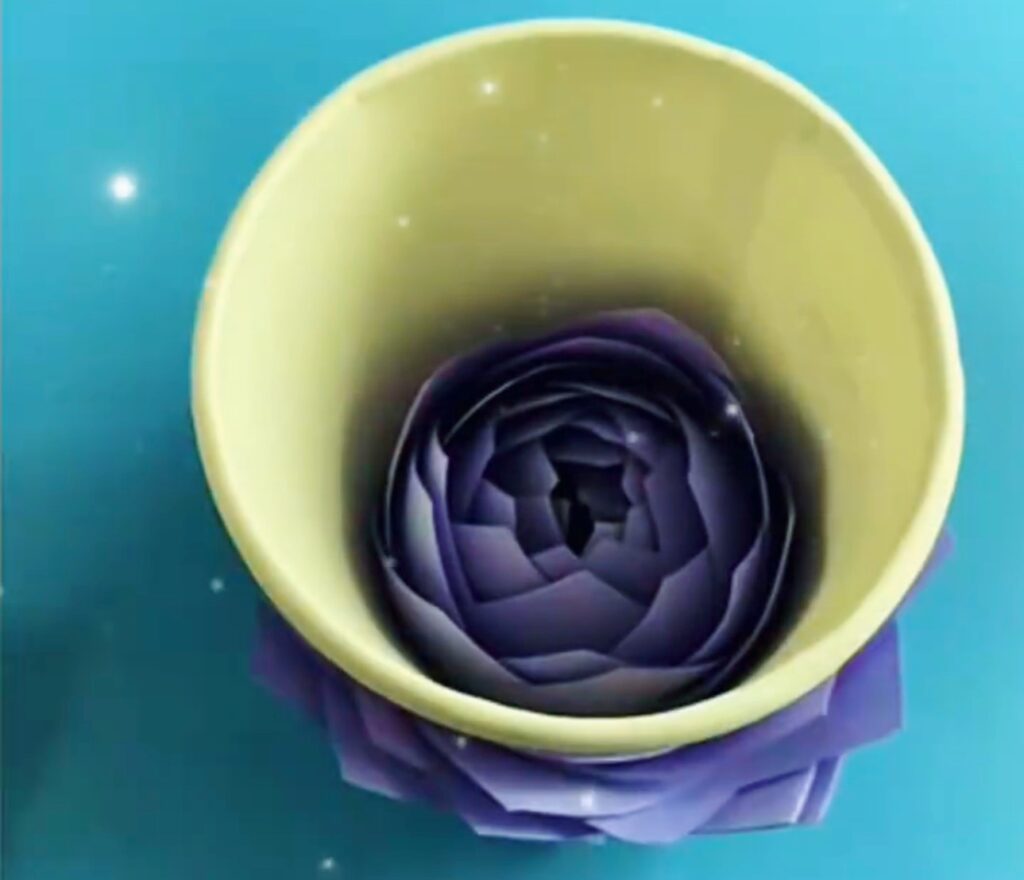
5. Turn the paper cup upside down, then you can see a flower, remove it from the paper cup.
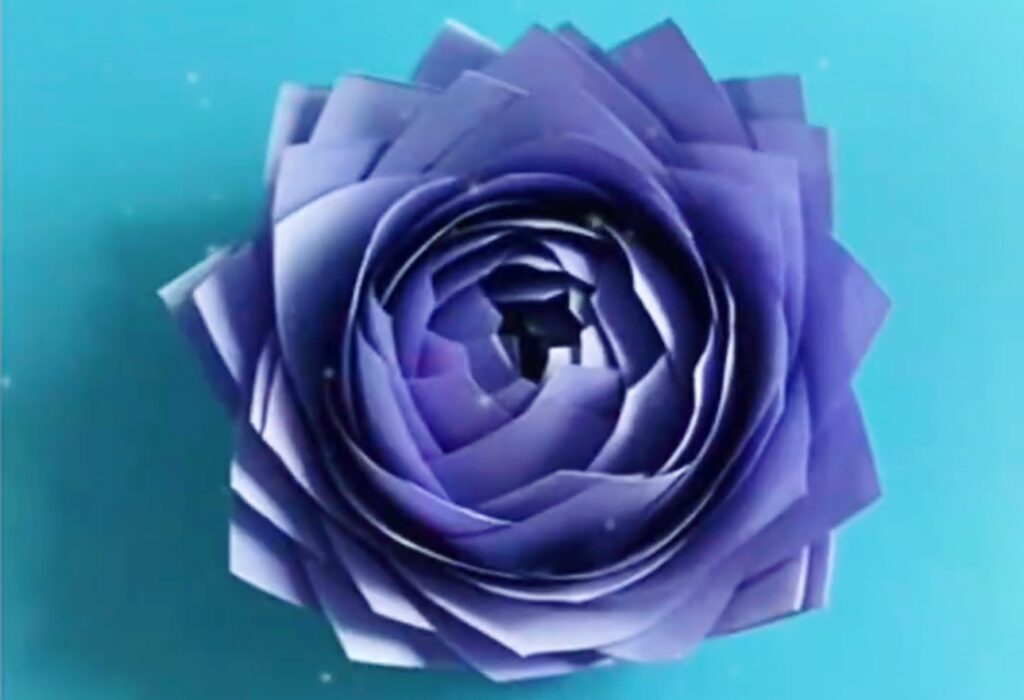
Now, a beautiful rose is ready.
We can make many rose flowers, put them in vases or wrap them up as gifts. Do you like it?
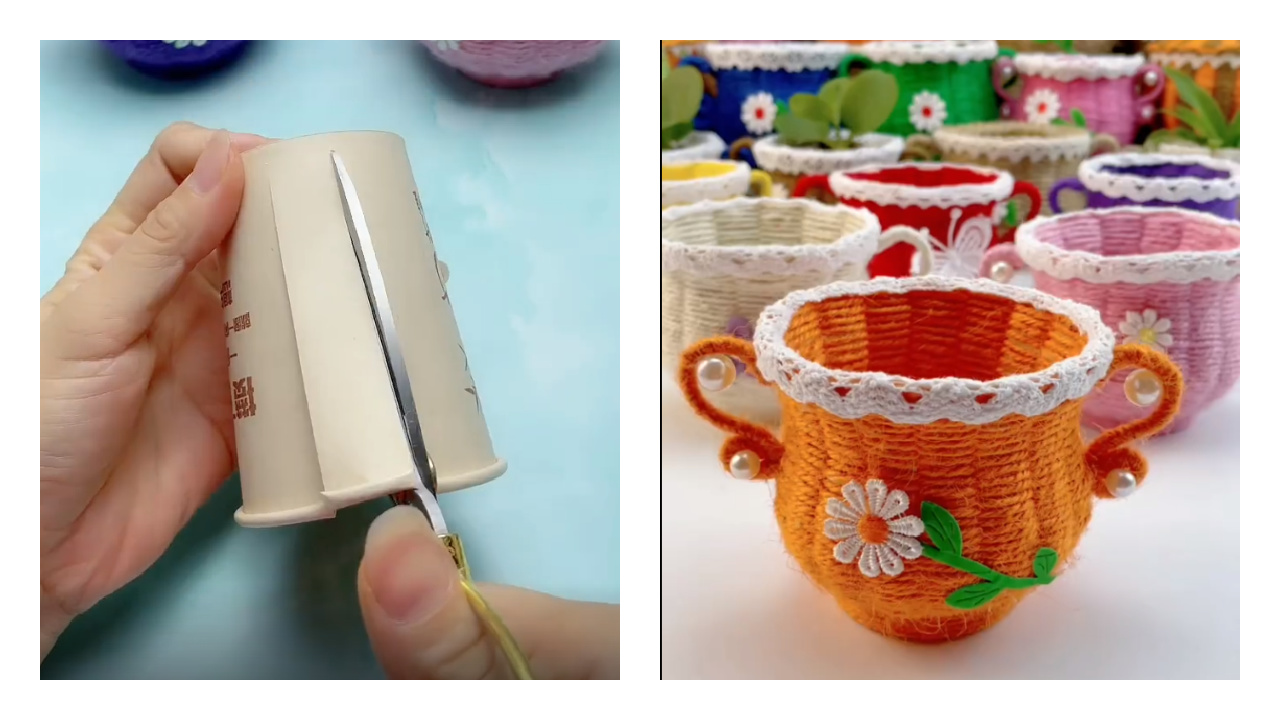
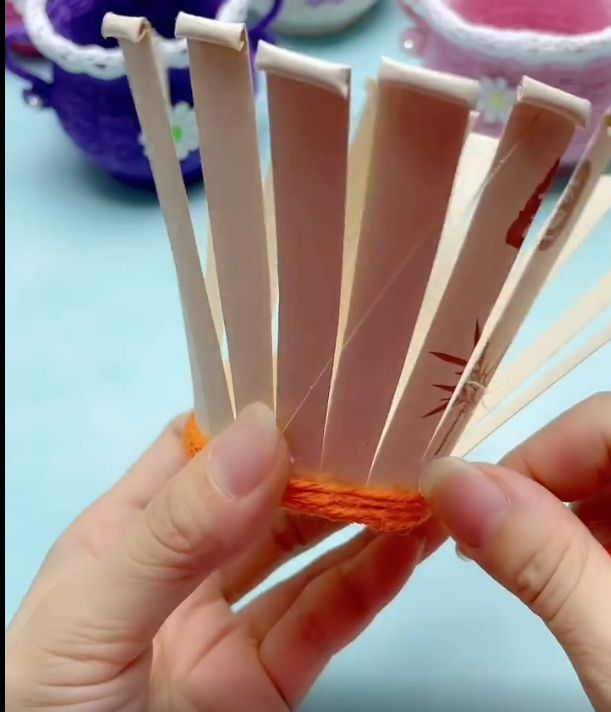
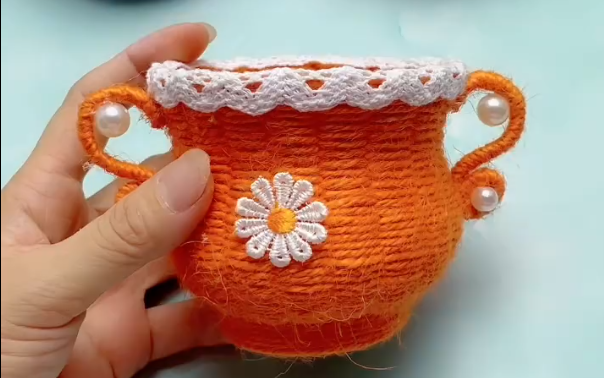
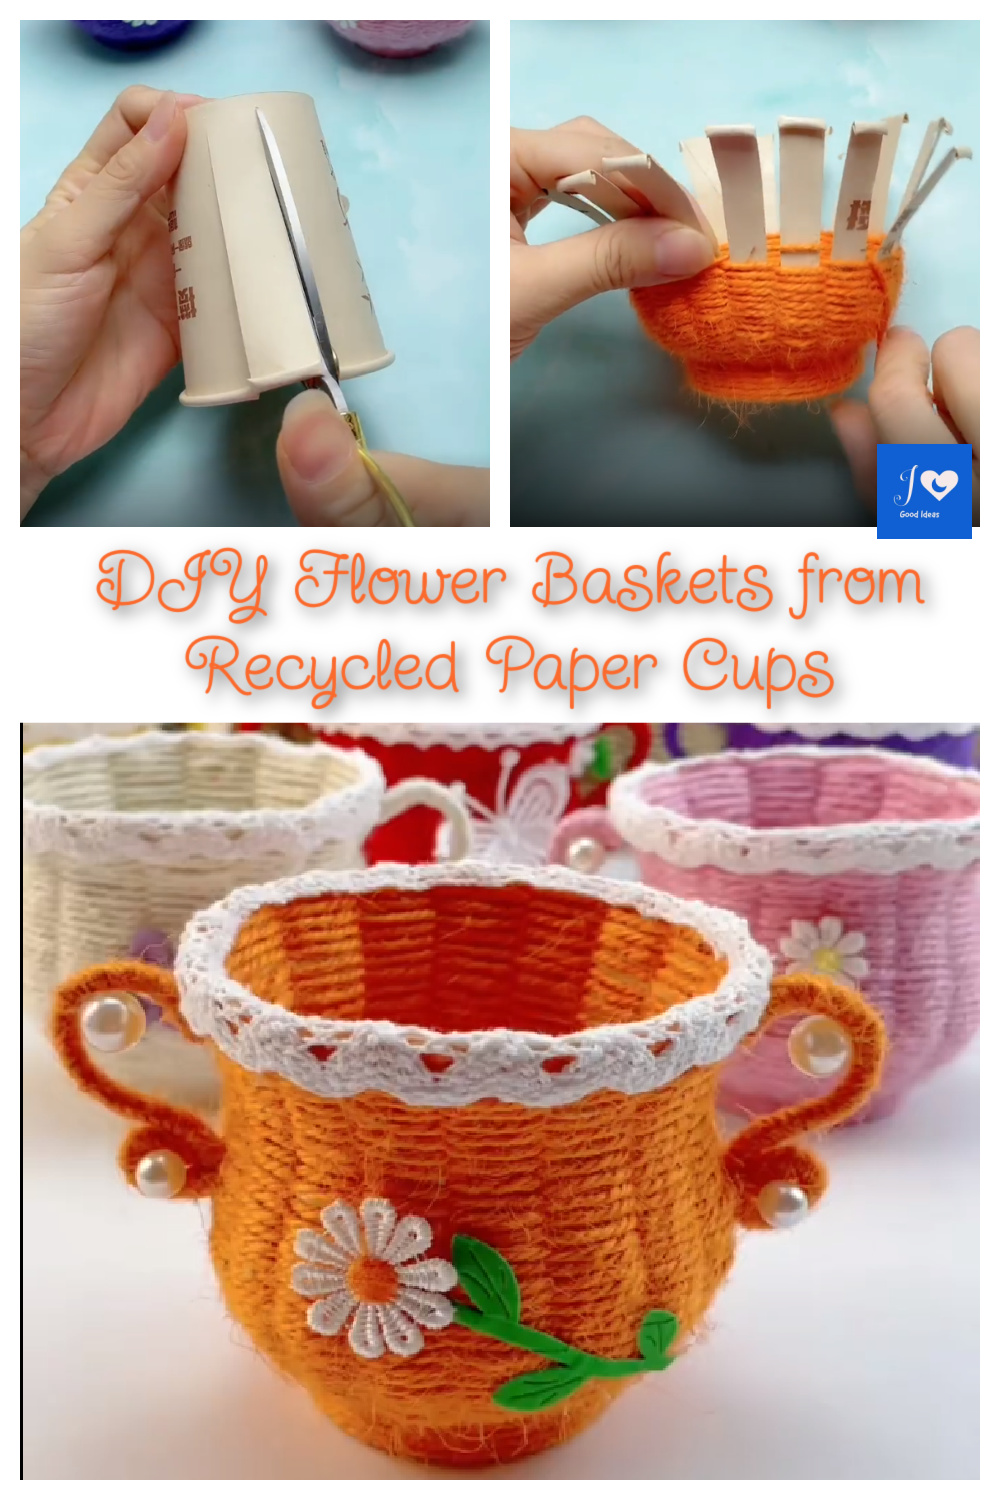
Don’t throw away the leftover yarn and paper cups, we can recycle these items to make flower baskets. These beautiful flower baskets can decorate our room and can also be used to grow flowers and plants. Let’s get started now!
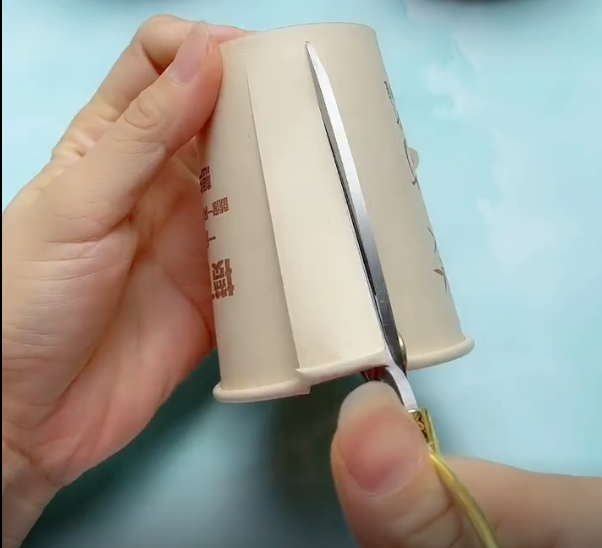
1. First, we take a paper cup and cut it with scissors on the paper cup.
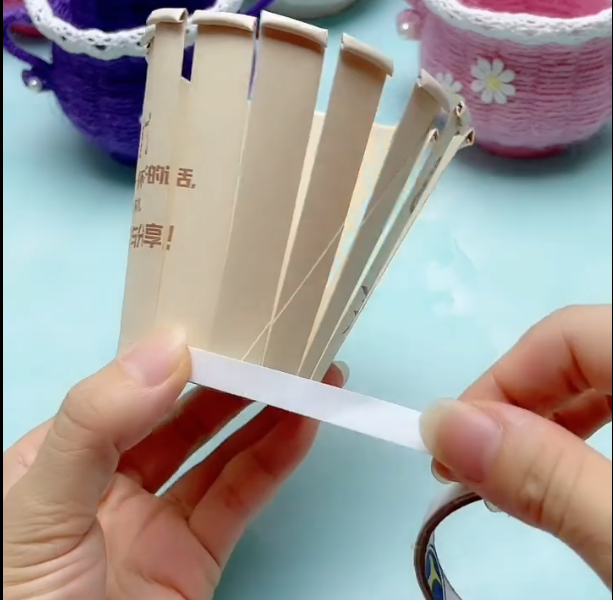
2. Cut the paper cup into long strips.
3. Cut the whole paper cup into a circle.
4. Wrap the bottom of the cup with double-sided tape.
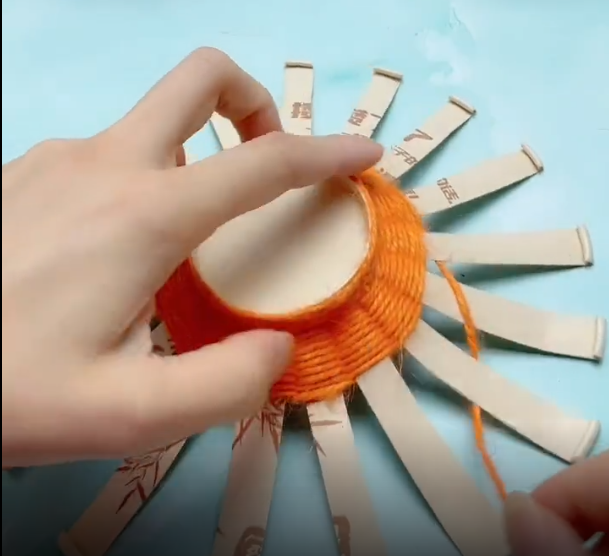
5. Using your favorite colored yarn, wrap it around the double-sided tape on the bottom of the cup.
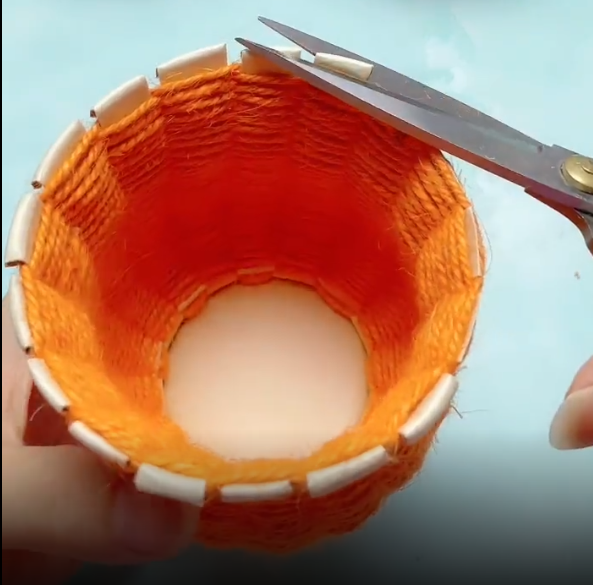
6. Keep winding, pay attention when winding into strips, and each strip should cross each other.
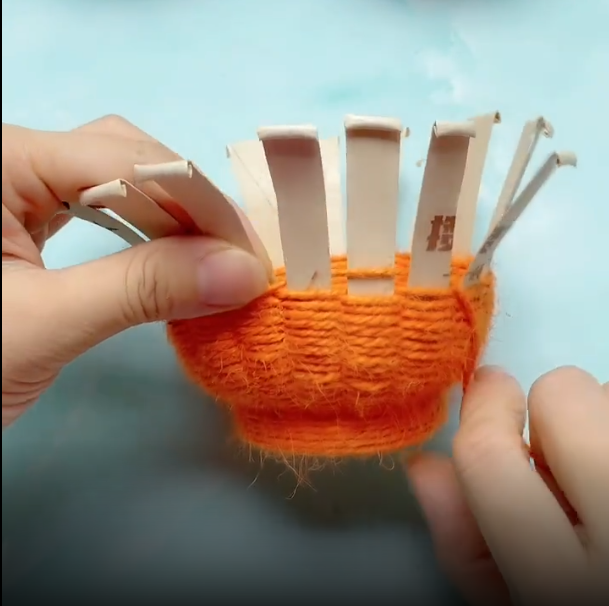
7. When reaching the mouth of the cup, we use scissors to cut off the excess part of the mouth of the cup.
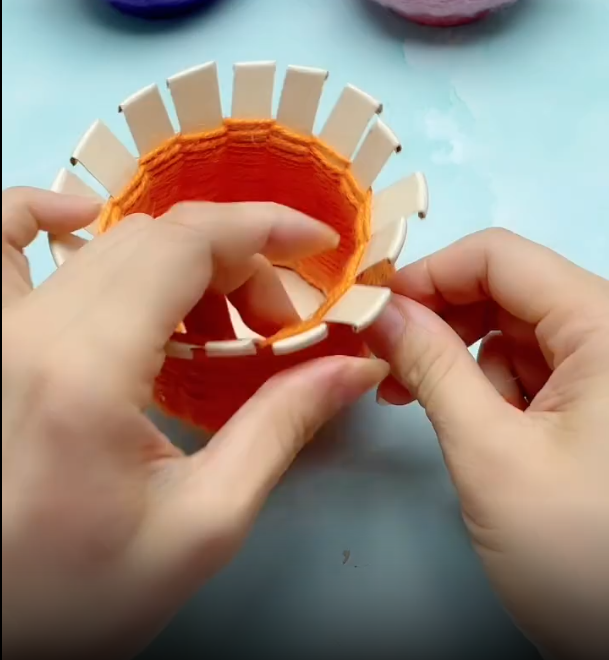
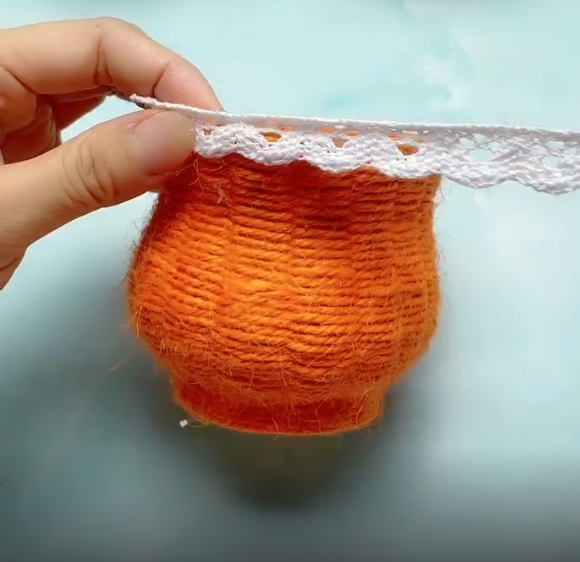
8. Then we wrap it around the mouth of the cup with our favorite lace.
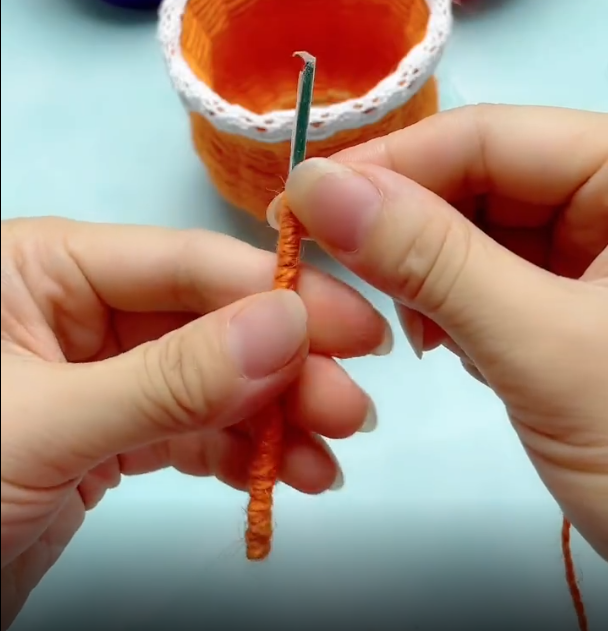
9. We wrap the yarn with a deformable hook.
10. Pinch the crochet hook into a handle.
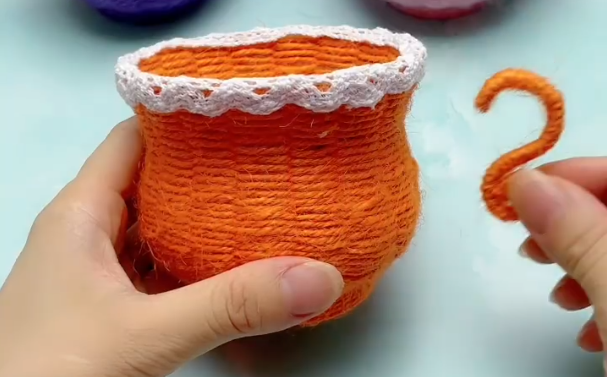
11. Make two handles in the symmetrical position of the cup, and add a little decoration to the handles.
12. Finally, you can add some other details on the cup, such as green leaves, etc., so that our paper cup flower basket is ready. Enjoy!
When I was a kid, I used to make pinwheel in the classroom with my classmates. The pinwills made by the students are really colorful! Red, white, green, and purple… At that time, the windmills I made were colored, and I thought my pinwills were the most beautiful, because they were made by my brain.
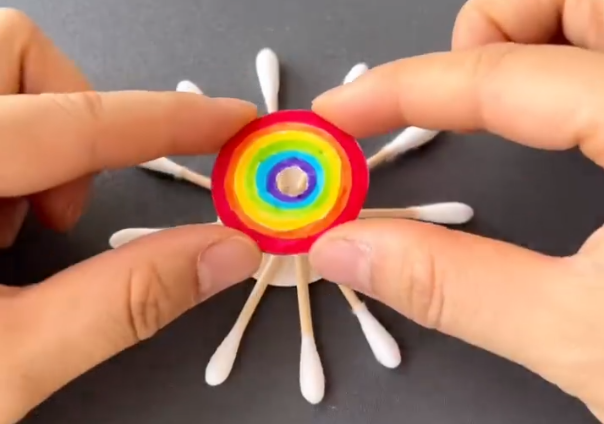
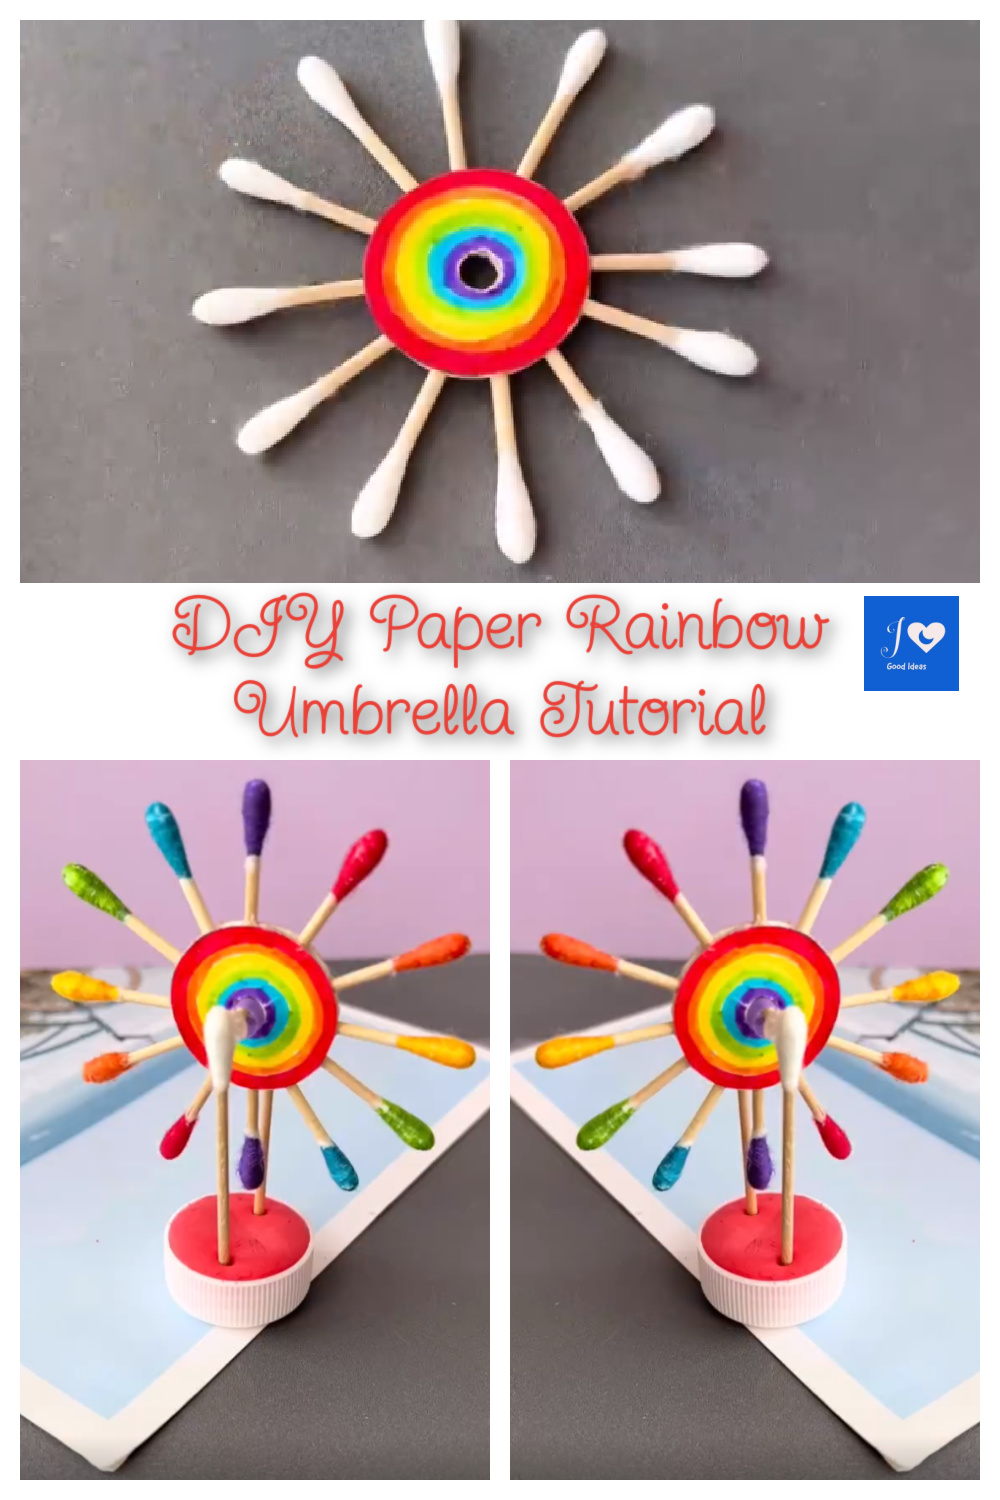
Now, I also enjoy making little Pinwheels with my kids. Do you believe? Use Q-tips and a small bottle cap to make a small rotating pinwheel, come and try it!
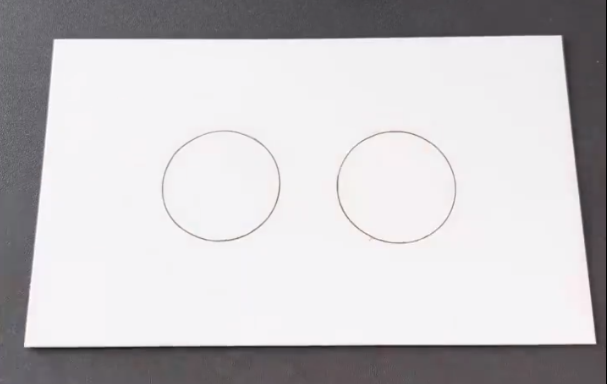
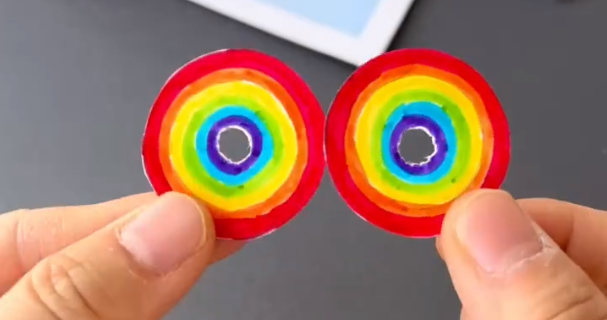
1. First, we draw two circles on the paper.
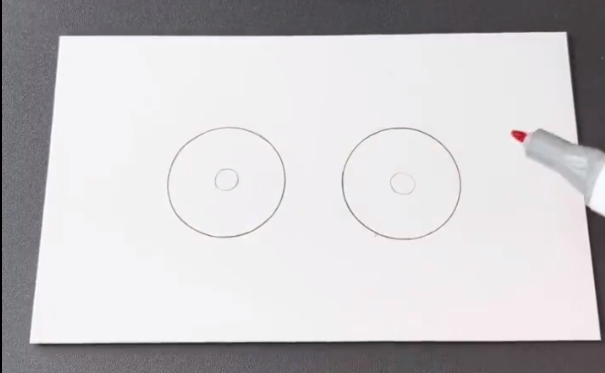
2. Draw another small circle in the circle.
3. Use a crayon to paint your favorite color in the circle. Remember that the small circle in the middle does not need to be painted because it needs to be cut.
4. Cut out the circle with scissors, and the small circle in the middle.
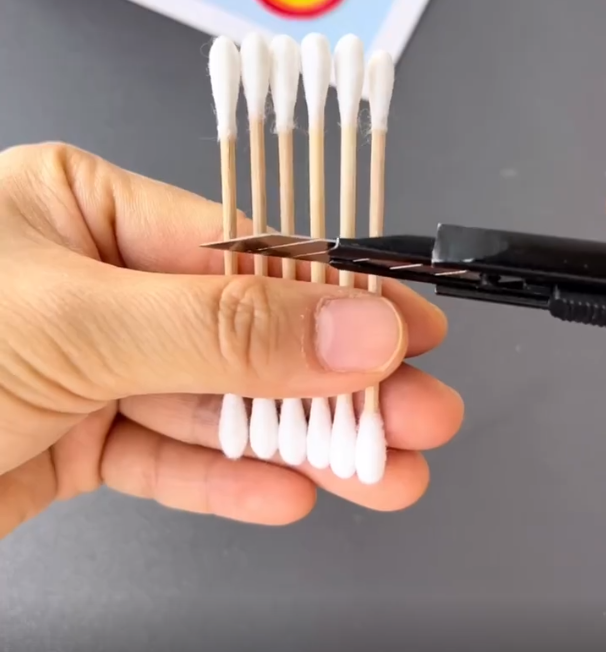
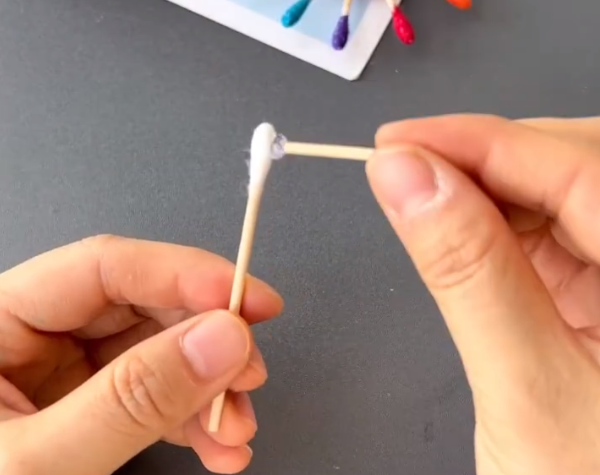
5. Take out 6 Q-tips. and cut in the middle.
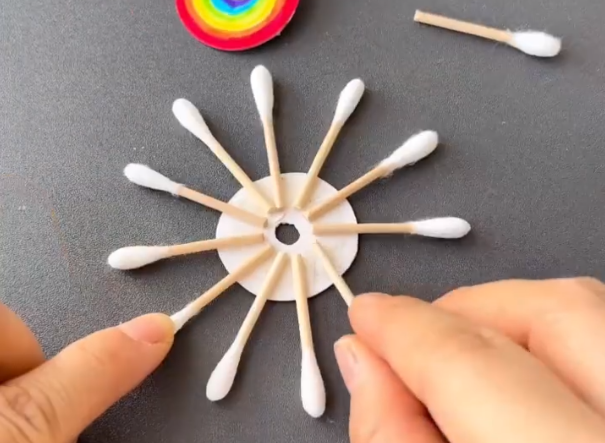
6. Apply double-sided tape or glue on the back of the cut circle.
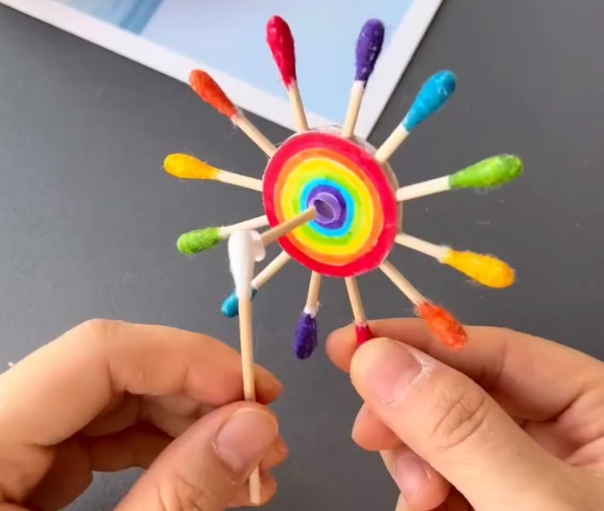
7. Stick the Q-tips you just cut on the circle neatly one by one.
8. The other circle is also stuck to the Q-tips.
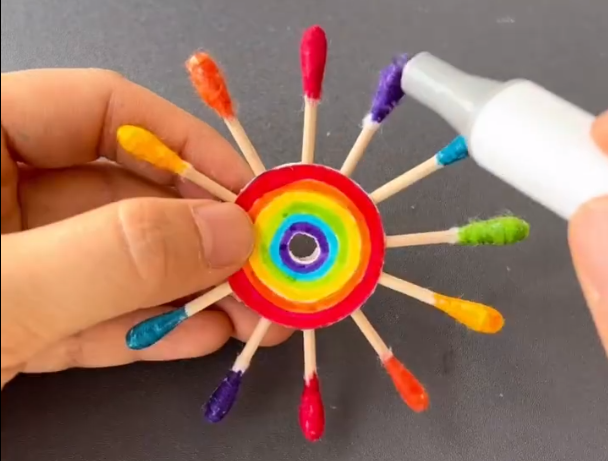
9. We put various colors on the cotton tip of the Q-tips with a watercolor pen.
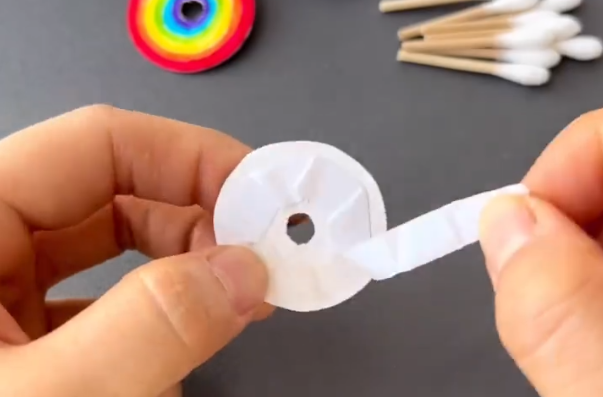
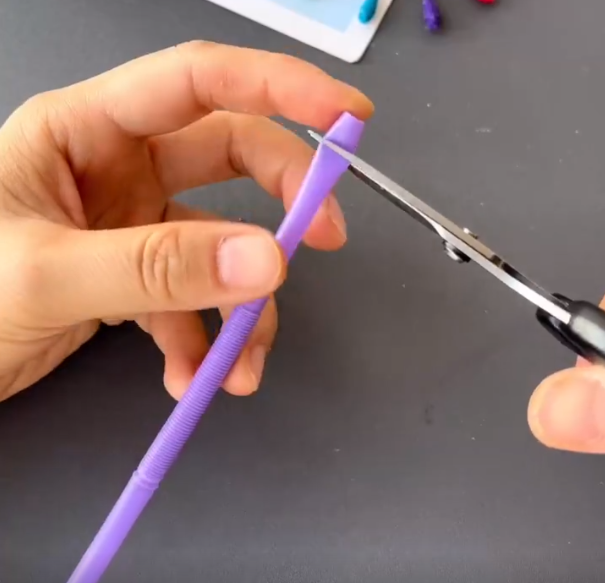
10. We prepare a straw and cut a section.
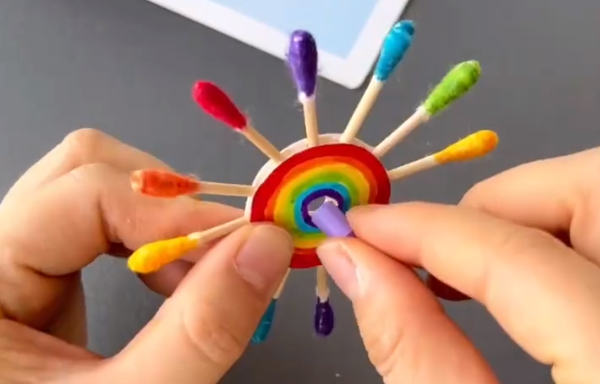
11. Insert the cut section of the straw into the center of the circle as a bearing.
12. Then we prepare two Q-tips and glue them together.
13. Put the glued cotton swabs through the bearing.
14. Glue a Q-tips on the other side as well.
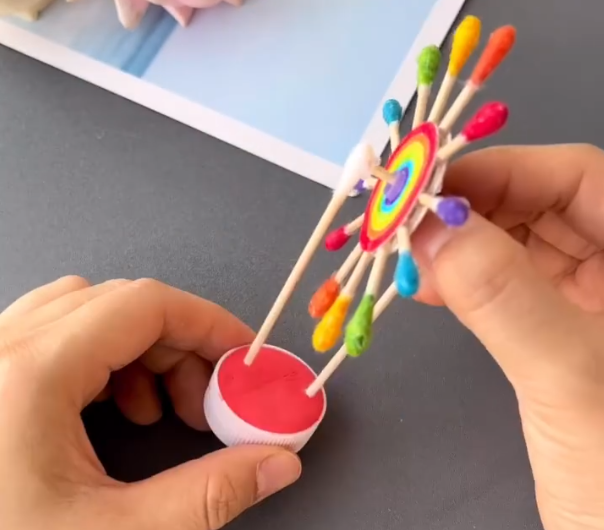
15. We prepare a bottle cap and put some plasticine inside the bottle cap as a base.
16. Insert the assembled windmill into the plasticine.
17. In this way, our handmade small windmill is completed. Enjoy!
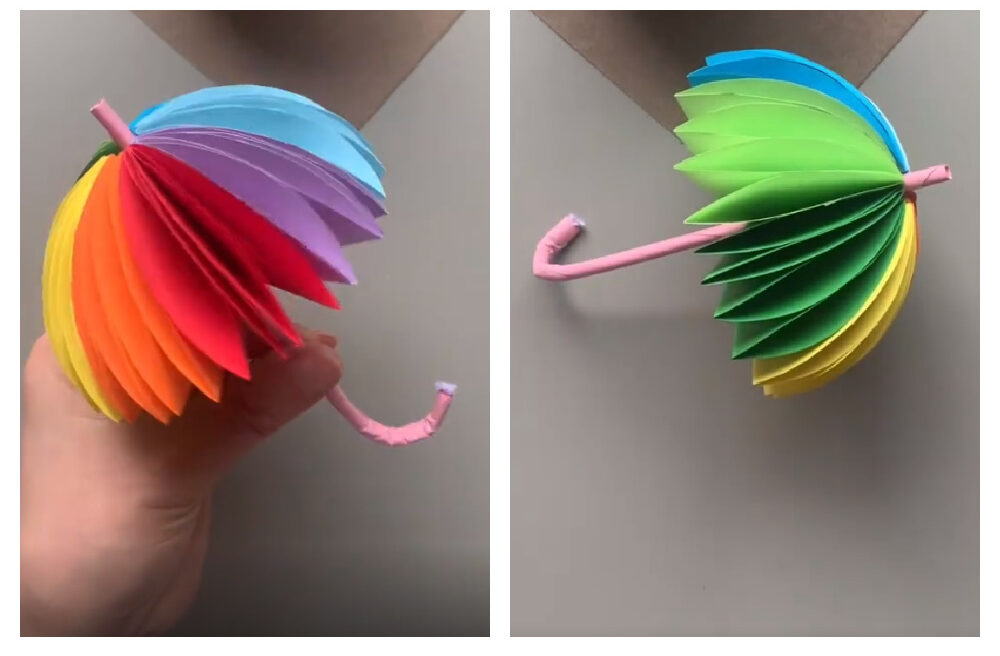
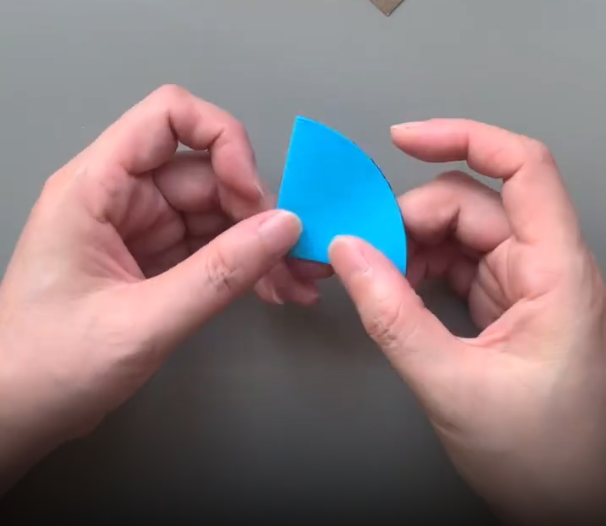
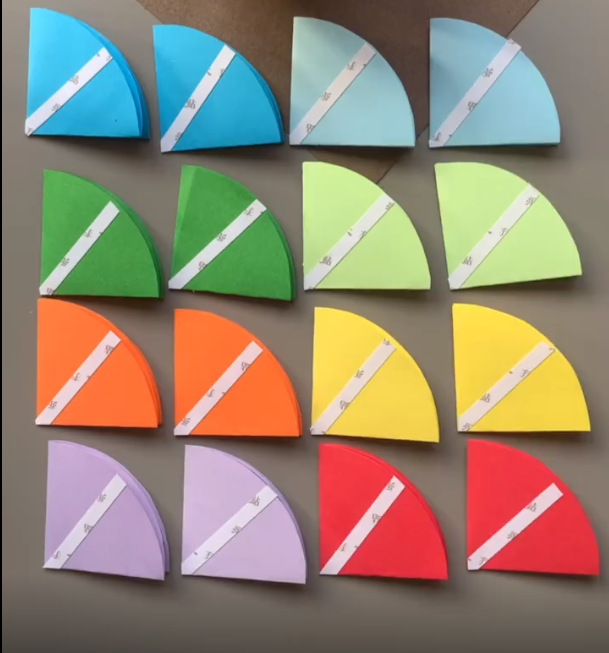
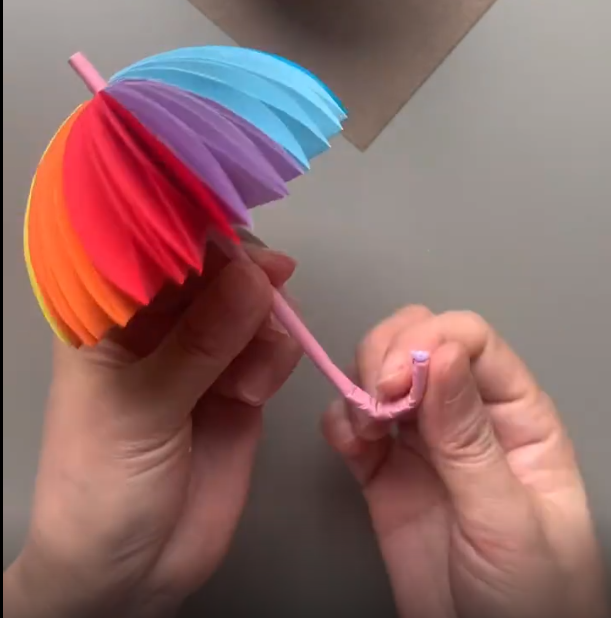
This is a very creative craft – DIY rainbow umbrella. These little umbrellas look so small and cute, your little ones will love them. Let’s spend quality parent-child time with our children.
For this DIY Paper Rainbow Umbrella project, materials you will need:
Colored paper, double-sided tape, scissors, pen
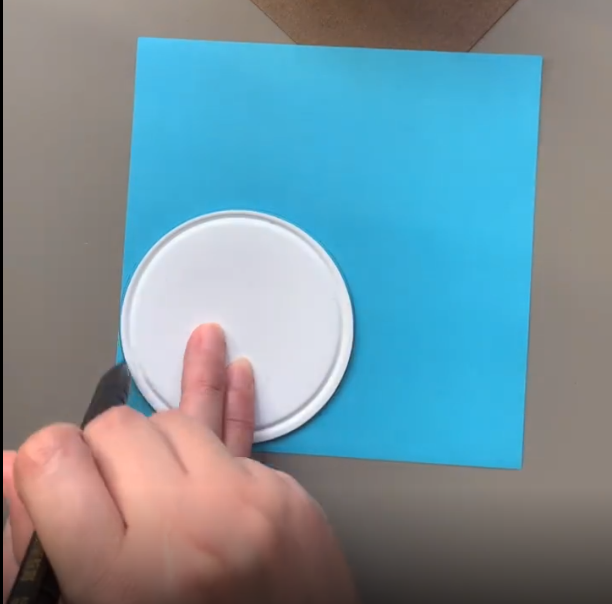
1. First, we use a circular tool to draw a circle on the paper.
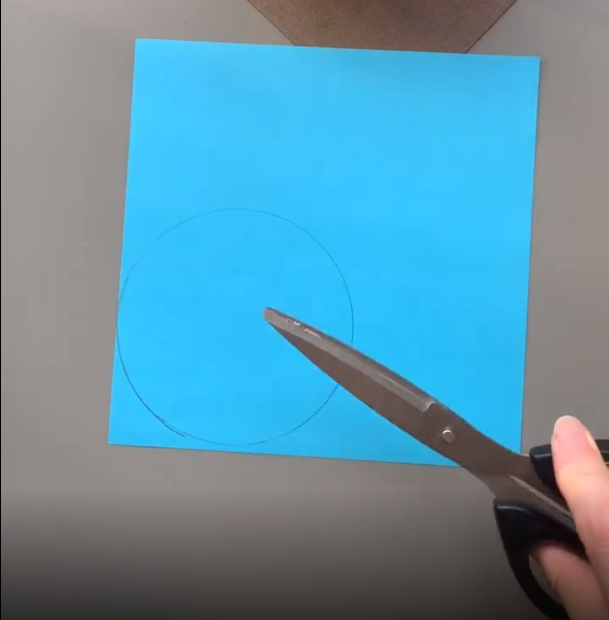
2. Cut the drawn circle with scissors.
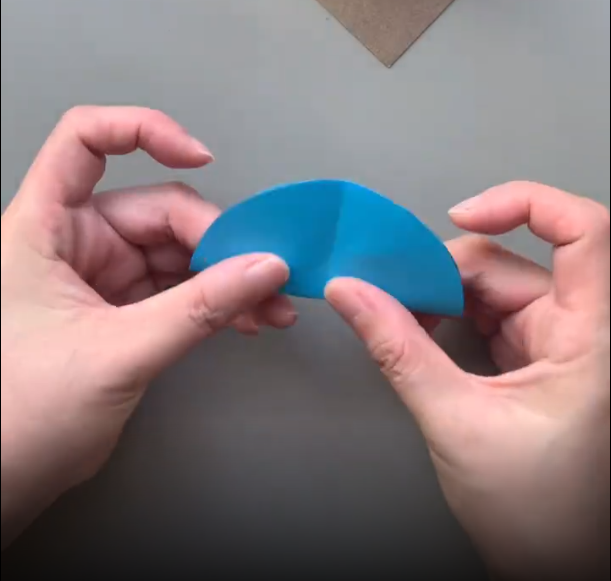
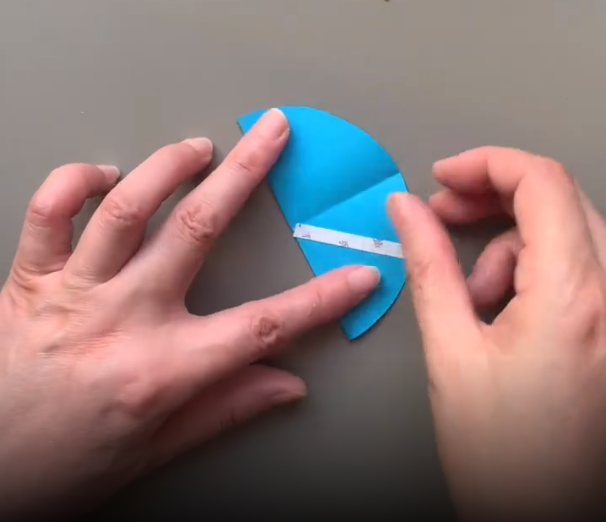
3. Fold the cut circular paper in half.
4. Fold in half again.
5. Put double-sided tape on the folded surface.
6. Then fold it in half to make the double-sided tape and paper stick firmly.
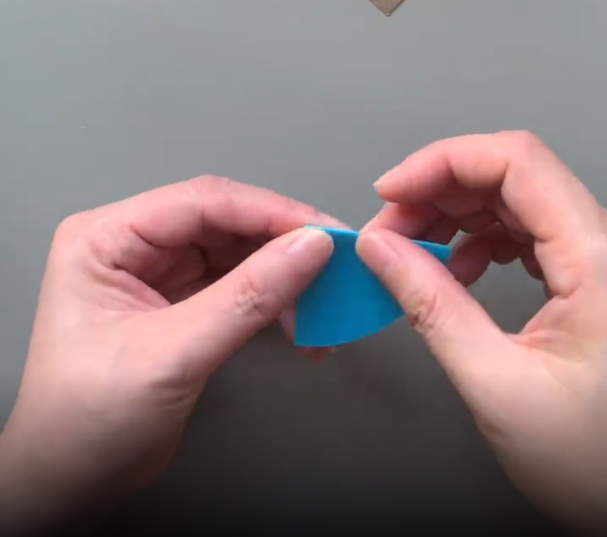
7. Put double-sided tape on the paper.
8. Then repeat the above steps. We can take it with a variety of different colors of paper. Double-sided tape must be in the same direction.
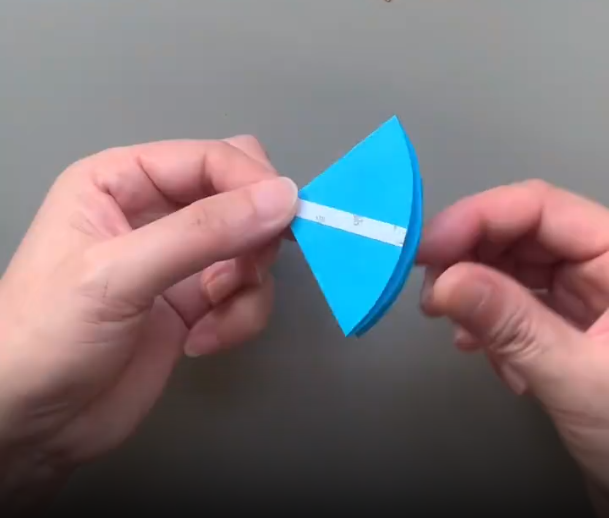
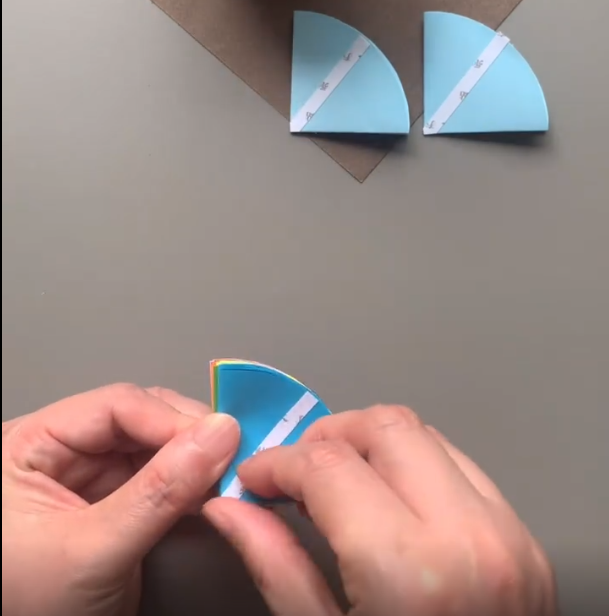
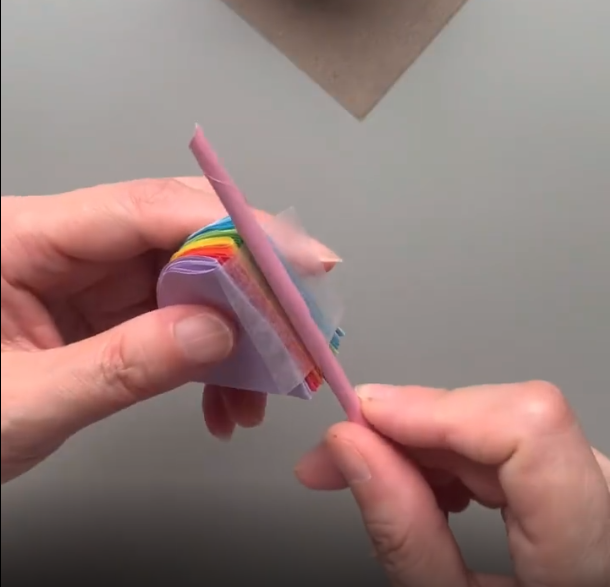
9. We glue the finished papers of various colors together layer by layer.
10. We glued all the colored papers together.
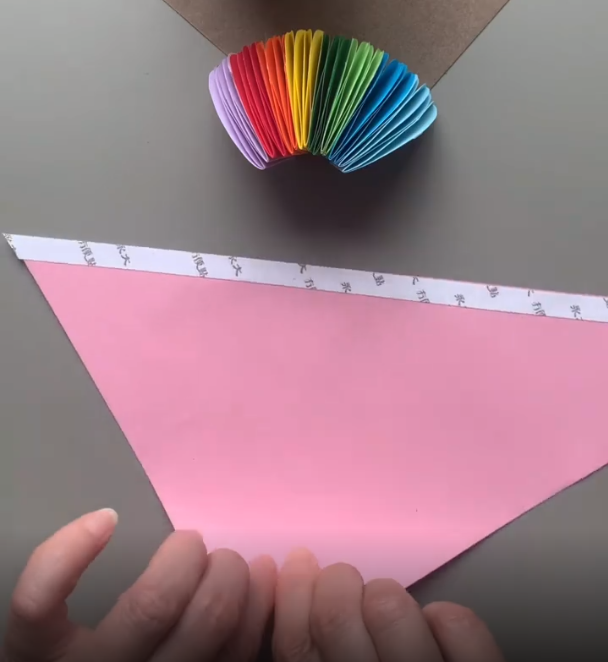
11. We are using other paper to make the handle of the umbrella.
12. We roll the paper into a straw shape.
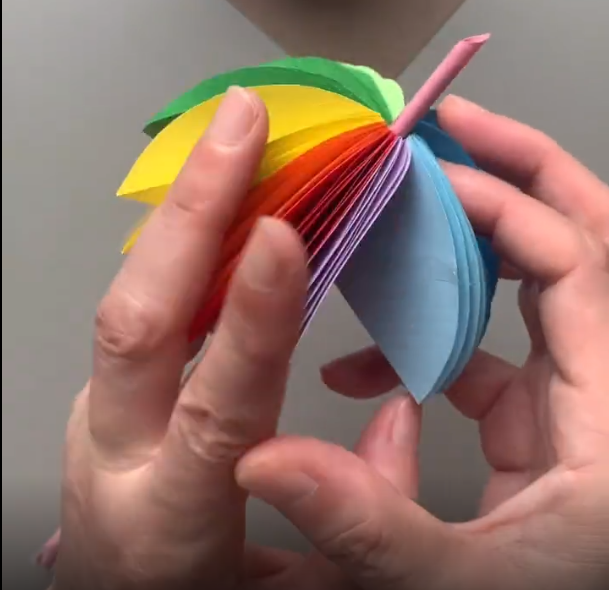
13. Apply double-sided tape to the cross section of the colored paper that was glued together earlier.
14. Paste the umbrella handle we made with the previous cross section.
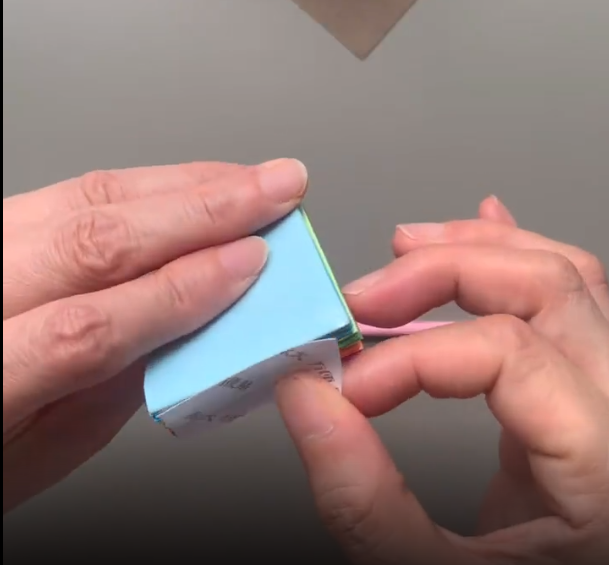
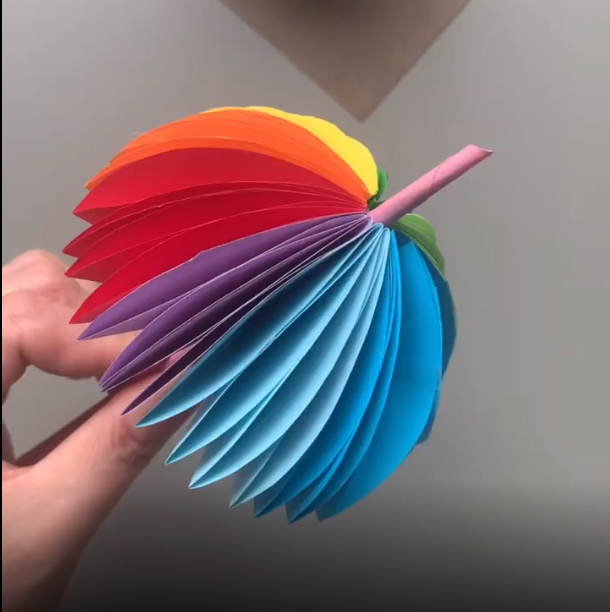
15. We open the colored cross-sections and paste them together.
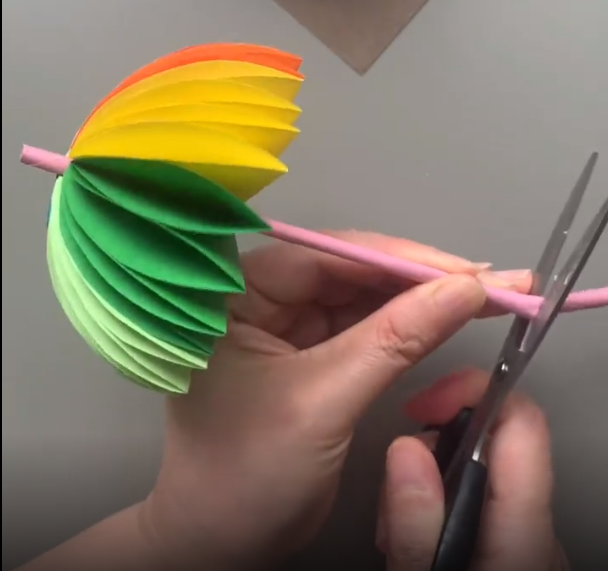
16. Cut off the excess umbrella handle.
17. Then bend it and glue it together.
18. In this way, our small handmade paper umbrella is ready. Do you like it?
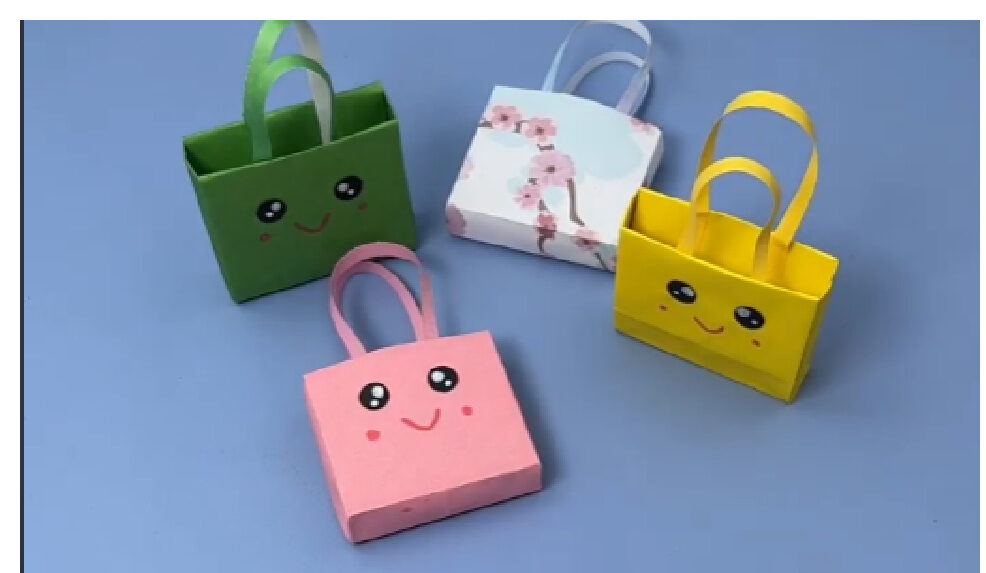
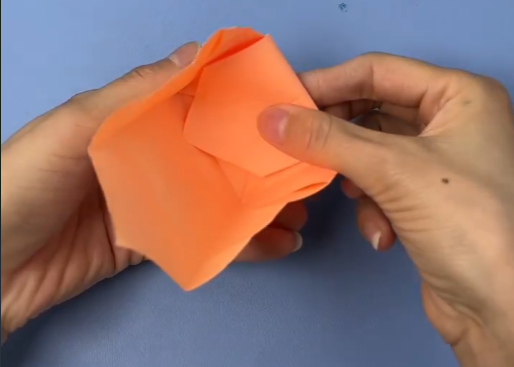
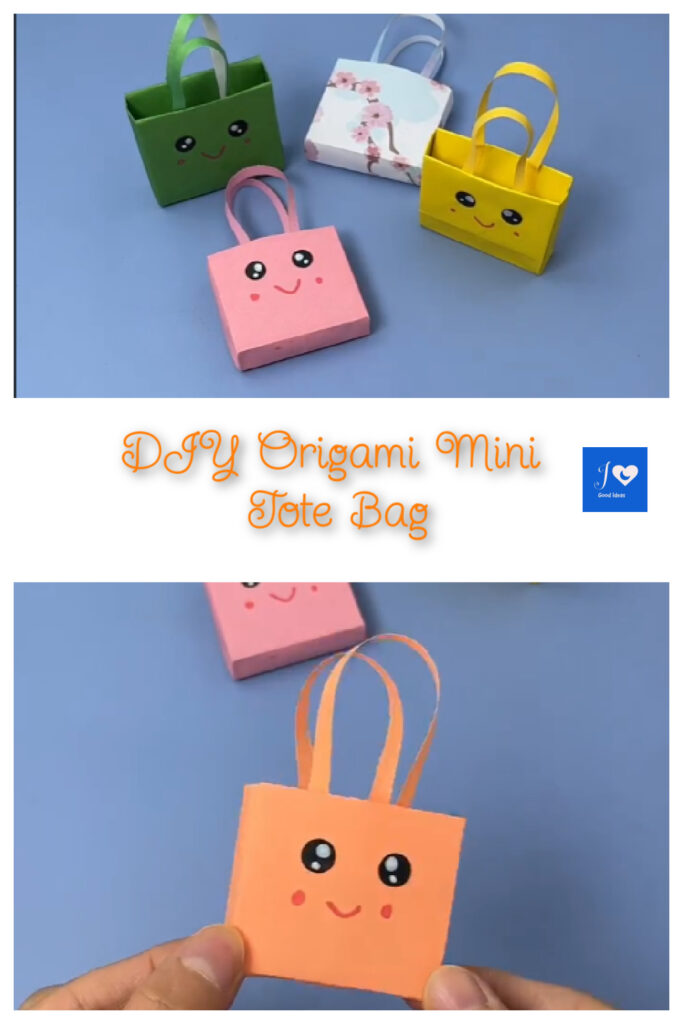
Origami is a very interesting handmade activity, it is an art activity in which paper is folded into various shapes. Origami originated in China in the 1st or 2nd century AD, was introduced to Japan in the 6th century, and then spread to the world through Japan. Today, we are going to share a DIY origami mini tote bag tutorial.
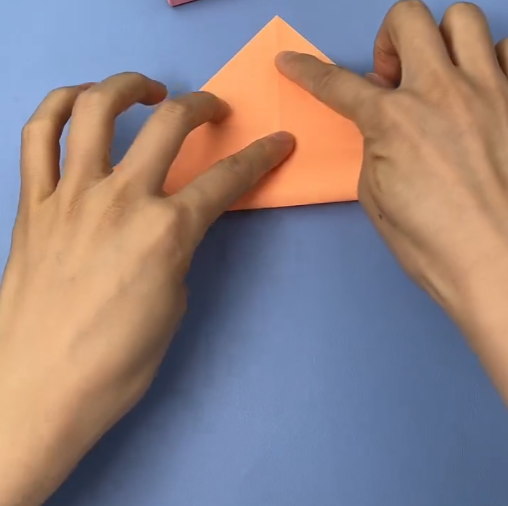
1. First, we prepare a square piece of paper, you can choose the color you want and fold it in half.
2. Continue to fold in half in the other direction.
3. At one end of a corner, fold to the middle point.
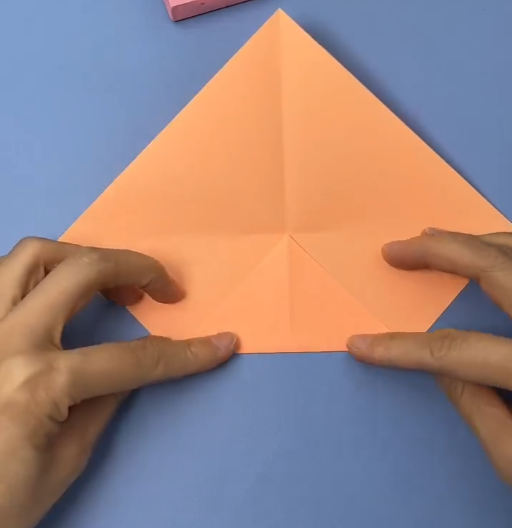
4. Continue on this basis and fold to the middle point again.
5. Repeat the above operation in the other direction.
6. Then we opened the paper and got a creased piece of paper.
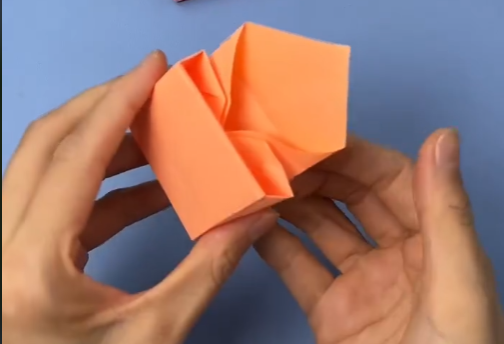
7. We fold in half again.
8. Fold the bottom edge of the triangle up.
9. Fold the right edge to the middle.
10. Fold the left edge to the middle.
11. Unfold the sheet again and fold one corner to the middle according to the crease.
12. Do the same steps as above for the opposite corner.
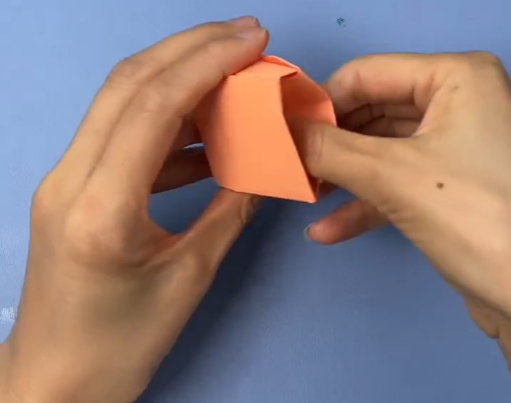
13. Unfold and fold inwards according to the crease.
14. Fold the exposed sides inwards.
15. Follow the crease to form this look.
16. Fold the exposed sides inwards.
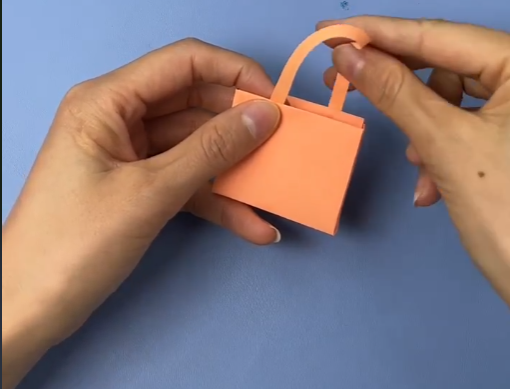
17. We use thin strips of paper to make the handle of the bag.
18. Finally, we use the brush to draw the pattern we like. Such a small and cute tote bag is ready, I hope you like it and have a good time!