Category Archives: Basic Designs

How to Draw the Model of the Jack-o-Lantern by C4D

Halloween is coming! The pumpkin is an iconic symbol of Halloween. Pumpkins are orange, so orange has also become a traditional Halloween color. Carving jack-o-lanterns from pumpkins is also a Halloween tradition that also dates back to Ireland. Legend has it that a man named Jack was so miserly that he couldn’t enter heaven after death, and because he made fun of the devil he couldn’t enter hell, so he could only wander around with a lantern until Judgment Day. Thus, Jack and the jack-o-lantern became symbols of the cursed wandering spirit. In order to scare away these ghosts on Halloween, turnips, beets or potatoes are carved into scary faces to represent Jack with a lantern, which is the origin of the Jack-o’-lantern. When the Irish moved to the United States, they began to carve with pumpkins, which are more abundant than turnips in the American fall. Now, if people hang jack-o-lanterns in the windows on Halloween night, it means that those in Halloween costumes can knock on the door for candy.

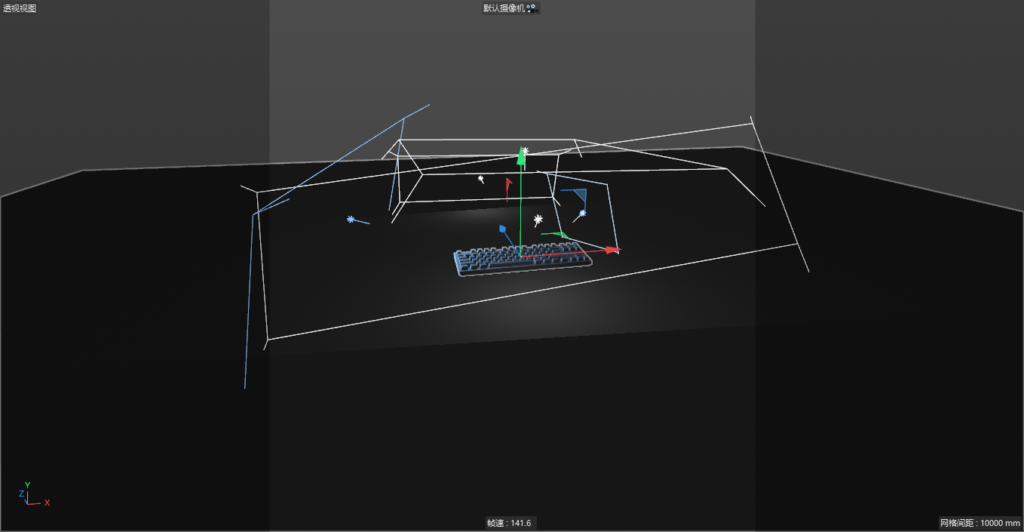
Today we are going to share how to use C4D to draw the model of the jack-o-lantern.
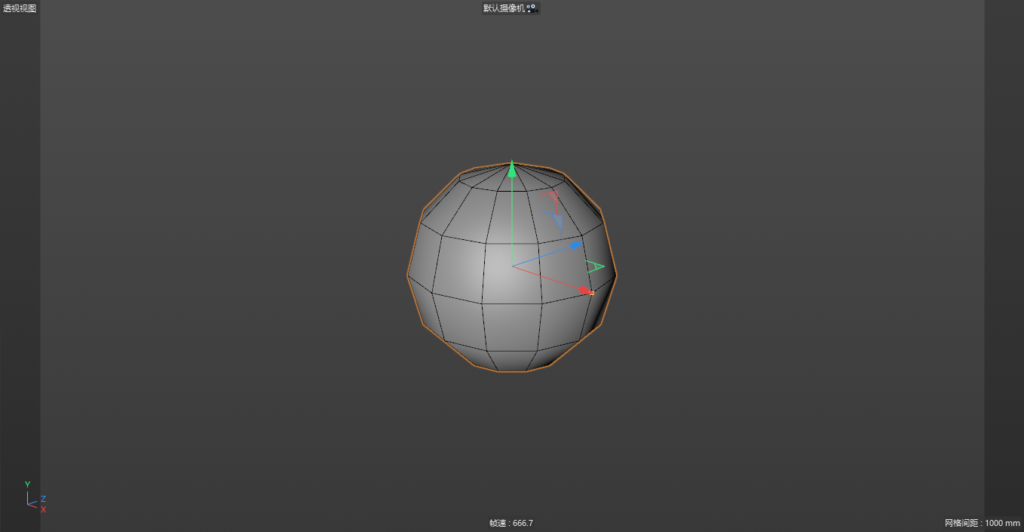
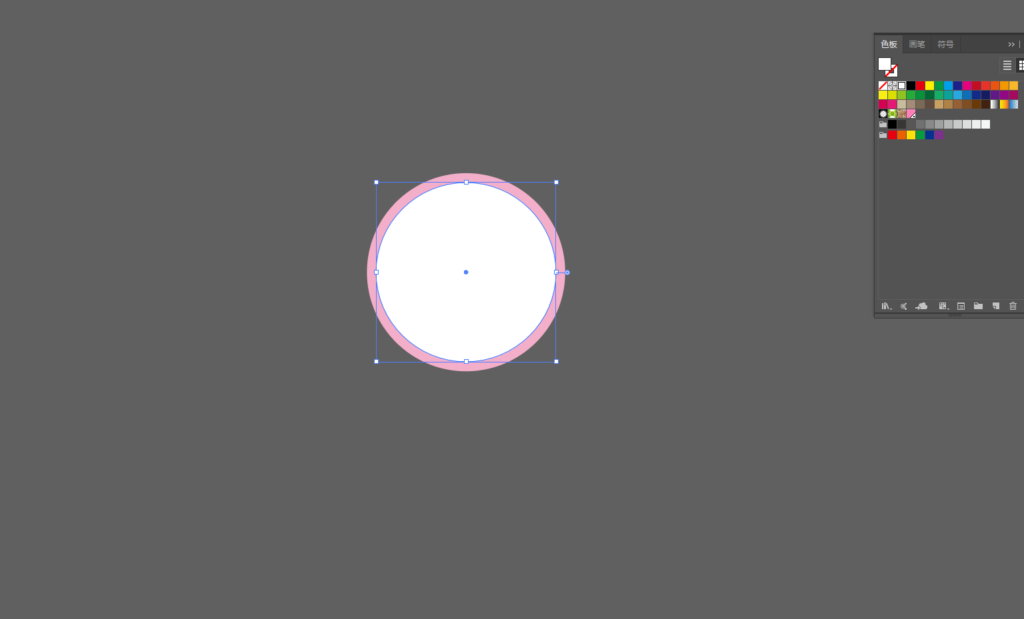
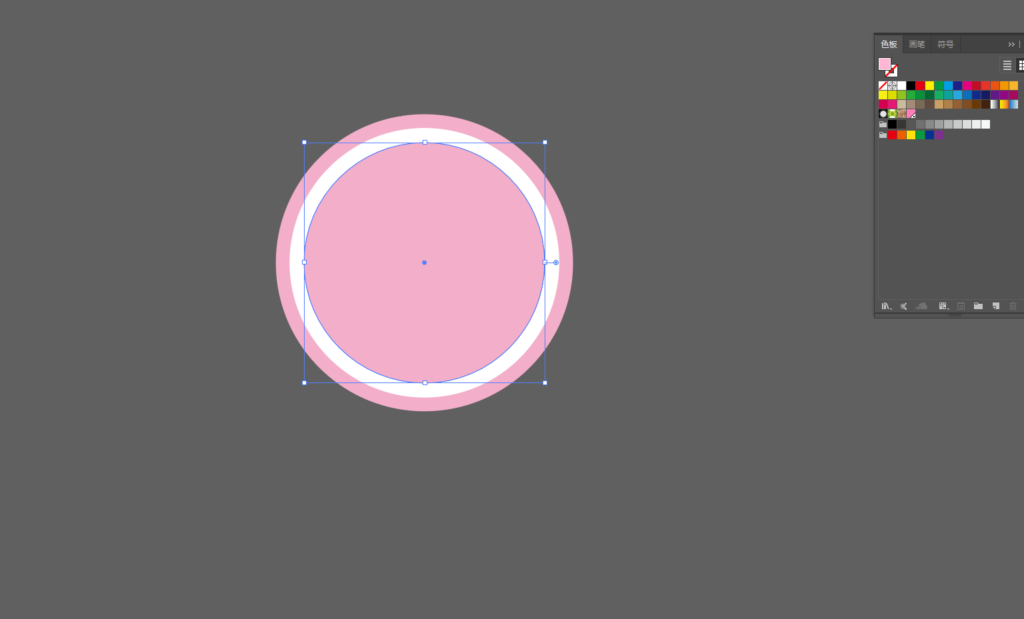
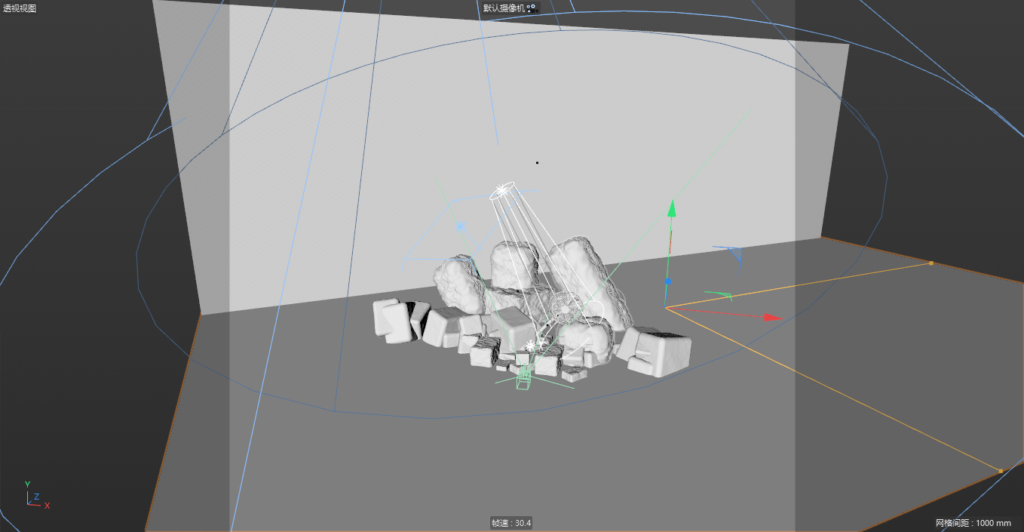
1. First, we build a sphere and change the sphere into 12 segments. 
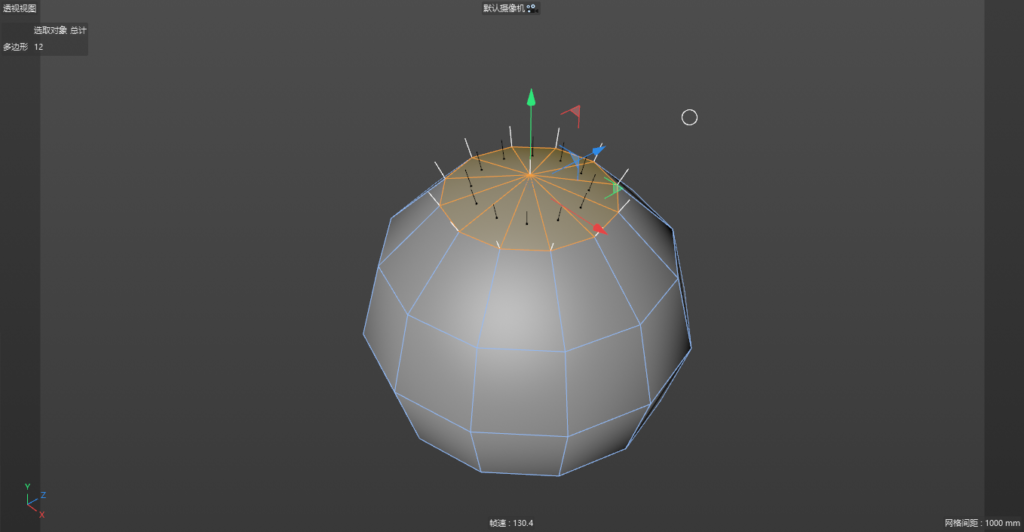
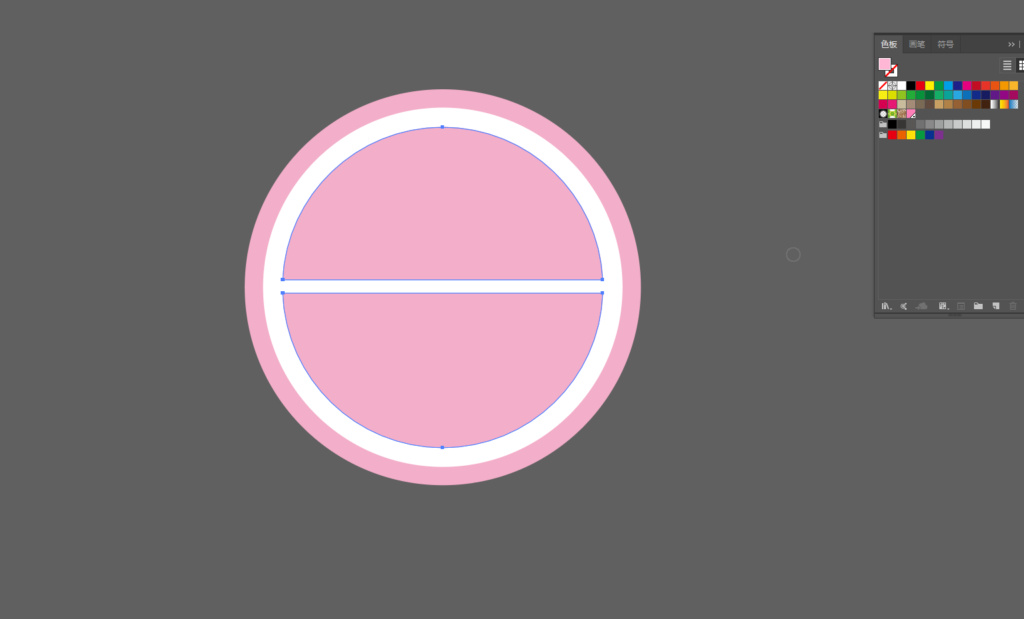
2. Turn the sphere into an editable object and press the shortcut key C. Change to face mode and select the top face. 


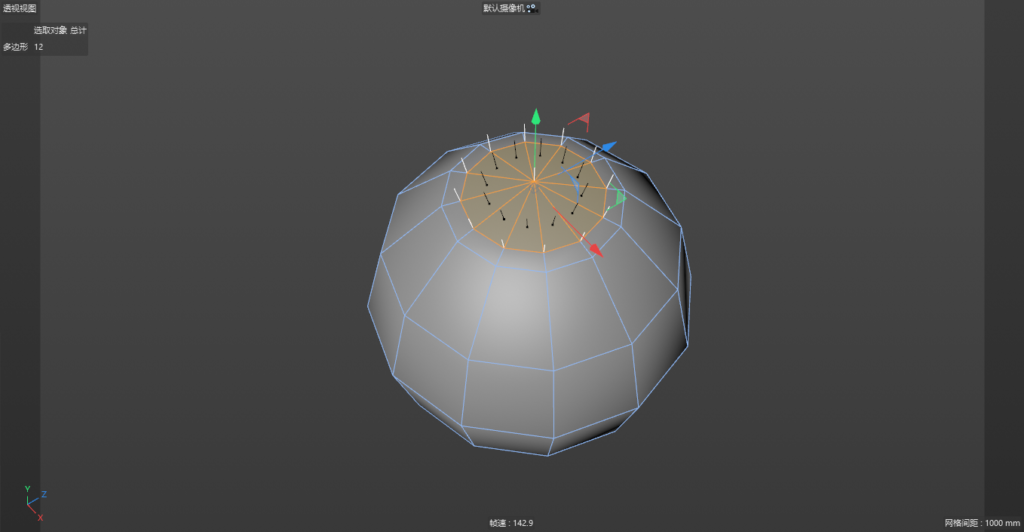
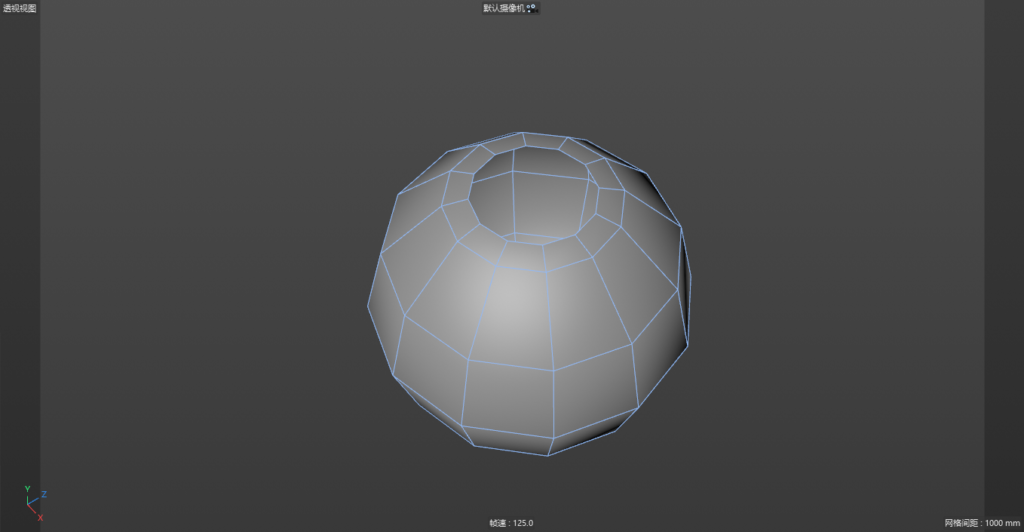
3. Use internal extrusion, shortcut key I, to extrude the empty hole above. 
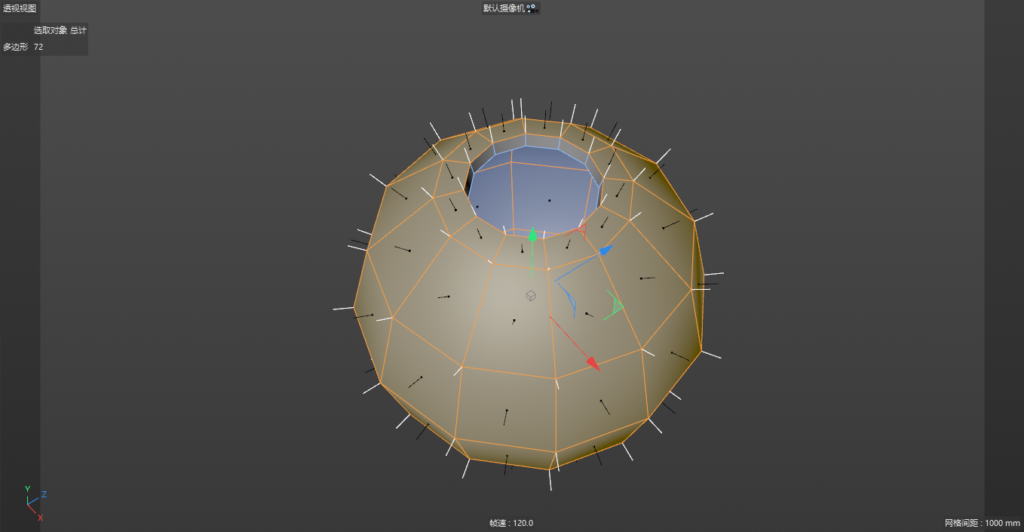
4. Select all the faces (CTRL+A), and then use Extrude (D) to extrude a face. Remember to tick Create cap. 

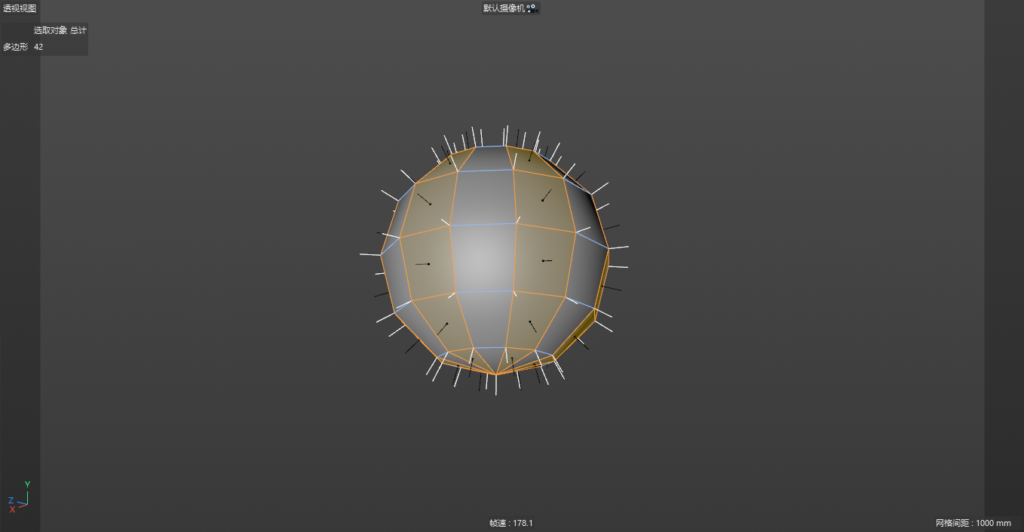
5. We select an edge every other.
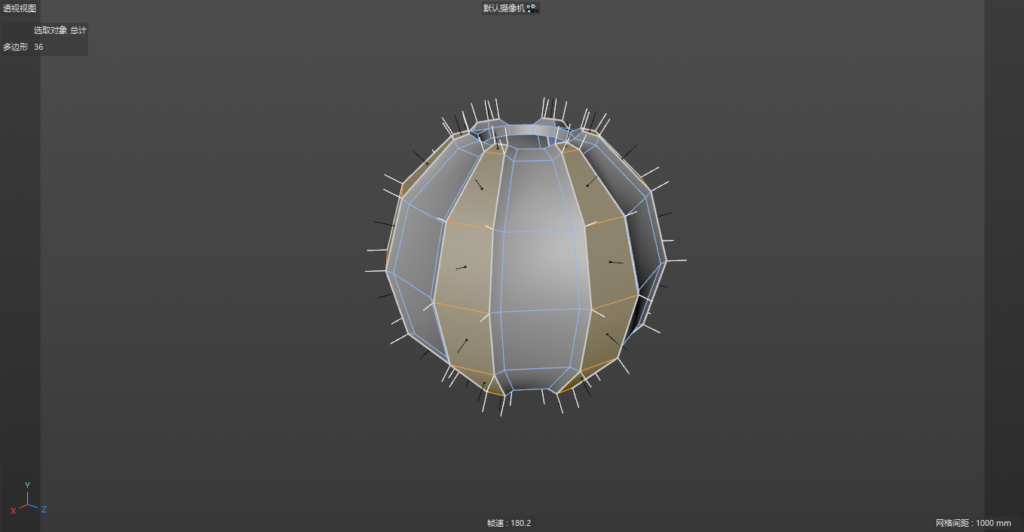
6. Then we use the chamfer function (M, S) to chamfer the corner and turn off the subdivision. 
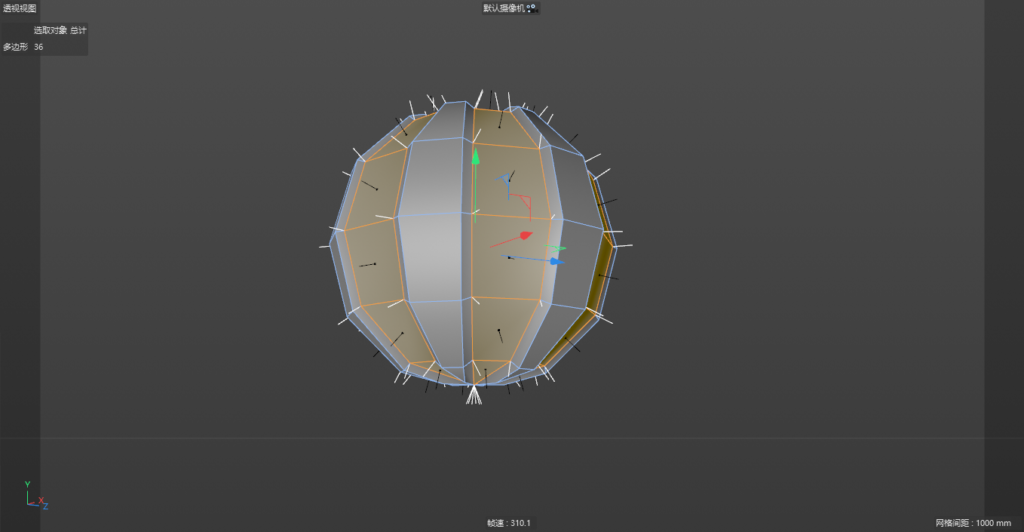
7. We select another edge that was not selected before. 
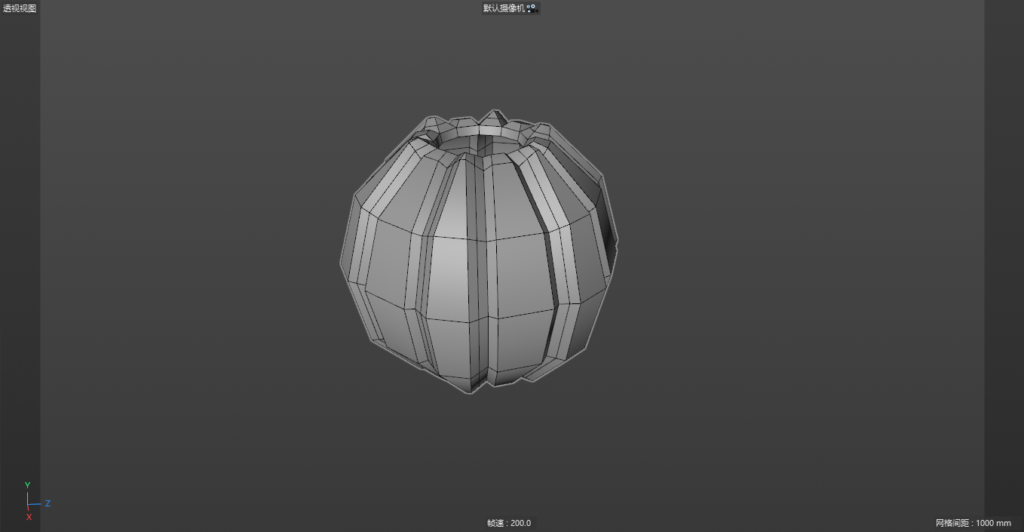
8. Repeat step 6. 


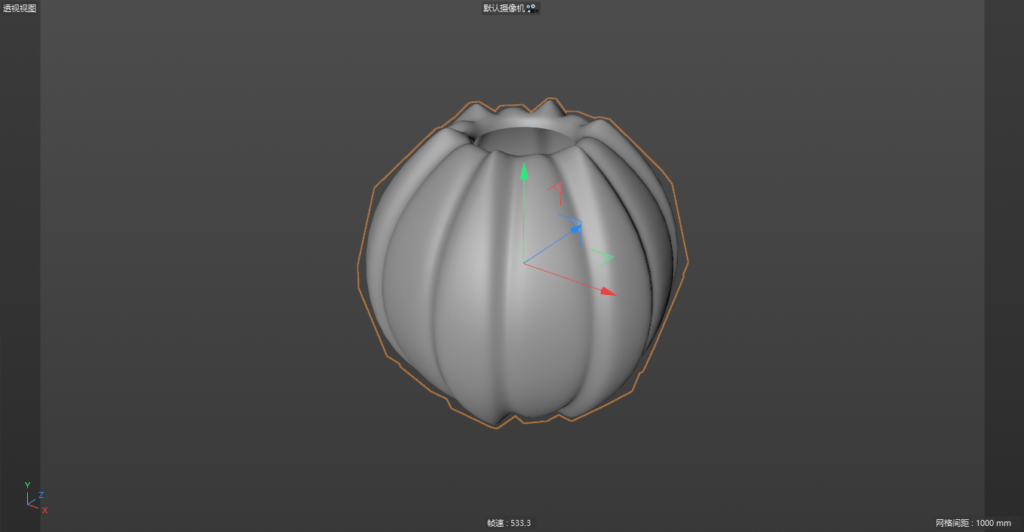
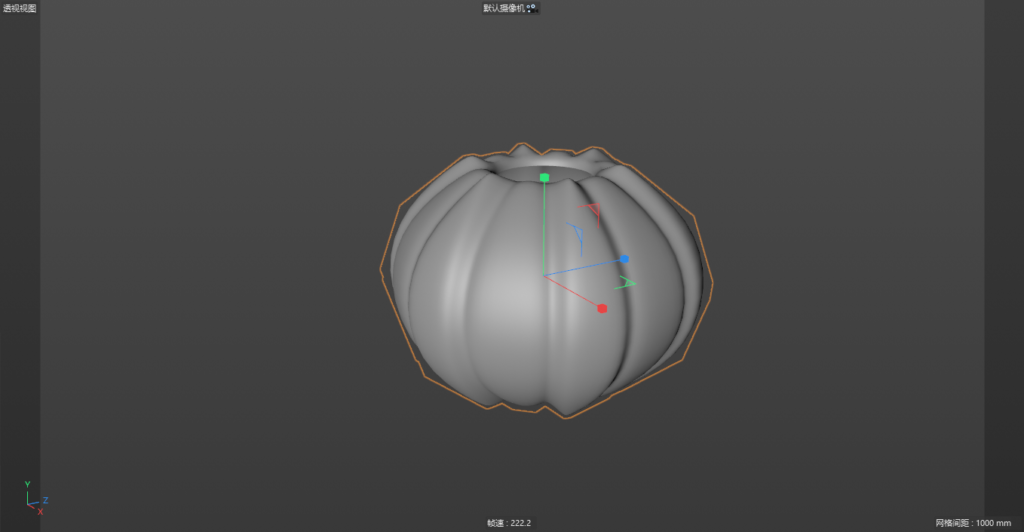
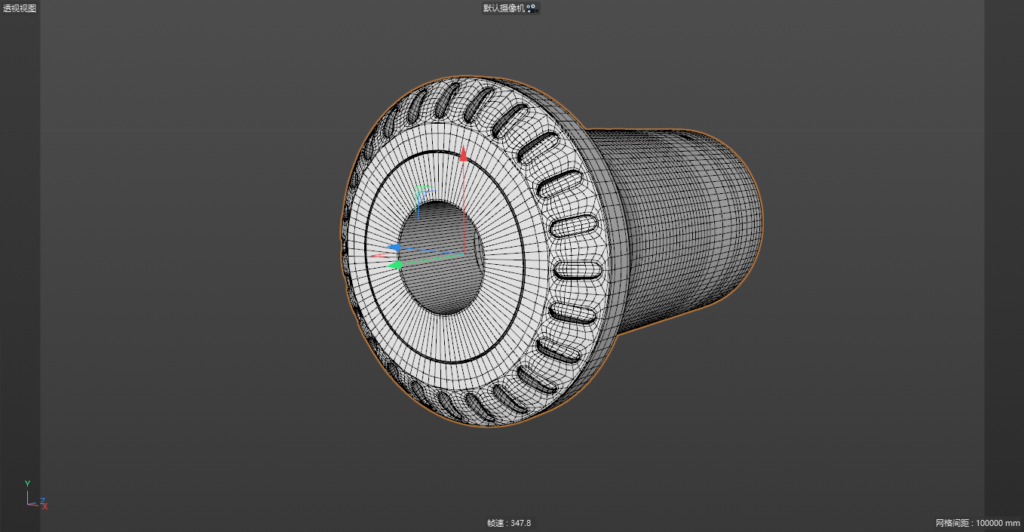
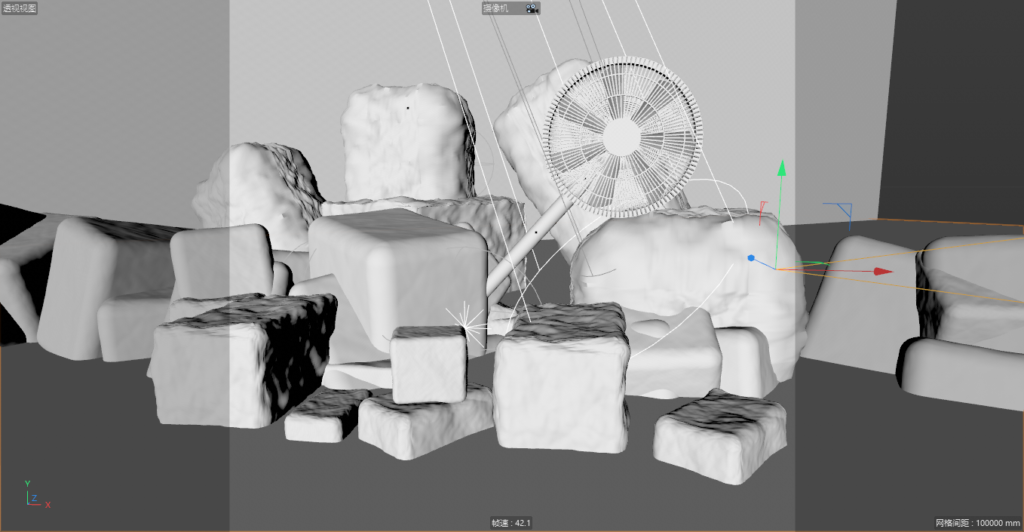
9. We add a subdivision surface to the sphere. If you think the pumpkin is not flat enough, you can use T to shrink it inward. 
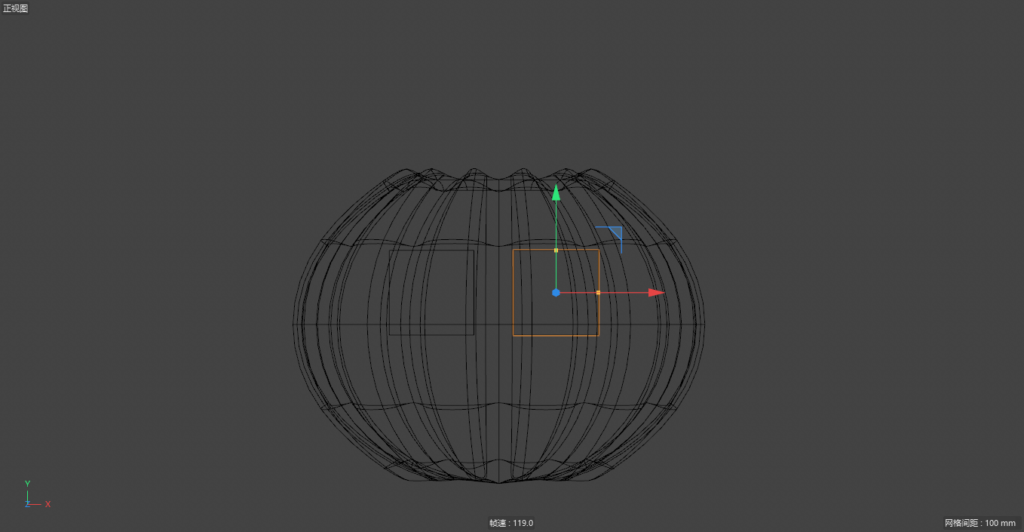
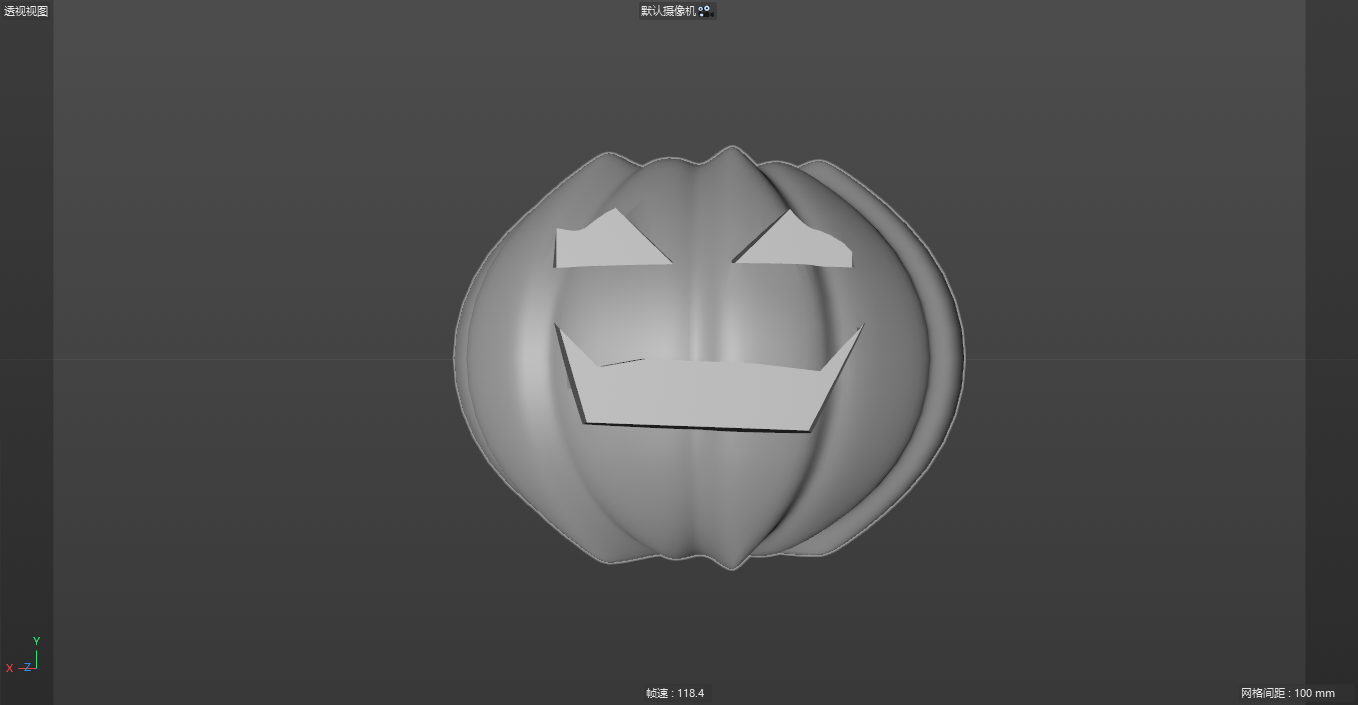
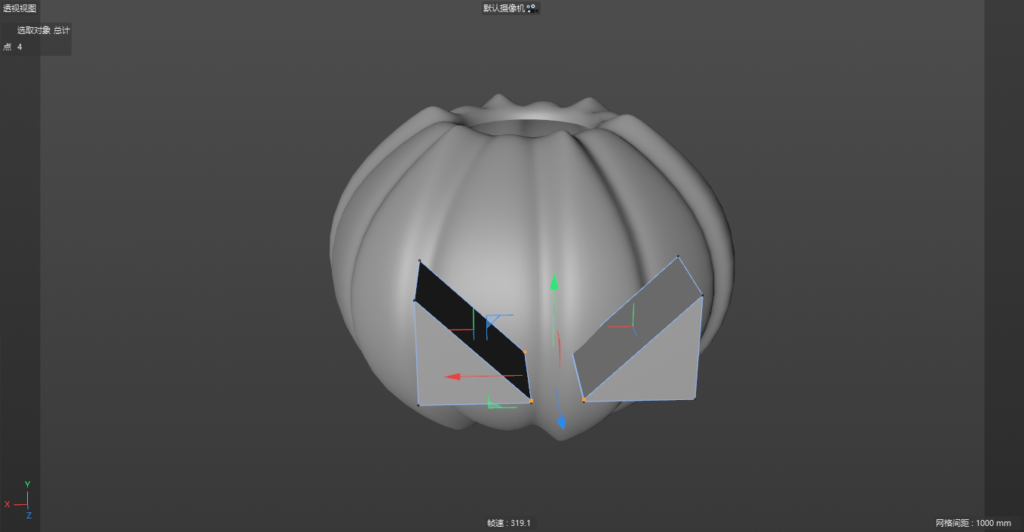
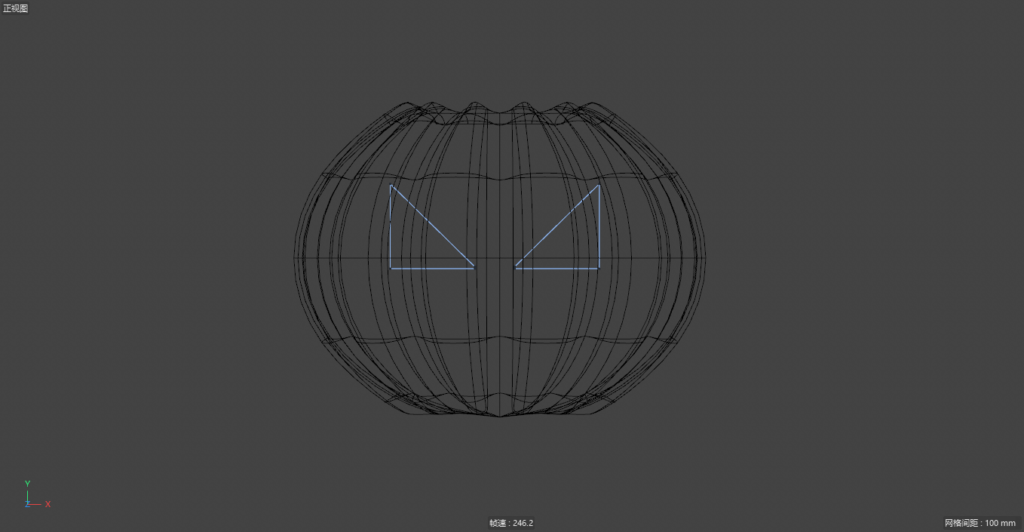
10. We use two cubes as the eyes of the pumpkin, which can be switched to other views. 
11. We turn the two cubes into editable objects, switch to point mode, select these points, and pull down. 
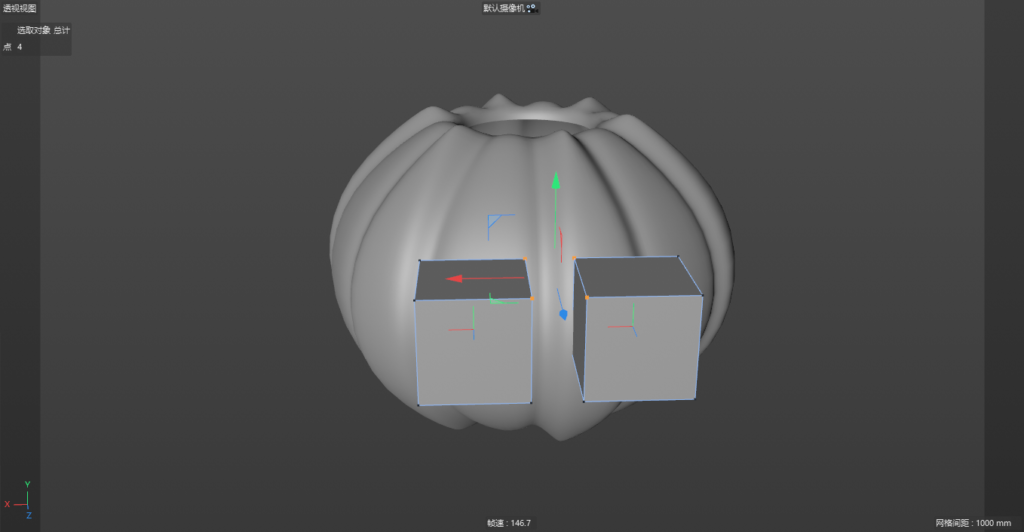
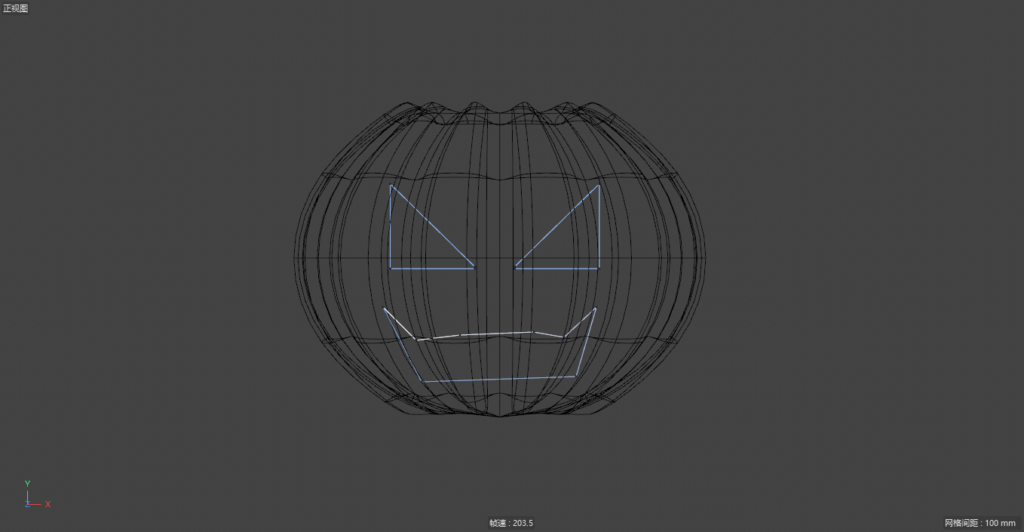
12. Using the spline brush tool, draw the pumpkin’s mouth. 


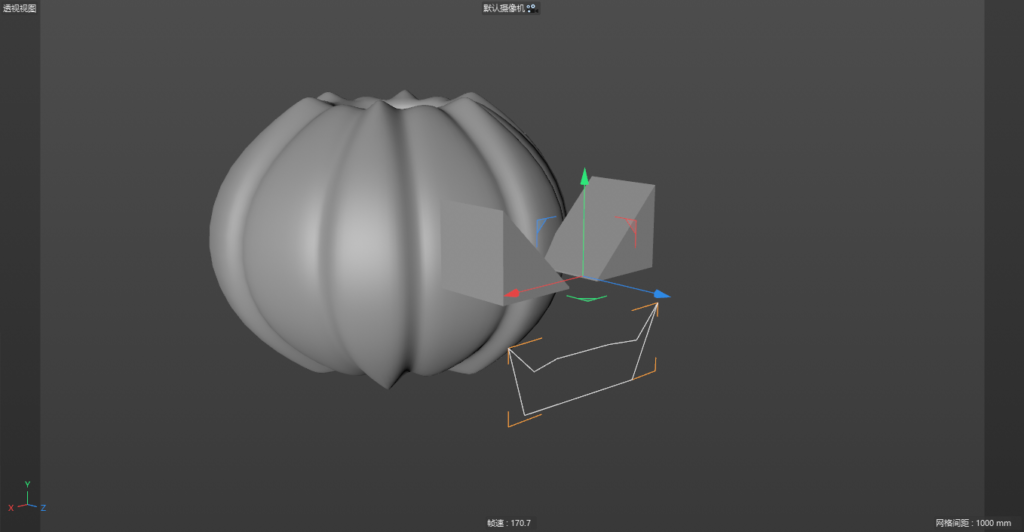
13. Extrude the splines and align them with the eyes.
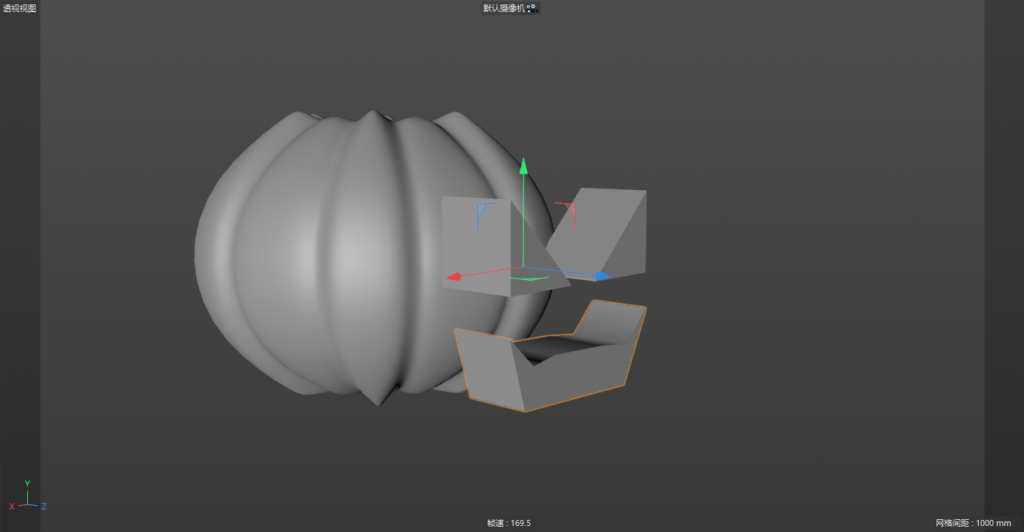
14. Turn the mouth into an editable object and merge it together.
15. Merge the two eyes and mouth together.
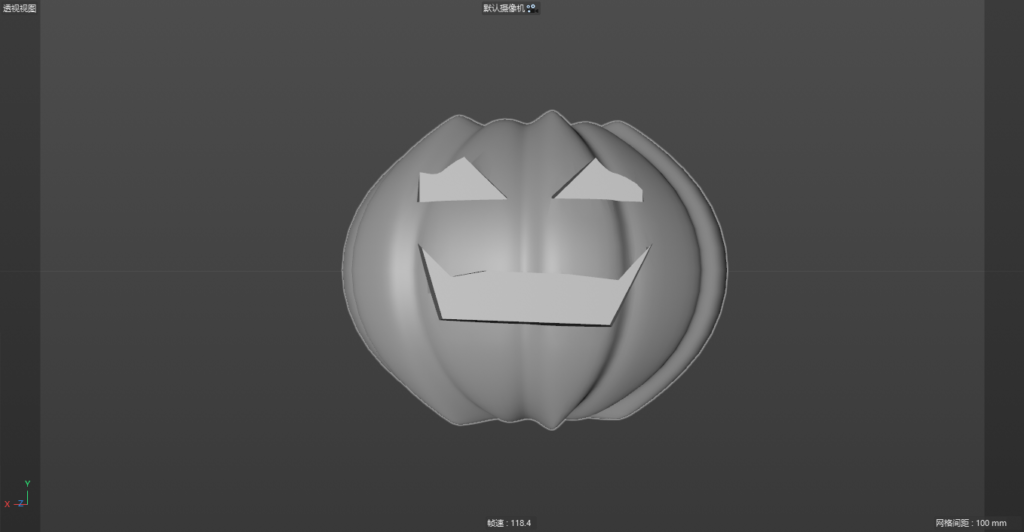
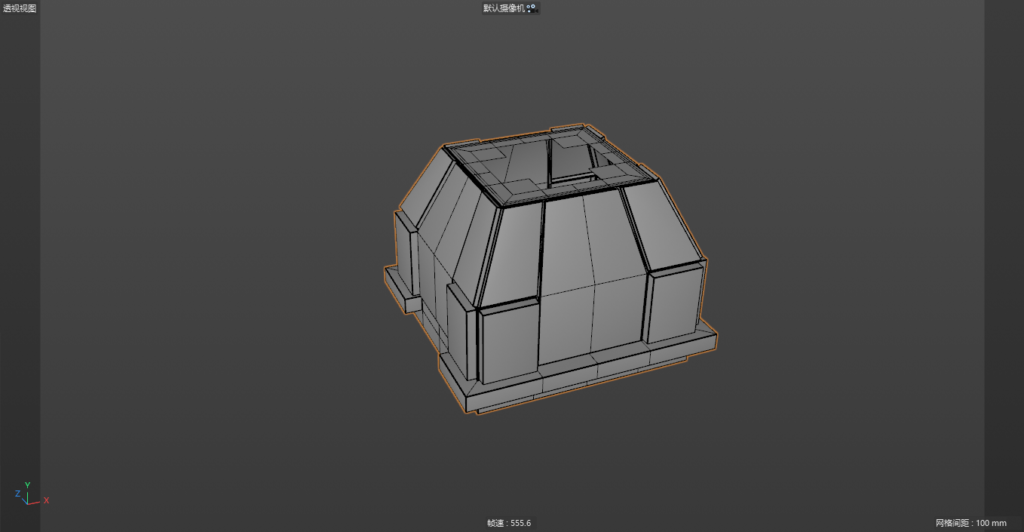
16. Then use the Boolean tool to insert the eyes and mouth into the previous pumpkin.  That’s it!

MORE GOOD IDEAS HERE.

Sharing is Caring:

How to Draw Cartoon Pencils by AI

Pencils, as our earliest writing tools, can be erased at any time and are easy to carry. When I first went to school, I always put several spares in the pencil case, in case the exam questions could not be solved, I broke the pencils when I was angry.
Today, what we are going to share is how to draw cartoon pencils by AI. It’s so easy that even beginners can master it easily.
1. First, we use the rectangle tool to draw a rectangle and fill it with the color we like. 
2. Using the Polygon Tool, draw a triangle to match the previous rectangle. 
3. Using the rectangle tool, draw a rectangle and place it under the pen holder. 
4. Then use the rectangle tool to draw the eraser of the pencil. 
5. Select the rectangle tool of the eraser, use the direct selection tool (shortcut key A), select two anchor points, and pull to make them rounded. 
6. Using the rectangle tool, draw a rectangle in the middle of the pen as the pencil lines. 
7. Copy the triangle of the pen tip in place and fill it with different colors. 
8. Select the tip of the pen and use the eraser tool to erase an arc. 
9. Delete unnecessary parts. 
10. Select the part except the tip of the pen. 
11. Add a stroke of a certain color and thickness.  That’s it! Have fun!

Do you know the origin of the pencil’s name? Pencils originated in ancient Rome more than 2,000 years ago. At that time, the shape of pencils was very simple: a lead rod was sandwiched in a metal sleeve, which was named pencil as the name suggests. With the advancement of science and technology, the pencil also began its evolutionary history. In 1564, someone in Barrodale discovered graphite, a black mineral, and graphite can leave traces on paper, which is darker than the traces of lead. People call graphite “black lead”, but it is easy to be hacked. In 1662, the first pencil factory in the world was built in Nuremberg, Germany, the Shidelou Pencil Factory. In 1761, German Farber mixed graphite powder with rosin, sulfur, etc. to make strips, with high toughness and suitable hardness, easy to write and not easy to get dirty hands, which made pencil manufacturing technology take a big step forward. At the end of the 18th century, the pencil industry was initially monopolized by Britain and Germany. Later, France also found graphite mines in its own country. However, due to the small output, the graphite was mixed with clay for firing, and economical pencils were made. core. So that’s why you don’t get lead poisoning when you get stabbed with your own pencil, because pencils don’t contain lead, they’re just graphite and clay. But it’s too bad if you stab someone with a pencil.
MORE GOOD IDEAS HERE.
Sharing is Caring:

Tutorial for Drawing Cartoon Oranges with AI

Who doesn’t love oranges? They are both beautiful and delicious, today we will use AI to draw cartoon oranges.
1. First, we use the ellipse tool to draw a perfect circle and fill in the color you like. 
2. After duplicating a perfect circle, make it smaller inward and hold down the SHIFT+ALT keys. 

3. Use the same method again and draw a white circle inside.


4. Select the circle in the middle, and then use the eraser tool to erase the edge of the orange. 
5. Select the outermost circle and divide it in two with the Knife Tool, remember to hold down the SHIFT+ALT keys. 
6. Fill half of it with other colors you like. 
7. Adjust the distance between each circle again. That’s it.

Common sense of life:

Do you know? Oranges are rich in vitamin C and P, which can increase the body’s resistance, increase the elasticity of capillaries, and reduce blood cholesterol. People with hyperlipidemia, high blood pressure and arteriosclerosis often eat oranges. The cellulose and pectin substances contained in oranges can promote intestinal peristalsis, which is conducive to clearing the bowels and expelling harmful substances in the body. Orange peel is sweet, bitter and warm in taste, and its effect on relieving cough and phlegm is better than that of tangerine peel. Oranges have almost become synonymous with vitamin C.
In fact, it is rich in vitamin C, which can enhance the body’s resistance and expel fat-soluble harmful substances from the body. It is a healthy antioxidant in line with its name. Orange peel is also called yellow peel. In addition to the ingredients in the pulp, it contains more carotene, which can be used as a stomachic agent and an aromatic flavoring agent. Orange peel also contains a certain amount of orange peel oil, which is effective against chronic bronchitis.
For women, eating more oranges has an unexpected benefit, which is to reduce the incidence of gallstones. According to a survey in the United States, 2/3 of the 19 million patients with cholecystitis in the United States are women. Women are prone to gallstones because estrogen causes cholesterol to accumulate in bile, which leads to high cholesterol concentration and stone formation. Oranges can play a significant role in reducing the occurrence of gallstones.

More good ideas HERE.

Sharing is Caring:

How to Draw a Realistic Fan with C4D

Electric fan, referred to as electric fan, is a household appliance that uses a motor to drive the fan blades to rotate to accelerate the circulation of air. It is mainly used for cooling and relieving heat and circulating air. Widely used in homes, classrooms, offices, shops, hospitals and hotels and other places.

Today we use C4D software to draw a realistic fan. First of all, you can take photos of fans from all angles on the Internet or in your own home, so as to make fans easier.
1. We can start from the middle position of the fan, as shown in the figure, first make the axis position of the fan.
2. Then we make the shaft wheel of the fan as shown. 
3. Put a protective cover on the axle wheel. Of course, these are all details, you don’t need to be so meticulous. 
4. We make the fan blades on the protective cover. The fan blades of the fan are curved. 
5. Let’s add a circle around the fan blade as a protective layer for the fan blade. 
6. Make the protective cover of the shell as shown in the figure. 
7. Add a protective cover. 
8. Let’s add a layer of measures to what is shown in the picture. 
9. Then there are outer measures. 
10. Don’t forget the measures section in the middle. 
11. Having done the previous part, let’s add a layer of measures to the latter part. 
12. As before, perfect the following measures. 
13. After the whole upper part is finished, we start to make the pole of the electric fan. 
14. Make the bottom disc of the pole as well.
15. Of course, we can also do some details and make small cushions at the bottom.  16. Then we use subdivision surface to make the whole fan more perfect. 
17. Let’s make a scene, you can put some sundries such as ice cubes in the scene. 
18. Adjust the angle, turn on the lights, and set the renderer. Wait for rendering. 
19. A finished realistic fan rendering is ready.  Enjoy!

MORE GOOD IDEAS HERE.

Sharing is Caring:

How to Draw a Cartoon Girl by AI

Cartoon characters refer to characters with distinctive prototype characteristics created by using relatively realistic graphics to reproduce the prototype with exaggerated and refined methods. The more famous cartoon characters, such as Mickey Mouse and Donald Duck from the American Disney Company, Monkey King Monkey King and Fuwa from China, have become unique graphics known to all ages. The use of cartoons to create ideas requires designers to have a solid artistic foundation, and to be able to skillfully extract characteristic elements from natural prototypes and re-express them with artistic methods. Cartoon graphics can be funny and cute or serious and solemn.
Today we will use AI to draw a cartoon girl, this is a simple tutorial, very interesting, I hope you like it.
1. First,we use the oval tool to draw the child’s face.
2. Duplicate an ellipse tool and enlarge it in sync with the outside as the hair. 
3. Duplicate a layer of hair and place the top layer.
4. Select the top layer and use the eraser tool to erase the excess. as bangs. 
5. Using the oval tool, flatten a circle and place the bottom layer as the root of the hair. 
6. Use the Ellipse Tool and Pen Tool to outline the eyes and eyelashes, and duplicate one as the eye. 
7. Continue to use the oval tool and pen tool to draw the glasses. The color picks the stroke instead of the fill. 
8. Using the Ellipse Tool and the Eraser Tool, draw a mouth. Fill it with pink. 
9. Duplicate a mouth in place and fill it with black. 
10. Use the eraser tool to create the appearance of a tongue. 
11. Finally, we are using the rectangle tool to draw the character’s neck and clothes.  That’s it!

MORE GOOD IDEAS HERE.

Sharing is Caring:

How to Draw Cartoon Characters by AI

Cartoon is a general term for cartoons and comics. The word originated in Italy during the Renaissance period. The earliest was used as a sketch of murals and oil paintings. Later, because of the humorous way of satirizing some social phenomena in comic magazines, it formed what is called “cartoon” in folklore. , close to the modern understanding. Therefore, cartoons are not only cartoons, but also static cartoons. And many people’s understanding of “cartoon” is from the level of age. They think that cartoons and comics that tend to be children’s level, concise and clear, are cartoons. The author disagrees, but in a broad term, “cartoon style” Such words are easy to understand. In the past, when the author was discussing style with an artist who was engaged in design, she used “this pattern is too cartoony” to complain about the childishness of the picture, but strictly speaking, cartoons and childishness are not childish. It is also inaccurate to regard “cartoon style” as a symbol of childishness and childishness directly.

Today we are going to share a tutorial on drawing cartoon characters with AI, which is suitable for beginners


1. First, we use the Rounded Rectangle Tool to draw a round face. 
2. Using the Rounded Tool, draw a rounded rectangle for the hair.
3. Duplicate the hair in place and place it on top. 
4. Use the eraser tool to erase the lower part, leaving the upper part. 
5. Add anchor points to the bangs.  

6. Then adjust the anchor points to make wavy bangs.
7. Using the Ellipse Tool, draw a circle. 


8. Continue to use the eraser tool to erase the eyebrows. 
9. Continue to use the oval tool to draw the character’s eyes. 
10. Using the pen tool, outline the shape of the eyelashes. 
11. Copy the eyebrows, eyes, and eyelashes to the other side, you can use the symmetry tool. 
12. Use the Oval Tool and Eraser Tool to draw the character’s mouth. 
13. Duplicate a mouth in place and fill it with black. 
14. Use the eraser tool to erase the appearance of the tongue. 


15. Using the rectangle tool to draw the shape of the teeth, you can use the free transform tool to make a trapezoid. 
16. Use the rectangle tool to draw the shape of the neck. 
17. Use the Rounded Rectangle Tool again, cut in half, then add anchor points, pull down the order of the anchor points, and make the upper body.  Have Fun!

More good ideas HERE.

Sharing is Caring:

Step by Step Tutorial to Create a Concept Deer with C4D

The essence of C4D software is a 3D design software. As long as it is involved in the production of 3D scenes, products, and visual effects, C4D can be competent. At the beginning of C4D’s existence, it was produced for the later stage of film and television. In the field of film and television design, it is mainly used to build three-dimensional scenes, create character models, and interpret animation ideas…
Today we will use C4D to make a concept deer.


1. First, we use the terrain tool in C4D to build a terrain.
2. Use the FORESTER plug-in to make several different grasses. 
3. Use the clone tool to clone the grass made before, and add random effects. 
4. Making a terrain. Placed behind the previous terrain. 
5. Continue to use the FORSTER plugin to make several trees. 
6. Use the same method of cloning to clone trees, remember to use random effects. Make sure the trees don’t look regular. 


7. We choose several different trees and place them in the woods. 
8. We make or download the model of the deer and place it in the forest. 
9. We use a sphere to make the moon. 
10. Adjust the camera and render settings. Remember to use the fog effect. 
11. A rendering of a mysterious concept deer is ready.  Have fun!

You may also like: AI for Making Flat Style Bottle Illustration

MORE GOOD IDEAS HERE.

Sharing is Caring:

AI for Making Flat Style Bottle Illustration

What are the characteristics of flat style illustration? Flat style illustrations show a flat or abstract feature, with obvious geometric features in the performance of the outer contour, high generality, a lot of details are deleted, and many three-dimensional features are removed. The style is changeable, it can be cute and childish, or it can be exaggerated or delicate. Flat-style characters generally do not show muscles, or muscles are presented in regular and smooth lines. The facial features are also very simple, and the proportions are more flexible and exaggerated, with a sense of design decoration, which can form a more intense picture effect. Mainly used in fashion magazines and children’s books. This kind of illustration production cycle is short, the effect is outstanding and eye-catching, and it has good dissemination.

Today we are going to make a simple bottle illustration. The style of production is flat style. The software we need to use is AI (Adobe Illustrator).

1. We first open AI and draw a rounded rectangle with the Rounded Rectangle Tool, as shown above.
2. Use the rounded rectangle again, and draw a small rounded rectangle on top of the previous rounded rectangle. 
3. Using the Rounded Rectangle Tool, draw a bottle cap. 
4. Duplicate a rounded rectangle from photo 1. 
5. Then duplicate a rounded rectangle. and move parallel to one side. 
6. Use the Pathfinder tool to subtract the two rounded rectangles to get the following shape. 
7. Change the color of the shape obtained in Figure 6 to a slightly darker color. 
8. Paste the shape parallel to the rounded rectangle. 
9. Copy one parallel and symmetrical horizontally. 
10. Draw a new rounded rectangle in the middle of the bottle. 
11. Draw another rounded rectangle. 
12. Put the decorations in (you can choose the soup spoon made before). 
13. Copy a rounded rectangle in place and change the color. 
14. Use the eraser tool to erase a curved shape. 
15. Delete the top part of the shape. 
16. Select the bottle cap. and replicated in situ. 
17. Change the cap color. 
18. Use the eraser tool to erase to make a texture. 
19. Select the entire bottle. 
20. Use the knife tool to divide the bottle into two, in order to facilitate the coloring. 
21. Then adjust the color of each part.  Enjoy!

You may also like: How to Make a Cute Cartoon Rainbow with AI

MORE GOOD IDEAS HERE.

Sharing is Caring:

How to Make a Cute Cartoon Rainbow with AI

Rainbow is an optical phenomenon in meteorology. When sunlight hits water droplets in mid-air, the light is refracted and reflected, forming an arched colorful spectrum in the sky, from the outer circle to the inner circle, showing red, orange, yellow, Green, blue, indigo, purple seven colors. There are actually an infinite number of colors in the rainbow, for example, there are many more subtle differences between red and orange, but for the sake of simplicity, only seven colors are used as distinctions.
In fact, as long as there are water droplets in the air and the sun is shining at a low angle behind the observer, an observable rainbow phenomenon may occur. Rainbows most often appear in the afternoon, just after the rain, when the sky turns clear, when there is less dust in the air When full of small water droplets, one side of the sky is darker because there are still rain clouds, and the observer is no longer obscured by clouds above or behind the observer’s head and the sunlight is visible, so that the rainbow will be easier to see. Another place where rainbows are often seen is near waterfalls. In clear weather, spraying water or spraying water mist in the air with your back to the sun can also create artificial rainbows.

Who doesn’t love a colorful rainbow? Although we can’t see it often, we can use AI to simply make a cute Cartoon Rainbow. Let’s get started now!

1. First use the oval tool to draw a garden and fill in the color you like. 


2. Using the Offset Path tool, select a negative value for the displacement and offset it inward. And fill in your favorite color. 
3. Repeat the previous step and fill in the color you like. 
4. Repeat the previous step and fill in the color you like. 
5. Repeat the previous step and fill in the color you like. 
6. Repeat the previous step and fill in the color you like. 
7. Repeat the previous step, you can choose any color here. 
8. Select the entire screen. 
9. Use the Split function in Pathfinder to split all layers. 
10. Select the middle two layers. 
11. Use the “Subtract Top” feature in Pathfinder. 
12. Select all layers. 
13. Using the eraser tool, hold down the SHIFT key and erase a line in parallel at a suitable position. 
14. Delete useless parts. 

15. Use the oval tool to draw small clouds.
16. Select the entire small cloud, copy a layer, and place it under the cloud as a shadow.


17. Duplicate one and place the 2 clouds in the appropriate positions. That’s it! Enjoy~~

You may also like: Office Furniture Design Tutorial

Sharing is Caring:

How to Design a Keyboard by C4D and PS.

Today we are going to design a keyboard that is realistic. The tools we need are C4D and PS. A keyboard is an instruction and data input device used to operate computer equipment, and also refers to a group of function keys (such as typewriters, computer keyboards) that are arranged to operate a machine or equipment through a system. In simple terms, a keyboard is an input device for a computer, consisting of an array of key switches.

1. First, we use C4D to make the model of the keyboard. First of all, we first make a bottom axis of the keyboard, because the bottom axis of the keyboard is almost the same, so we only need to do one, and the others can be copied.


2. We copy the finished bottom axis into several pieces and sort them according to the keyboard order.

3. In order to pursue the details, we will also make the axis of the keyboard. And it is arranged according to one axis of each bottom axis. 
4. We insert the shaft into the middle of the finished bottom shaft.
5. After doing this, we also need to make the keycaps of the keyboard. And also sort by sort. 
6. Let’s hide the axis series first. We make a base according to the appearance of a real keyboard. At this time, we can refer to the real keyboard to make the base. 
7. Then we put the finished shaft series into the base and adjust the position appropriately. Of course, everything is in the calculation. 
8. We will perform subdivision surface operations on these well-made parts. 
9. Next, we should use PS software to make the letters on the keyboard. At this time, you can export the UV texture map and put it into PS. 
10. We will fill in the letters in the UV texture map in the actual order. And export black and white images.  11. We put the finished keyboard on a plane in C4D.
12. We set up the light and put the previous black and white image into the material. 
13. Adjust the angle of the camera to find the one you need. 

14. You can adjust different lights, angles, and various rendering values ​​to achieve your ideal look. Of course, on this basis, you can add some breathing lights, or decorative lights.

Now that you have finished designing your own keyboard, have fun!

MORE GOOD IDEAS HERE.

Sharing is Caring:

How to Design a Cartoon House by AI

We shared how to use AI to design coffee cups last week, and it was a relatively simple tutorial. Today, we will use AI tools to design a Cartoon House, this is a slightly more complicated project. We hope you like it.


1. First, draw a white frame of your own size as the background.


2. Use the rectangle tool to draw a color block at the bottom. (The colors here are just as transitions).


3. Continue to draw a rectangular color block according to the picture.


4. Use the Rectangle Tool to draw a rectangle.


5. Use the Rectangle Tool to draw a rectangle, and use the Anchor Point Tool to pull out a parallelogram shape.


6. Draw a small window in the middle.


7. Draw two small doors in the middle. The amount is up to you.


8. Use the Rectangle Tool to draw a rectangle on the other side.


9. Continue to draw a rectangle with the Rectangle Tool, and use tools such as the Anchor Point Tool to pull out the following shapes as the eaves of the house. 
10. Use the pen tool to outline the shape of the lawn yourself. 
11. Use the Ellipse Tool and the Rounded Rectangle Tool to form a small tree.


12. Use the oval tool to draw the grass. The method is to use the oval tool to draw 2 long flat circles, and then use the anchor point tool to shrink the two openings.


13. Continue to draw the window.


14. Draw a row of small windows on the house.


15. Continue to use the rectangle tool to deform and other methods to draw the eaves.


16. Use the Polygon Tool or Pen Tool to draw 2 triangles as decoration. 
17. Use the rectangle tool to draw a color block. 
18. Use the rectangle tool to deform and draw the eaves. 
19. Draw windows under the eaves. 
20. Draw a white color block. 
21. Put the white color block in a certain size and position.


22. Use the Anchor Point Tool to adjust to the following shape.


23. Place the white color block on the appropriate layer order.

24. Make another white color block in the same way and place it in the appropriate layer order. 
25. Draw a color block on the eaves. 
26. Draw the chimney. 
27. Draw a white color block. 
28. Draw another color block on top of the white color block. 
29. Draw a triangle as the top of the tower. 
30. Draw 2 circles as decoration. 
31. Draw a triangle next to the tower and adjust the layer order. 
32. Draw 2 decorations. 
33. Use the oval tool to draw the sun. 
34. Use the Pen Tool to outline the shape of the cloud. 
35. Copy all.
36. Use Edit – Edit Color – Recolor Artwork – Edit – Check Link to Coordinate Color – Drag the color wheel. You can change the color of all color blocks at will.  Now you have your very own cartoon house, Have fun!

MORE GOOD IDEAS HERE.

Sharing is Caring:

How to Design Realistic Trees by C4D

Today we are going to make a picture of a real tree, that means we will learn to Design Realistic Trees, and  will use 3D software – C4D.

First of all, let’s talk about the advantages of C4D compared to other software.

1. Powerful function
The C4D operation interface is simple and easy for novices to get started, and the works produced have excellent visual expression. Moreover, it has a mogragh module specially prepared for column packaging, which has incomparable advantages when doing graphic animation and array animation. And C4D’s default renderer is powerful, rendering speed and quality are quite good, you can also use third-party renderers octance, arnold and redshift to achieve better results. And the latest version of C4D supports interaction with AI and AE, and the efficiency and effect are even higher.
2. Large value space in the field of post-design
Now many e-commerce companies have listed C4D as a bonus item for job seekers, which means that designers who are also designers who know C4D are more popular in e-commerce companies and have more competitive advantages. C4D has formed an industry consensus in the field of post-design – designers who know C4D are more valuable, and the employment space will be wider.
3. Collaboration between C4D and other software will be more efficient
It can be said that C4D is an efficient production tool for post-design workers. Whether it is film and television post-production, architectural design, industrial design, or UI animation, e-commerce posters and other fields, C4D has been widely used.
If you are a little more careful, you will find that AE is featured in many C4D animations. In fact, to put it simply, AE post-compositing and fine-tuning are added during C4D production to make the picture more in line with real-time needs and more textured.
In daily work, to put it bluntly, if you use a single software for production, it is actually a waste of production time. At this time, you often need to cooperate with multiple software, and the work efficiency may be increased by more than half.

1. We first open the C4D software and use the Forester plug-in to make trees.

2. The plug-in provides many tree types that can be selected, you can choose by yourself.

3. After selecting the required tree type and adjusting the parameters of the trees, we will copy a few more trees.

4. On this basis, we light the whole environment. You can use sunlight or area light, depending on what kind of atmosphere you want to express.

5. Then you have to find the picture you want to show. Find the best spot in the woods you built yourself, hit the camera, and adjust the focus.

6. When you have selected the picture you want to display, you have to continue to set various parameters of the renderer and add shaders to the trees. This has to be constantly tried and changed. In the end you will get a very realistic picture.

Here is the dynamic picture, Enjoy!

MORE GOOD IDEAS HERE.

Sharing is Caring: